DIY miter saw table
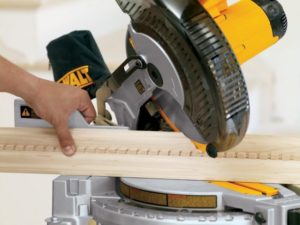
First, let's figure out what a miter saw is and why it is needed. It is worth noting that, first of all, this is an electric tool designed for working with lumber. Secondly, the main feature of this tool is the ability to cut the ends of wooden parts at exactly the right angle.
Of course, such a tool is necessary to have in a carpentry workshop with large volumes of work. How to make such a tool yourself will be discussed in this article.
The content of the article
Preparing materials and tools to create a miter saw table
 Once the decision has been made to make the necessary tool, it is necessary to prepare everything necessary to complete this work in a short time and not clutter the workshop with materials and tools.
INimportant to remember! The better the materials, the more reliable the tool will be, and the better the cut on the wooden workpiece will be.
Drawing up a diagram
 Before you begin preparing to build a DIY miter saw table, you need to decide what functions you want the tool to perform and what additional features might come in handy. Thus, a diagram of the device, its drawings and details are drawn up. And only then are drawings of each part drawn up.
Moreover important see the overall picture of the entire device, and not just the picture of each node.
Product assembly
 It is recommended to begin assembling the entire product by studying the drawings and all the parts necessary for assembly. It is also necessary to check the availability of plumbing tools, without which it will be impossible to assemble the table. Important take into account the order of assembly of each unit. Descriptions of these nodes are given below.
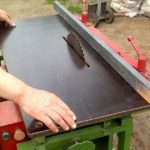
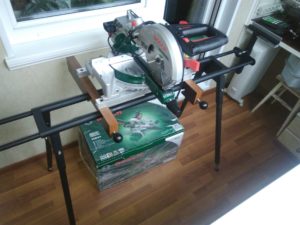
We begin the manufacture of a table for a miter saw by assembling the base or platform on which the tool itself will be installed directly. The dimensions of this plate largely depend on the dimensions of the miter saw itself. Moreover, if we want to make a universal table so that it is possible to install other compatible tools on it, for example, such as a slotting machine, then the size is taken according to the maximum size of the tool.
It is better to use 19 mm plywood as a material; if this is not available, you can use chipboard or MDF boards of suitable sizes, but plywood is more reliable.
- Installation of side extensions. Quite often, parts are used that are much longer than the saw frame, and to process such parts, removable side extensions are installed. Moreover, you can use them both on the right and on the left of the bed. Extensions are usually made of the same material as the frame itself. That is, 19 mm plywood will be quite enough.
- Upper shelves: an important detail of the table. In order for the part to be freely attached to the extension, as well as for more comfortable attachment of the extension itself to the frame, it is necessary to make upper shelves. They are attached with screws to both the frame and the extension. Shelves are also usually made from 19mm plywood.An important feature of the shelf is the presence of a tongue along the entire length of the part, 19 mm wide and 3 mm deep. Its purpose will be explained later.
- Application of clamping plates. Clamping plates allow the most accurate and reliable alignment of the bed and extensions in width. To do this, it is best to use clamps that will tighten the extensions and the base of the table together. After this fixation, the extensions can be attached to the base of the table.
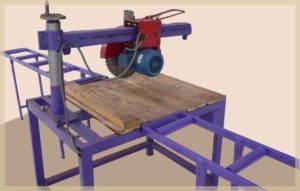
- Collaboration of machines. When several machines work together, as mentioned earlier, it is necessary to align their planes. If, for example, you want to use a slotting machine together with a miter saw, then it must be installed so that the working planes of both machines coincide. This means it will be necessary to equalize the heights of both machines. They are the ones that are inserted into the tongues made in the shelves installed on the extensions.
- Movable stops are also important. Mobile stops are designed to fix parts using guide rails made from hardwood blocks. The quality of trimming of parts also largely depends on the quality of their manufacture.
- How else can you use extensions? Extensions allow you to fasten parts of a sufficiently long length. In order to use them correctly, you need to reconfigure the table for such a part. Of course, this will take some time, but then it will pay off when producing a large number of long parts.
So, to summarize: you can make a table for a crosscut plate even in your home workshop. Moreover, the result of manufacturing parts on this table will be much better than on an ordinary workbench.