DIY cake turntable
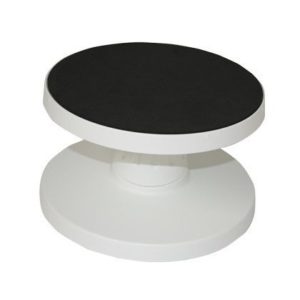
A rotating table for making pastry products should always be at hand not only for professional bakers, but also for all those who like to cook for themselves and their loved ones. The rotating surface allows you to significantly simplify the process of decorating cakes. You will no longer have to walk around the baked goods, because it will rotate freely around its axis.
The content of the article
What materials and tools are needed to create a table?
 You can buy a turntable in a store, but it is much more convenient to make this product yourself. In the process of self-assembly, it becomes possible to make an individual drawing, as well as select suitable materials. In addition, the price of such a product will be much cheaper than a purchased one. The item can be made using available materials and tools:
- Wood base;
- Bearings (2 pcs.);
- Liquid nails or self-tapping screws;
- Plastic or iron tube;
- Metal circle;
- Thin sheet of plastic.
Any materials can be used as a wooden blank. To save money, you can also use a door from an old cabinet. Each of them has certain advantages. For example, wood is more environmentally friendly and safe, and MDF is very easy to work with. Chipboard is an attractive material in terms of price.
Assembly stages
 How to make a cake turntable? The process of assembling a rotating stand is not particularly difficult, but it requires some physical effort. First you need to prepare the necessary materials and make a drawing. Follow a certain sequence of actions:
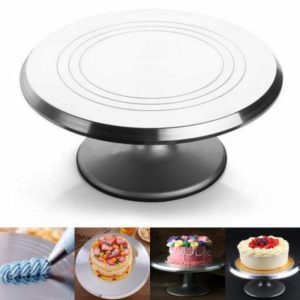
- This is how you make a DIY rotating turntable for a cake. It is necessary to cut two circles from a piece of chipboard or other material. You can select the parameters as you wish. In this example it is 20 cm.
- In one of the circles in the center we make a recess in which the bearing will be installed. It is this detail that will give rotation to the entire structure.
- Using liquid nails or self-tapping screws, we attach the second element, which does not have a recess, to the first. Due to the second circle, the device will firmly adhere to the surface.
- Next, we insert a tube into the bearing that will connect the lower and upper bases. The length of the tube can vary from 15 to 18 cm. This is the most preferred size, neither short nor long.
- It is better to make a stand for a confectionery product from a metal circle with a diameter of 30-40 cm. It is attached to the top of the tube using a welding machine.
- Plywood or chipboard is placed on a metal surface using self-tapping screws.
ATTENTION! In most cases, not all people have the opportunity to do full welding. In this case, cold welding, whose texture resembles plasticine, comes to the rescue.
The nuances of making a rotating cake table
 To make the assembly process go smoothly, you need to know some nuances. For example, it is better to take a double pressed bearing. Otherwise, two bearings will be required, and one of them must fit into the other.One element can be driven into another using nails. It is also necessary to ensure that the plastic tube fits into the bearing as accurately as possible. It is important that there is a strong fixation and that it does not dangle. Otherwise, it will be very difficult to use such a device.
IMPORTANT! The resulting product can be given an attractive appearance. It must be covered with a film or plastic base. This will also extend the life of the device and make it easier to maintain.
The rotating rotating table provides convenient access to the confectionery product from all sides at the same time. You can make such a stand yourself, especially since the materials for its manufacture are available in every home.