DIY manicure table: drawings and dimensions
Of course, designing and directly assembling a manicure table yourself is not only about saving money, but also about having fun while working. But in any case, it is necessary to take into account certain nuances, and of course, the manicure table is no exception. In this article, we will look at the main aspects and rules that every craftsman should adhere to when assembling a product.
The content of the article
Choosing manicure table sizes
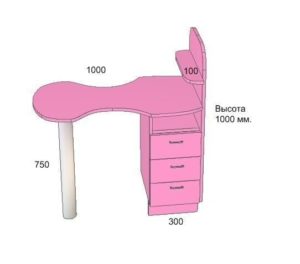
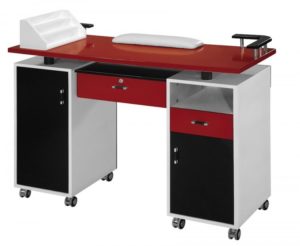 As for the optimal parameters of a do-it-yourself manicure table, the drawings and dimensions of which are mostly standard, these are the following indicators:
- The height is 750 centimeters;
- Width - 460 cm;
- Length - 950 cm.
In addition, you can calculate the size of the built-in cabinet of a manicure table made by yourself, where it is convenient to store the tools necessary for work. Typically this is 400 by 300 centimeters, where the height and width are the first and second values, respectively. Thus, you can safely create a standard table with your own hands, the dimensions of which have been verified by a certain number of people.
Of course, you can create your own sketch and navigate according to it. However, here you should not forget about changing all indicators if you decide to change one of them. This is necessary in order to maintain proportions and not lose the stability of the entire structure.
Drawing up a product drawing
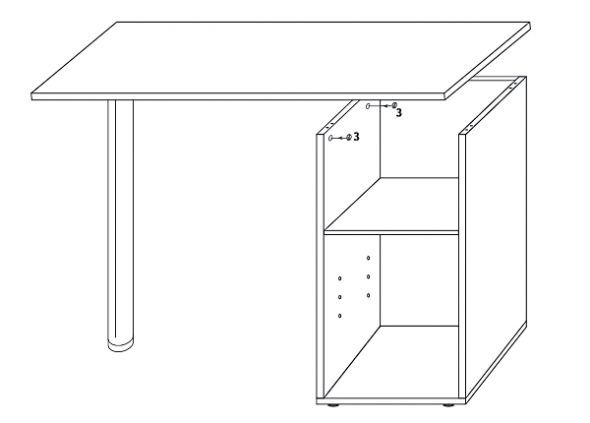 Once you have decided on the dimensions, you can safely begin creating a sketch. Some people miss this point in the process. But it is he who helps not to stray from the right path.
This means that even in case of problems, if, for example, you forgot a part, you can always refer to the diagram.
Rules for assembling manicure tables of various sizes
 It is very important to prepare for the process, namely to collect all the necessary materials and tools for a do-it-yourself manicure table. These include:
- Screwdriver;
- Pencil;
- Roulette or measuring tape;
- Electric jigsaw;
- Scissors;
- Screwdriver;
- Keys (IMPORTANT! They must have six sides);
- Iron;
- Chipboard.
Once everything is ready, you can proceed to the main stage. It is recommended to perform all actions in the suggested sequence, otherwise the product may not obtain the desired appearance. So, you should carry out the following manipulations:
- First you need to fix the ends on the stops. Next, cut off a small part and place it on the PVC surface, while simultaneously applying an iron on top. It is very important to remove the heating agent in time, namely, at the moment when the glue begins to melt a little and the space begins to sink down. ATTENTION! All actions must occur at an accelerated pace, since the glue can cool quickly, which is undesirable in our situation. Those edges that remain can be eliminated by trimming.
- Moving to the sides, you should make holes. They will be needed for the dowel. As a result, you should have two recesses on one part of the cabinet and two on the large shelf. After which you can safely fix the products with glue.
- Let's move on to the eccentrics.To do this, you need to retreat 15 millimeters in depth where the large shelf is located.
- Now we need to deal with the back wall. Namely, to attach the dowels. You need to pre-drill 4 holes. We do the same with the side parts. IMPORTANT! Don't forget to add glue when fixing the parts. This will provide additional reliability for the entire structure.
- The next step is to connect all the parts to each other, namely the sides with the top side. This is done thanks to a specially designed mechanism, counterclockwise.
- Then it is advisable to pay attention to the recesses for the hinges. They should be at a distance of 20 centimeters from the very edge.
- Let's move on to arranging the bottom. To do this, turn the product over and drill a place for the dowels. You can fix the product with self-tapping screws.
- After that, you can think about the legs. They can be purchased ready-made at any hardware store, or made at home using small bars. To attach the named element, it is worth stepping back from the edge of the table about 20 centimeters. It is recommended to arm yourself with a pencil in advance and mark the proposed locations for the legs.
- Next, the main part is fixed in the tabletop. The whole process can be diluted using metal corners. But this is done in cases where there is no need to move the table around the room in the future.