DIY computer desk
 A desktop computer has long become an integral part of our lives. Work, study, communication and just entertainment that he offers us make us spend a lot of time near him. In this regard, a computer desk is a necessary piece of furniture in any home. It provides convenience while using this technology. Also, with the right choice, this piece of furniture fits perfectly into any environment and improves the interior of the home.
The desire to make a good computer desk with your own hands may arise if the models offered on the market are not satisfactory. Or you want to build something unique that fits perfectly into the interior, is comfortable and functional. In addition, making it yourself will help save some money, although you will have to spend a little time and put in some effort.
The content of the article
Pros of making your own computer desk
It is not always possible to go to a furniture store and find a computer desk that you will like and fit well into the interior in terms of dimensions. Therefore, many decide to make it themselves. The advantages of such furniture:
- Product quality.Furniture factory workers do not always use high-quality fittings in production (handles, fasteners, canopies, guides, etc.). Such a table may soon begin to creak, become loose and will not last long.
- The required size and functionality. It often happens that the proposed models do not fit into the chosen location. When making it yourself, you choose the size, shape and other design features. It also becomes possible to make various drawers and shelves that suit your needs and wishes.
- Low price. It is known that the cost of factory products is greatly inflated. And this is understandable, because it includes not only materials. The price is also influenced by factors such as workers’ salaries, transportation and storage, various markups, VAT, etc. When making your own, the only thing you have to pay for is the materials.
In addition, self-production will help you get a truly unique and attention-grabbing item that will decorate your interior and will be in perfect harmony with it.
Choosing design and construction
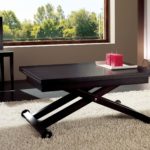
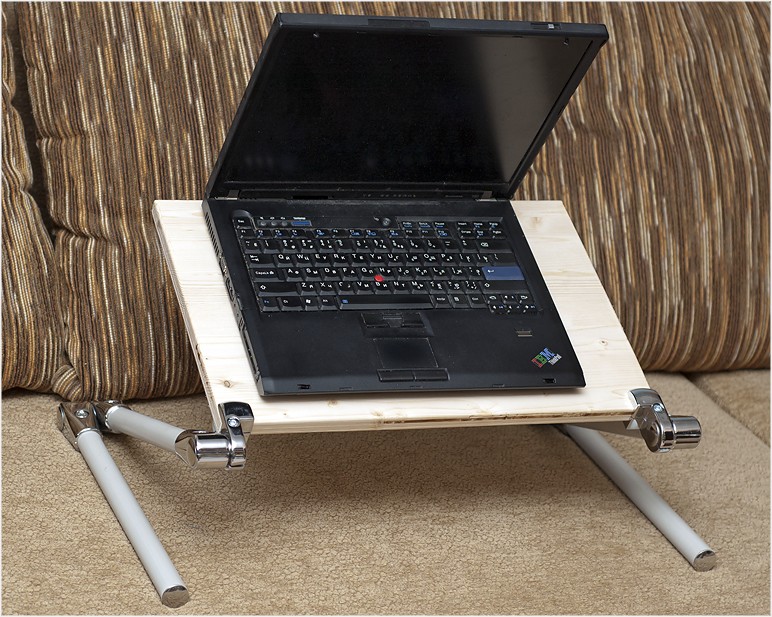
Before you start work, you need to think through the design and create a drawing of the future structure. At this stage, you need to decide on the place where the table will stand and the dimensions of the future product. You should also provide a niche for the system unit if it is a table for a desktop PC. In the case of a laptop, this is not necessary, which allows you to make the table more compact or add an additional compartment for storing various folders, disks, and other items.
By design, computer desks are divided into three types:
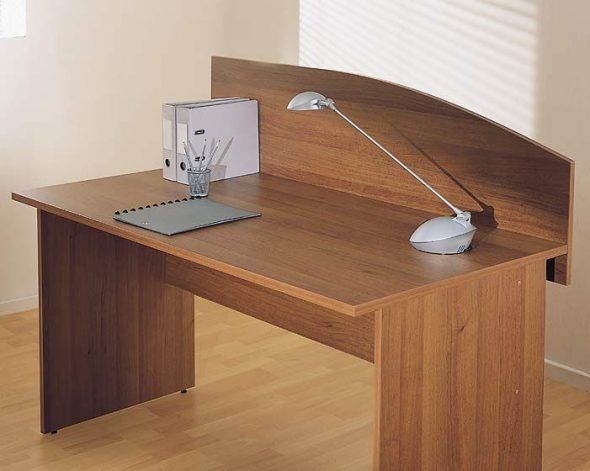
- Straight. The classic look of a computer desk, reminiscent of a regular desk.If you have free space along the wall, or even better near a window, this design would be an excellent choice. It is best suited for long work, and if there is a window, it will give you the opportunity to be distracted for a while and allow your eyes to rest.
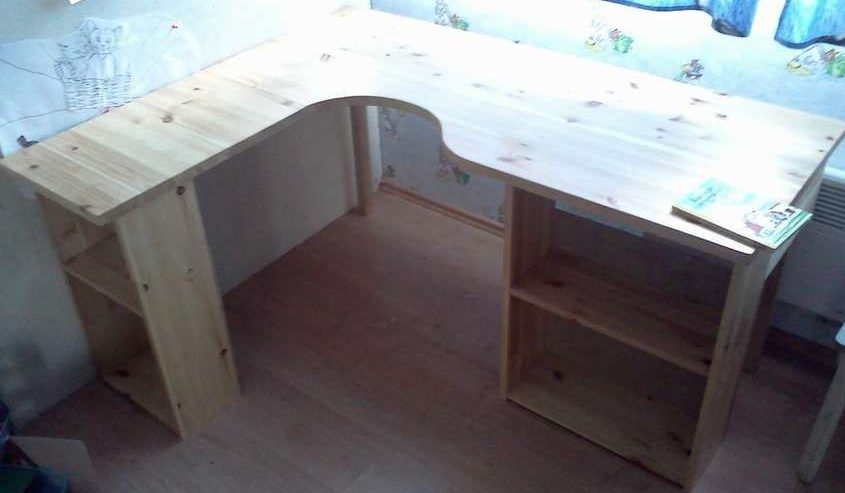
- Angular. The most cost-effective option in terms of resources and space occupied. Suitable for those who like to sit near the monitor for a long time without being distracted. The main problem will be the small size, which will affect the number of shelves and drawers for storing things.
- Combined. It will take up space both in the corner and along the wall. Such a table will require the most materials and time to create, but for work it is considered the best option.
IMPORTANT! Psychologists have proven that a workplace in a corner has a negative impact on a person’s emotional and psychological health. If possible, avoid spending long periods of time in such places.
Considering how much time a modern person spends at the computer, it is very important to approach the layout of the future table as responsibly as possible. Pay more attention to such aspects as convenience and structural strength.
Materials and tools
If you decide to make a computer desk with your own hands, you need to take care of materials and tools. It is important to understand the complexity of working with each of them so that unforeseen difficulties do not arise in the process. The most used materials in this case are:
- Tree. Although it is a very high-quality, durable and non-toxic material, it is quite difficult to process. Wood will require expensive and complex equipment (circular saw, planer, etc.) to work with it efficiently.
- Glass, iron.These are the materials from which fashionable modern furniture is made. Their use in the production of homemade interior items is not recommended without special skills and tools. Because they are difficult to process, and glass is also very fragile.
- Chipboard, chipboard, plywood. The best choice for beginners. Laminated chipboard is especially recommended. This is due to the fact that this material has a beautiful coating and does not require painting. In addition, many stores offer cutting and edging services. You just need to bring drawings with the required dimensions.
Depending on the drawing created, fastening items will be required - screws, confirmations, guides. Having decided on the choice of material, you need to take care of the fittings. The choice on the market is huge, and allows you to choose the fittings with which the appearance of the product will be perfect.
The necessary tools include:
- drill, screwdriver;
- jigsaw, circular saw;
- sandpaper, sander.
You also cannot do without a measuring tool. Things like a tape measure, ruler, and square will come in handy. To mark the parts you will need to stock up on chalk or markers.
Do-it-yourself computer desk: drawings and diagrams, step-by-step process
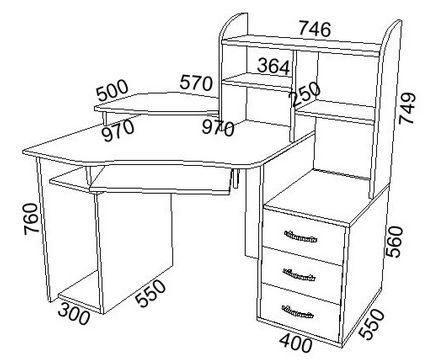
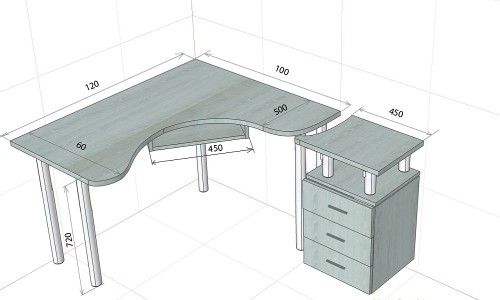
Having prepared all the necessary tools and materials, you can begin to work. The first thing you need to do is a drawing and diagrams of the future computer desk. To do this, the easiest way is to look at the desired model on the Internet, make the necessary modifications and transfer everything to paper. It is necessary to draw the outlines of all future parts and sign the dimensions of each side. With ready-made project drawings, you can begin work.
Here are its stages:
- Marking the material according to the diagram.To do this, you need to draw on the surface with a marker all the necessary details of the future table.
- Cut according to the markings. All parts are cut out from the sheet according to the drawn lines. You can skip this and the previous steps by going to a building materials store with a drawing. Most of them offer cutting services according to the diagram.
- Preparing parts for assembly. At this stage, careful grinding of the cut points and joints of the table elements is carried out. Next, if the material requires painting, we paint it. In the case of laminated chipboard, it is necessary to edge (glue with a special decorative tape) the visible edges of the parts.
- Table assembly. Here you will need a drill and a screwdriver. If a Euroscrew (confirmat) is chosen for the connection, we make a hole in the parts with a drill of a smaller diameter (than the screw). Then we connect the table elements together with screws.
If the design includes a pull-out shelf for the keyboard, use the guide strips. This element of fittings is easy to find in specialized stores.
The last step is to screw in the table legs. These are small plastic parts that prevent damage to the material and scratches on the floor.
After completing all the above operations, the table will be ready for use. All that remains is to install it in place.
Creating a computer desk with your own hands is not an easy task, but it is quite doable. If you approach it correctly, the result will please you for many years.