DIY built-in wardrobe
 Due to its spaciousness and small dimensions, the wardrobe is very popular among our fellow citizens. It can organically fit into any interior. This cabinet can be installed anywhere. The most important thing is to choose the necessary filling option that corresponds to the main purpose of the room.
The content of the article
How to make a built-in wardrobe with your own hands
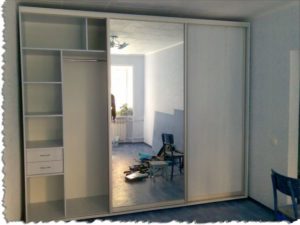
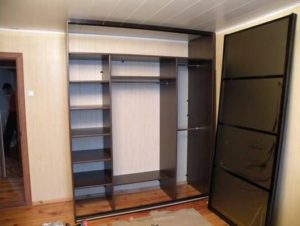
The wardrobe has a sliding door system. Which is quite convenient and practical for small rooms, since this system significantly saves space.
Taking into account placement, there are several types of cabinets. The most popular are built-in products, which have a number of advantages:
- due to installation in a niche, this furniture takes up almost no usable space;
- built-in wardrobes make it possible to create an overall composition in the room while maintaining its practicality;
- ease of manufacture, since the support is the walls.
Required tools and materials
Chipboard is considered the most popular for coupe assembly. These plates are durable, practical, and inexpensive. Disadvantages include difficulty in fine processing. Therefore, it is difficult to create elegant structures from this material.
MDF board is easier to process. Due to the elasticity of the material, you can make beautiful and original elements.Furniture can be matte or glossy; there is also a huge selection of colors.
Attention! The choice of material is made taking into account personal preferences.
As a tool for work you will need:
- electric drill;
- screwdriver;
- square;
- level;
- saw;
- clamps;
- mallet.
Choosing a location for the future cabinet
When choosing the location of the structure, a number of factors must be taken into account:
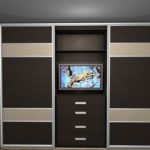
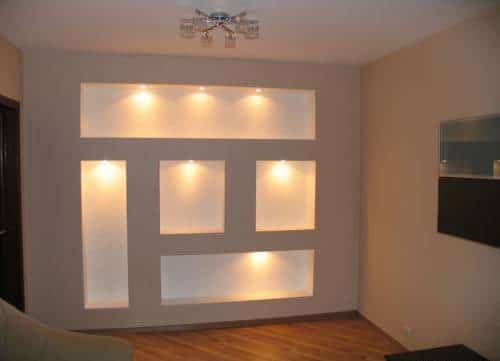
- A wardrobe installed in the living room is usually required for storing documents, light items, and various equipment. Therefore, the interior space must have many shelves. Often the central part is made open, and the shelves are used as a stand for a TV or other equipment. On the sides there are usually open shelves for small items.
- The compartment in the hallway is used, as a rule, for outerwear, so you need to provide at least one section for heavy things. Another section must have shelves for accessories - umbrellas, hats, handbags. Below you need to organize a place for shoes. All sections are made closed, and there must be a full-length mirror on one of the doors.
- A wardrobe in a nursery must be universal. There will be things here, as well as books and toys. Therefore, you need to organize open shelves.
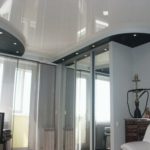
- Bed linen and underwear are usually stored in the bedroom, so there should be no open sections. And the door must have a mirror.
Design selection
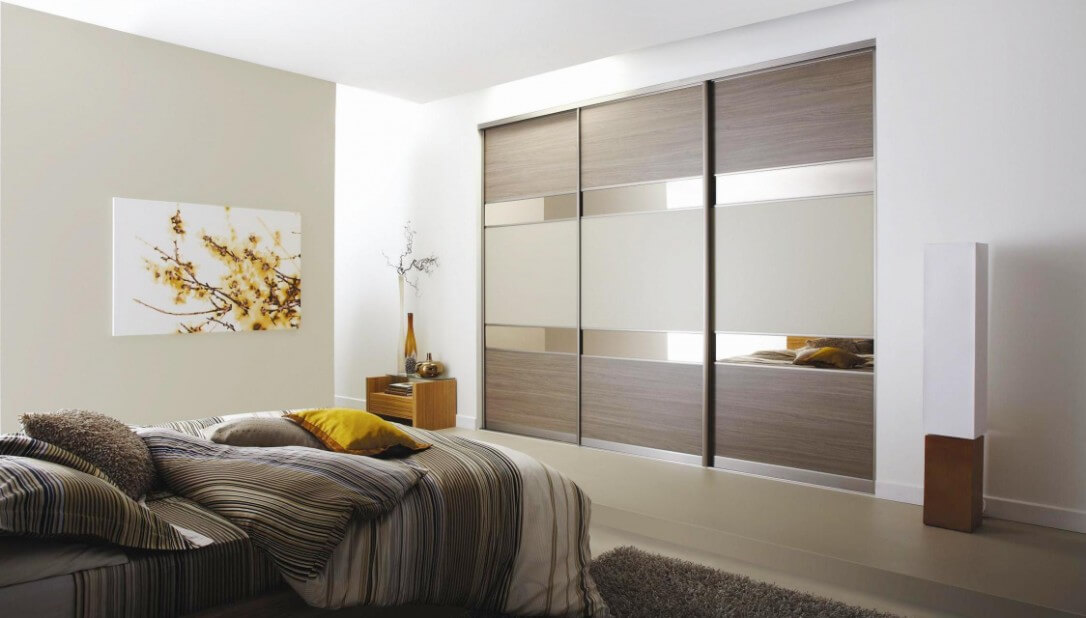
The door is the main part of the compartment. Therefore, door design is very important. They can be made entirely of wood, made of mirror or glass. These materials can be combined in one design. Having decided on the door design, the built-in wardrobe has already been practically chosen.
To give the structure a more attractive look, you can decorate it with a mirror with a pattern. The drawings are made both monochromatic and multi-colored.
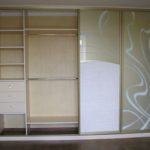
There is no need to neglect the functionality of the furniture. The closet must be both beautiful and practical. The interior design can be organized using fittings, shelves and dividing the space into different parts. Therefore, before assembling the coupe, you need to have an idea of its contents.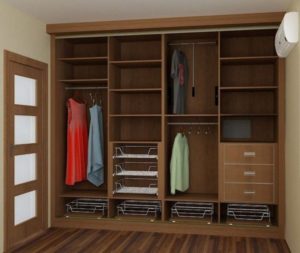
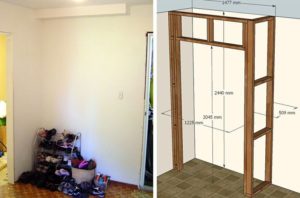
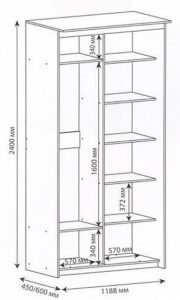
Drawing development
Before making drawings, you need to take measurements. Not all the time the niche where the structure is planned to be built has an even geometry. Therefore, measurements are performed according to certain rules:
- First, measurements are taken along the back: top, center, bottom;
- then the front part is measured in the same way;
- height is also measured at all positions.
Installation of a built-in structure, carried out without taking into account possible unevenness, can lead to the fact that the frame either does not fit, or large gaps appear during installation of the structure.
Therefore, carefully calculate all possible errors in order to make the necessary allowance for installing the structure. In some cases, it happens that the resulting shelf layout looks like a trapezoid rather than a regular rectangle.
Then you can go directly to the drawing.
Attention! If you have no experience in drawing up diagrams, then contact a designer. Taking into account measurements and individual wishes, the specialist will draw drawings of the future cabinet. In this work, it is necessary to take into account the thickness of the material and the margin for the door mechanism itself.
For a cabinet installed in an opening, the doors act as a façade. The most popular coupe system is doors in which all guides are arranged according to the internal type.The rollers are installed either from above or from below. The latter option is quiet and more durable, but will require more careful maintenance. It is necessary to periodically clean the rails from dirt. The upper roller system is not as reliable, but will not require as much maintenance since the grooves do not become dirty.
Built-in wardrobe yourself: step-by-step instructions
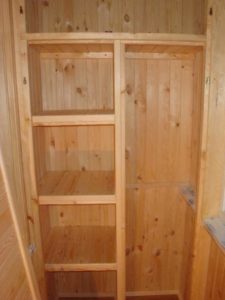
First you need to secure all the shelves. There are two ways to fix them in a built-in compartment. The most economical option is to simply attach the shelves to the wall.
The step-by-step action is as follows:
- To fix the shelves to the wall you will need a tape measure and a level. First, you need to mark vertical lines on the wall for fastening using a marker.
- When the markings are drawn, guides are attached to the wall, on which the shelves are fixed. Guides can be purchased at a hardware store or you can use available materials, such as plinths or ordinary wooden beams. If there is a vertical partition supporting the shelves on one side, then it will also need to be secured with guides.
- It is not advisable to fix the shelves directly to the partition with self-tapping screws, since if you decide to remove or move them in the future, this will be difficult to do.
The next option for making a cabinet in a niche is to sheathe all the walls. Why is a box made that is installed in the opening?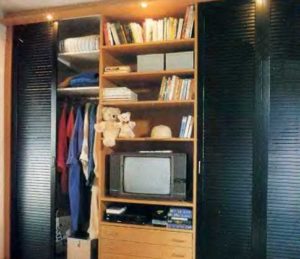
Despite the fact that this option is more expensive and requires more labor, it is much better. Since the compartment in the wall is additionally protected from temperature changes and moisture penetration, which will prevent possible problems during storage of things.
Regardless of which option was chosen, we must not forget that the recess in the niche may turn out to be crooked. Therefore, when installing shelves, you need to measure each one individually and cut it according to size.
Next, you should install sliding doors. First you need to fix the top guide. How to attach it is indicated in the instructions, since these systems usually come with an installation diagram. The simplest method of fastening is with dowels or anchors.
Then you need to attach the lower rollers to the doors. The rollers themselves must be selected very carefully, since they are the ones that will hold the doors. They must be durable and of high quality. Since the failure of even one roller will significantly complicate the operation of the cabinet.
When the rollers are fixed, you need to secure the lower guides and install the doors. The lower rails must be clearly below the upper ones.
Important! To determine the location of the guides, it is advisable to use a plumb line. If the door leaf is skewed, this will increase wear on the fittings.
Naturally, assembling the structure alone is a rather difficult task. Therefore, it is best to invite a partner to make your work easier. But don’t forget that making a wardrobe is quite feasible and anyone can do it. The most important thing is to calculate all the points in advance.