DIY bookcase
 A bookcase is furniture you can’t do without. Books create coziness in a special way and give a home a warm atmosphere. Most people prefer paper counterparts to e-books, and rightly so. It’s always nice to take a volume of poems by your favorite poet from the shelf, and feel its weight in your hands, listen to the rustle of the pages. Therefore, it is very important to keep books in order. The bookcase will become a reliable assistant in this matter.
The content of the article
Advantages of making a cabinet with your own hands
 Nowadays, there is no piece of furniture that cannot be bought, however, when it comes to buying, it turns out that something is wrong: the dimensions of the furniture are not suitable, the model does not fit into the interior, or simply not a single cabinet you like so much so that you want to buy it right away. In this case, you can make a bookcase yourself, saving a considerable amount. In addition, there are a number of advantages to a handmade product:
- you will make the design strictly according to the dimensions that you need;
- the product will fit perfectly into the interior;
- your creation will be unique because it will be made by hand and taking into account all the nuances regarding the design of your home;
- Handmade furniture lasts longer than factory furniture because the owner does not skimp on the quality of material and fittings.
IMPORTANT! First of all, you need to think about what kind of bookcase model you want, think about its location and size, and only after that start working.
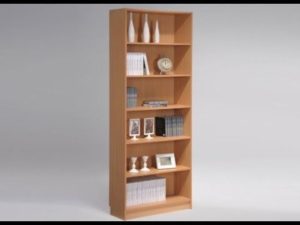
There are 2 types of this furniture: open and closed. The closed bookcase has doors that protect books from dust and sun. The open model does not have such doors.
Types of bookcases
To make a cabinet that is most suitable in size and style, you need to understand the types of such furniture. It is divided by type of assembly and method of use.
Table: types of bookcases
| Assembly type | Use Cases |
| Hull | The design can be with or without doors, contain a different number of shelves, the doors can be hinged, sliding, or accordion-style. Suitable for storing any printed materials. |
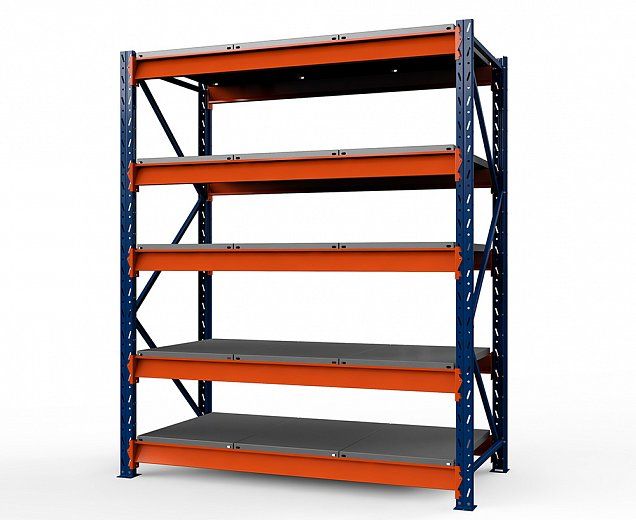
| Modular | It is convenient because it is easy to assemble and disassemble, it can be equipped with additional shelves, change shape and height. |
| Built-in | The design can be anything. In such cabinets it is better to install sliding doors, the parts of which are attached to the sides and top. |
| Angular | A win-win option for small rooms. |
Drawing for making a cabinet
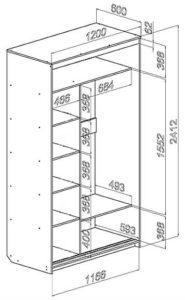 If you decide to make a bookcase yourself, you need to prepare a drawing. First, decide what shape the model will have, where it will be located, and what material it will be made of. Remember that it is best to place a bookcase in a study, living room, or other spacious room.
IMPORTANT! When drawing up a drawing, you need to take into account not only the height and width of the product, but also the number of book blocks.All this should be reflected in the drawing.
Before drawing, check how horizontal the floor is. This is easy to do using a level. If you omit this point, the finished product may be made with errors, and the shelves will become at an angle to the surface. If you still see that the floor is slightly sloped, decide what is easier to do: level the surface, or design the cabinet in such a way that it will subsequently stand firmly on the floor. All these nuances should be displayed in the drawing.
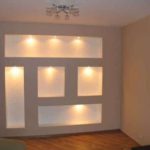
In order to get the most correct drawing, you need to take into account the depth of the bookshelf. A standard book is 20 cm wide, larger volumes are 30 cm, this must be shown in the drawing. The thickness of the bookshelf should be at least 2 cm. If the apartment has skirting boards, then the distance from it should be slightly more than 3 cm. It is also worth indicating the presence of sockets and the possibility of lighting the cabinet.
Cabinet making process
A drawing or diagram is an integral part of the manufacturing process. Therefore, drawing up a drawing must be approached with all responsibility. Next, you need to select the material and check the availability of all the tools.
When making a cabinet, you will need to mill the ends. This process is not labor-intensive, but it is worth devoting time to:
- You need to choose the right milling cutters that will help you create the perfect relief.
- The departure is set as clearly as possible.
- Milling equipment must be modern and of high quality.
There are milling features that must be taken into account:
- The router must be securely fastened.
- The workpiece should not deviate to the sides during milling.
- You should not rush during the process, as the result may be bad.
- The slats are processed after the optimal size is set.
- After all work, the parts should be treated with sandpaper to smooth out all irregularities.
For the back wall of the cabinet, you can use a sheet of chipboard; as a rule, this part of the furniture is not visible, and a simpler material is used for its manufacture.
IMPORTANT! The back wall must be fixed very firmly and evenly, this determines how reliable the structure will be.
If the cabinet is designed to hold a large number of books, laminated chipboard would be a good material for the back wall. It is easy to attach and can withstand a lot of weight.
Required tools and materials
 The materials for making a bookcase are selected in accordance with the chosen project and the interior of the entire home. If you want the product to last for many years, use solid natural wood: alder, cherry, oak, maple. The tree is non-toxic, so it costs a lot of money. A more budget-friendly option may be furniture made from chipboard and MDF. In this case, the texture and color scheme are quite varied.
The following materials may be needed for work:
- slats;
- curbs;
- metal inserts;
- glass with or without coating.
Wood blocks can be used as legs.
Tools should also be at hand, they need to be collected even before you get ready to make the cabinet. You will need:
- electric drill with various attachments;
- screwdriver;
- milling machine;
- Sander.
In the process of finishing work, it is worth stocking up on the following set:
- Ruler and pencil;
- tape measure and level;
- knives and jigsaw;
- screws, washers, nails and hammer;
- brushes and paints and varnishes.
This list may vary slightly, depending on the selected model.
Preparatory work
All of the above points can be attributed to preparatory work. If you do not have a machine for cutting chipboard, then it is better to order cutting from a specialist, since this is a rather complex process that requires a lot of attention and experience. When making a standard rectangular product, the ends are covered with veneer, or oak slats are prepared in advance and glued to the cabinet panels.
It is better to use MDF for shelves and sides; prepare the material in advance. Also available should be an MDF edge 2 cm wide, 8 mm thick, do not forget about the slats.
When all the preparatory work is completed, you can begin assembling the product.
Cabinet assembly
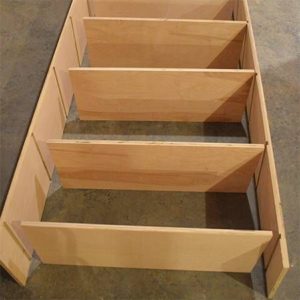
The structure must be assembled on a flat surface to avoid possible distortions. The whole process is divided into several stages:
- Assembly should begin from the top segment of the cabinet.
- The side walls should be connected to the top.
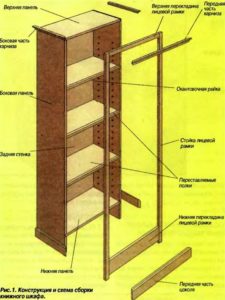
- Using a drill, make holes for fasteners. To fasten parts together, it is best to use confirmants; steel corners are also used as additional elements.
- The shelves need to be secured after the bottom part is ready. The shelves are pressed tightly and fixed.
Finally, the back wall should be installed and secured to the overall frame.
IMPORTANT! Experts do not recommend using removable shelves for a bookcase.
You can use a wide variety of fastening elements: nails, self-tapping screws, construction stapler. It all depends on the materials and configuration of the product.