How to assemble a cabinet
 There are three ways to get a closet. You can buy a ready-made model. Develop it yourself and order components according to the drawing. Or do everything completely yourself: from thinking through the diagram to cutting the materials into structural elements. But in any case, you will have to worry about assembly. By doing it yourself, you can significantly reduce the final cost of the cabinet. But this is not the main advantage.
The content of the article
Benefits of self-assembly
In addition to the quality of the materials from which the load-bearing structural elements are made, the service life of the cabinet is also affected by:
- fastening method;
- build quality.
REFERENCE! Durable furniture is characterized by duplicate fastening, when dowels and confirmations or minifixes are used in pairs. If the user is offered a cabinet with self-tapping screws, then you should not refuse it in only one case - the structural elements are fastened together using mounting angles.
 Hired workers are paid upon assembly, so they are interested in the speed of the process. And this, in turn, may not have the best effect on quality: even if duplicate fasteners are provided, they may be ignored. After all, if the structure is completely assembled and does not “dangle,” then the work is done.
When assembling a cabinet on its own, the owner is interested in its long service life. Consequently, he will check each connection several times to ensure its strength. And even if the furniture manufacturer made mistakes, with manual installation they can be corrected in a timely manner, thereby increasing the expected service life of the “new thing.”
What will you need?
Much depends on the design of the attachment points and hinges. If a duplicate dowel + euroscrew connection is provided, then the main working tools will be a rubber hammer and an L-shaped confirmation wrench of the appropriate size. For the screw and minifix option, use a key and a Phillips screwdriver. In a situation where a double is not provided, it is worth purchasing additional corners, at the rate of 4 pieces. on the shelf, and self-tapping screws of a suitable size (no longer than 3/4 of the shelf thickness) in the appropriate quantity.
 Also useful:
- roulette;
- drill;
- screwdriver with limiter;
- regular hammer;
- nails for nailing the back wall.
About hammers. If you need a rubber one, but have nowhere to get it, you don’t have to buy it. Its purpose is to seal the joint with dowels without damaging the outer coating of the cabinet walls. This can be done with a regular hammer if you place a shock-absorbing pad on the impact site.
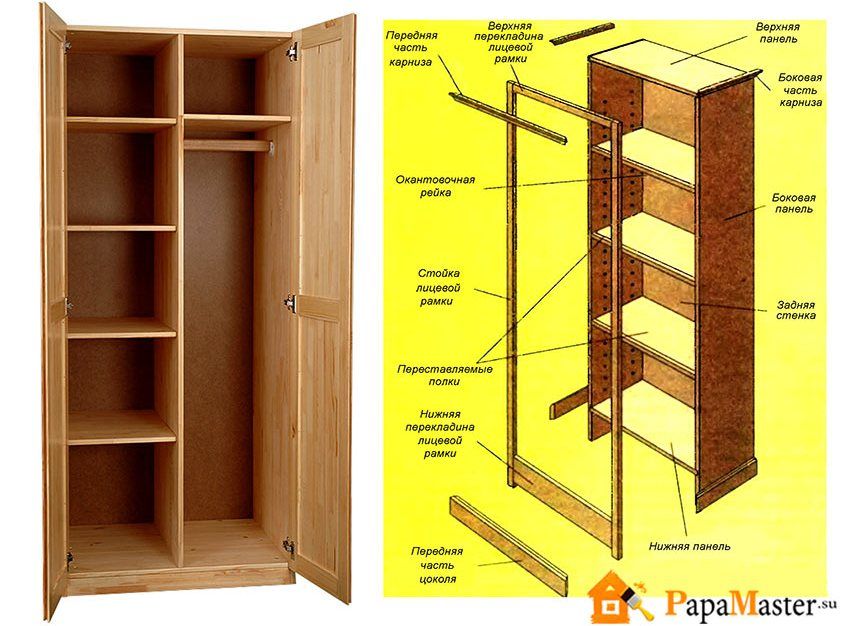
Step-by-step diagram for assembling the cabinet
IMPORTANT! First of all, you need to unpack and, focusing on the drawing, sort the structural elements.
 The doors and fiberboard sheets that are installed last, intended for lining the back of the cabinet, are set aside at this stage. Preparation ends with clearing the workspace and laying out the accessories and tools in a convenient place.
The frame can be assembled in several ways: vertically and on the floor. The latter option is often recommended because it is considered the only one that allows you to do without outside help. This statement is not entirely correct, since vertical assembly can also be done independently.
And it does not have the disadvantages characteristic of horizontal assembly, such as:
- the need to take into account the diagonal of the side wall - if the value is equal to or greater than the ceiling height, then it will not be possible to lift the assembled cabinet;
- loosening of fasteners during lifting, which affects the overall strength of the structure - the risk of damage increases if self-tapping screws are used.
Stage 1 - bottom
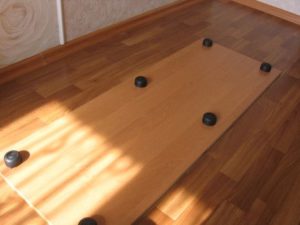 The frame is assembled in the direction from the bottom to the lid, so these elements should be carefully inspected. The bottom panel is distinguished by double-sided markings for fasteners. Having determined it, the top one is put aside and the assembly of the base begins.
If the cabinet is supported by legs, then they are first fixed with a central screw, and then you need to screw in the side screws. The base is usually attached using dowels. In this case, the spikes are first driven into the bar, which is then fixed on the panel that serves as the bottom.
IMPORTANT! There are models of cabinets with a combined base. In such a situation, you first need to install the furniture legs, and then the base.
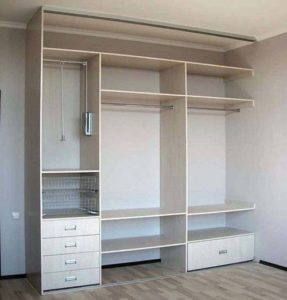
Stage 2 - frame
There are two options for attaching the sidewalls. If they are longer than the internal partitions, then lateral fixation is assumed. When they are equal, from above to the base.
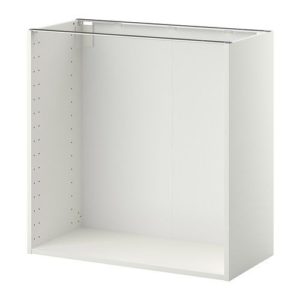 The second option allows assembly in the direction from one wall to another. The first is from the center to the edge. Having decided on the order of installation of the verticals, we begin to study the assembly diagram.The next procedure looks like this:
- Based on the drawing, select two adjacent partitions and a set of shelves for them.
- Dowels are driven into the shelves and with their help the vertical panels are connected.
- The resulting part of the structure is installed on a support and duplicate fasteners are mounted.
- Subsequent assembly is carried out according to the same principle: a dowel into the shelf, it to the vertical and connection with the rest of the structure.
The procedure for installing the cover depends on the method of fastening the outer walls. With the side option, the top panel is first installed on the partitions, and then the fasteners are inserted and tightened. If the lid is located on top of the wall, then first the clamps are attached, then the canvas is brought into place and fixed.
Completing the build
After the frame is completely assembled, it is necessary to check it for “distortions”. To do this, use a tape measure to measure both diagonals of the cabinet. If the measurement results coincide, everything is in order. Otherwise, the furniture is supported on the inclined side and the loose fasteners are tightened.
Back wall
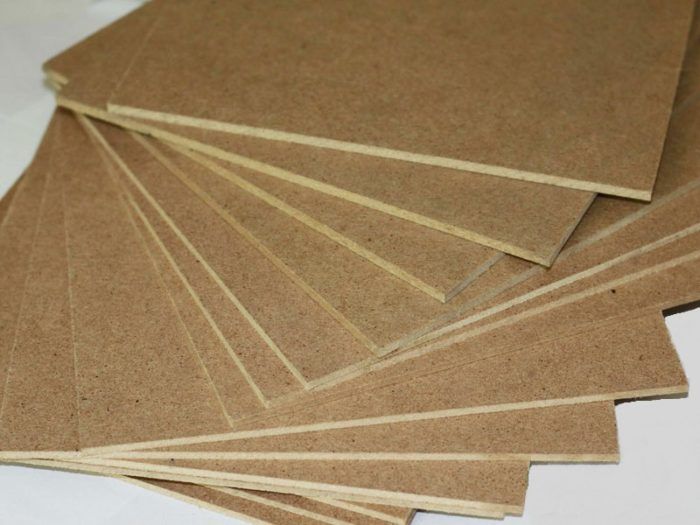 Upon completion of the inspection, installation of fiberboard sheets begins. If there is only one, then first it is fixed at the corners of the structure, and then nailed to all shelves and partitions. When the cabinet is large and there are several such sheets, they start from the bottom corner. Having fixed it at several points, the remaining fiberboards are installed and “attached” using a connecting strip. And only after the complete back wall has been formed is it nailed to the partitions and shelves.
REFERENCE! To strengthen the structure, diagonal struts can be placed on top of the fiberboard. This measure is relevant for cabinets with swinging doors, since they often experience lateral loads that can weaken the connections.
The next step is to install the cabinet in the space allocated for it. Having coped with the task, using a level, they carry out a control check of the angles of inclination in all directions. If necessary, adjust the height of the legs, achieving ideal horizontality along the lid and bottom. Then they begin to install the internal contents: rod, guides for drawers, etc.
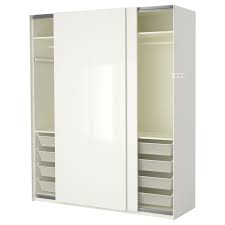
Doors
Sliding wardrobe doors are installed on rails. The upper one looks like a two-section profile, mounted flush with the end of the cover. The lower one, consisting of two guides for the rollers, is attached to the bottom with an indentation of 1-1.5 cm from the front edge. Before installing it, the wheel stoppers should be inserted into the grooves.
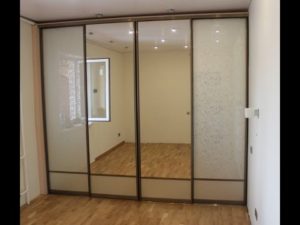 The next stage is installing the doors. If there is a decorative pattern on the facade, then the unpacked sashes are correctly laid out along the wall to determine their insertion order. They start with the internal ones. The door is first inserted into the upper rail, then the wheel is pressed out and inserted into the lower rail. The action is repeated with the remaining doors and the cabinet is ready.
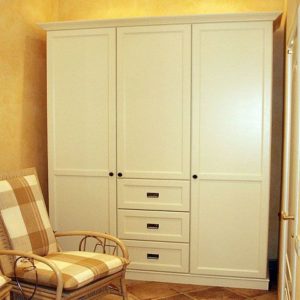
With swing ones everything is a little simpler. If the furniture manufacturer has provided holes for hinges, then, focusing on them, first install the corresponding elements on the door and in the body. Then they are connected and adjusted using a screwdriver. That's it, the installation of the door is complete.
Otherwise you must:
- attach the door to the body;
- identify and mark places for hinges;
- using a router, drill holes, focusing on the depth of the hinge bowl;
- assemble the structure.
After final adjustment of the fit of the doors, you can attach the fittings. The furniture is ready for use.
How long will the cabinet last?
With proper care and timely repair of minor problems, such furniture has virtually no restrictions on its service life. But its systematic movements around the house or moving, accompanied by disassembly and reassembly, do not have the best effect on the fasteners.
When choosing budget models made from laminated chipboard, you should remember:
- It is not advisable to disassemble it, because this fragile material crumbles and during subsequent assembly you will need to additionally strengthen the connections using glue or mounting angles.
- Dampness is the main enemy of such furniture. The slabs swell and deform, causing the entire structure to become unusable.
- Long shelves are not designed for heavy loads. On a mezzanine with a width of more than 70 cm, if there are no supporting partitions under it, it is not advisable to place a lot of weight - at best, it will bend. At worst, it will break in the center.
 Cabinets made of MDF or solid wood are more durable and do not have most of the disadvantages of chipboard. Such furniture survives moving almost painlessly. It is resistant to damage, but even if damage does occur, the wood is relatively easy to restore. The shelves do not bend under the weight of things and do not break at the fastening points. But you have to pay hefty sums for quality.
Warranties for cabinets range from 1 to 25 years. If you want to purchase a durable, wear-resistant option, then the warranty period should be at least 10 years. It is likely that such furniture can be passed on by inheritance. Especially if you assemble it yourself.