How to make a cabinet with your own hands
The modern market provides a large selection of furniture products, but what if you want to buy something special? You can create an exclusive wardrobe with your own hands. Everyth Wishgood will be able to assemble a closet in the hallway with his own hands or another room, you only need a description or step-by-step instruction actions. For inspiration You can see photos and drawings on the Internet. Let's look at how to make a cabinet with your own hands.
The content of the article
DIY wardrobe - deciding on the type
The first thing you need to do for this is to decide on the type of product:
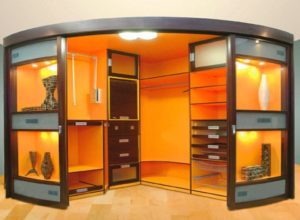
- straight, angular or radius (think about where and how your cabinet will be located and choose the appropriate option);
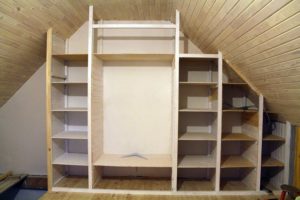
- built-in (placed in a niche, between two walls) or wall-mounted (located along the wall);
- framed (has top, bottom, back and side walls and a load-bearing base) or frameless (its structure lacks a back wall and a load-bearing frame).
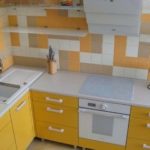
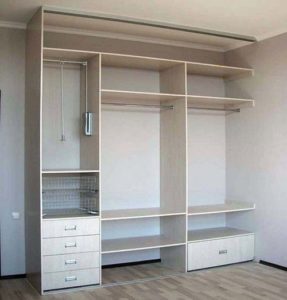
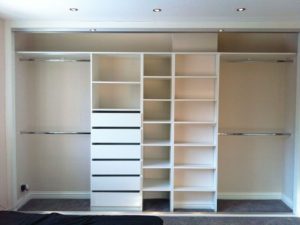
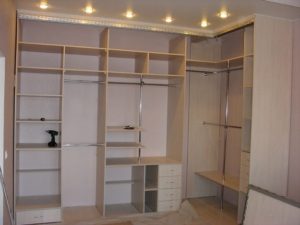
 Then think over all the technical characteristics (width, depth, height of the cabinet). If you have chosen the structural type of the product and decided on the structural features, it’s time to think about its design. It will depend on the purpose of the furniture (storage of dishes, books, clothes) and on the room in which the new cabinet will live. So, for small rooms, a sliding wardrobe is perfect, and for a spacious room, a product with racks, shelves, several rods (for hangers) and pull-out elements.
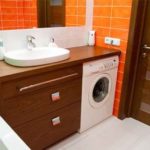
Before creating a wardrobe for a children's room, you can consult with your child and find out his preferences in design and color scheme. Simple cabinets with several shelves and a mirror are perfect for bathrooms.
Cabinet made of furniture panels
The right choice of material is half the success in making furniture. Furniture board is an environmentally friendly wood material formed in the form of a sheet of standard size. Compliance with the price and quality of the product contributes to the widespread use of the material for creating furniture with your own hands. A cabinet made of panels will look organic in any interior, be it a kitchen, living room or bathroom.
Features and Benefits
Cabinets made from furniture panels are varied in appearance and texture. For the manufacture of sheets, various types of wood are used: coniferous (pine, spruce) and deciduous (aspen, birch, oak). Furniture panels are perfect for creating a cabinet and have the following advantages over MDF and chipboard:
 reasonable price;
- long service life;
- environmental friendliness;
- easy processing;
- simple repair of the finished product;
- variety of textures;
- aesthetic appeal.
Due to their versatility, panels are popular among those who make furniture. When working with this material, you need to consider some features:
- Choose well-dried material.
- Inspect the boards for cracks (they can form due to improper drying).
- If the shield is not covered with a protective layer or enamel, it is better to treat it, so it will last you longer.
- Pay attention to the thickness and choose the one that suits your future product.
Preparing material and tools
Before you start creating a cabinet, you need to prepare the materials needed for the work. You will need:
- Furniture panel for forming the body and facade (thickness 1.8 cm - 2 cm).
- Plywood that will be used to create shelves, partitions (thickness 1.2 cm) and drawers (6 mm). Partitions can also be made from a shield, but this will be a more expensive option.
- Hardboard or plywood (at least 4 mm) to create the back wall of the cabinet.
- Barbell and holders for clothes. If desired, you can make them yourself from blocks of wood.
- Elements of fittings.
- Varnish for wood processing.
- Spot-type lamps, LED strip, if you are planning cabinet lighting.
To properly assemble the cabinet, you will need to prepare the following tools in advance:
 Sander;
- chisel;
- electric drill and drills of different sizes;
- screwdriver;
- hacksaw for wood;
- self-tapping screws;
- pencil and tape measure.
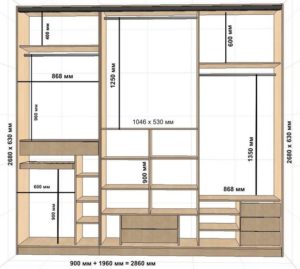
Drawing a drawing
Any thing begins with a project, especially if it is a prefabricated project. Taking into account the characteristics of the space in which the cabinet will be located, as well as the selected type of construction, we determine:
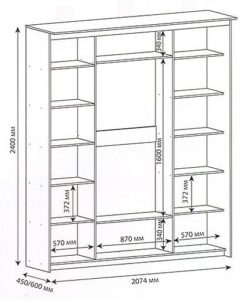 height, width and depth of the future product;
- number of compartments and shelves;
- shelf height;
- number of internal partitions, their width;
- the size of the drawers that will be pulled out;
- rod location;
- Number of doors;
- decorative elements;
- sizes of furniture panels that will be used in the work.
Based on the data obtained, you can create a sketch or use ready-made drawings that fit your dimensions. At this stage, you can make the necessary adjustments, draw up details and calculate materials.
IMPORTANT! If you doubt whether your drawing meets the stated requirements, use computer design programs.
Assembly technology
If you have completed the stage of selecting the material and creating a drawing, then you can safely begin creating the cabinet. This is quite easy if you follow the correct steps:
- First you need to mark all the parts (their number will depend on the type of cabinet you have), check the dimensions and cut
 them using a tool.
 - If your sheets are not covered with enamel, then varnish them on both sides. For a better look, you can apply 2 coats. After the first layer, the materials are sanded, then the varnish is applied again.
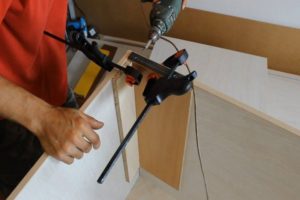
- Then drill holes in the sheets for fittings and fasteners.
- Now mark and drill holes for the hinge bowls.
- We install the base and secure it with self-tapping screws between the 2 walls.
- Next, you need to install the top part (“cover”) and check whether you have installed the parts correctly.
- If everything is level, without distortions, then we attach the back wall.
- We install shelves.
- We install the bar.
- We fasten the hinges and door handles, prepare the doors.
- We hang the doors and check the hinges.
The main feature of cabinets made from furniture panels is their ease of processing. Even a beginner in carpentry can make such furniture if he puts in a little effort and patience.
IMPORTANT! During the manufacturing process, you need to periodically use a level or other measuring objects to check the correct assembly of parts and to avoid distortions.
Wooden cabinet
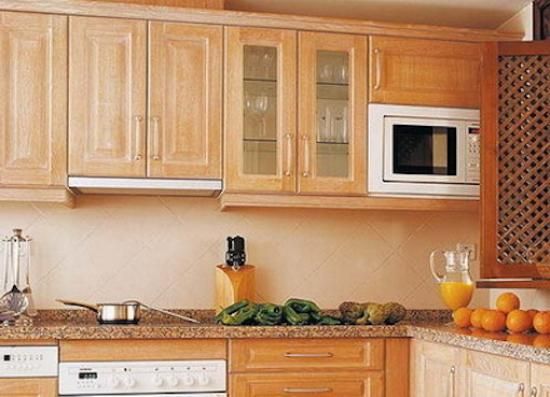
Wooden furniture is a classic in interior design. It is beautiful, practical and will serve you for many years. But the prices in the store for such interior items are expensive. You can make a wooden cabinet yourself using the recommendations in our article.
Features and Benefits
Wooden cabinets are popular in the furniture market. They have the following advantages:
- product durability;
- strength;
- wide choice of material;
- beautiful texture.
But despite the general qualities, the products have their own characteristics. First of all, this is the material of manufacture. If you want to get furniture that will last for decades, solid oak or walnut will suit you, if you count on the softness and pliability of wood - spruce or pine.
Preparing material and tools
There are a large number of wood species that are used in the manufacture of furniture products. But at home, coniferous species are most often used. They are softer than their deciduous counterparts and easier to process.
To work on creating a cabinet, you can choose wood materials such as:
- Board. Durable and comfortable material, it is best to purchase it in finished (dried) form, otherwise you may face unpleasant consequences. If not dried properly, the boards can become warped and bowed, making your work more difficult.
- Rail. Additional (auxiliary) moisture-resistant material when creating furniture. Made from pine and spruce, it is necessary for attaching some parts of the cabinet.
- Beam.Used in making frames.
To work with wood you will need the following tools:
- saw (manual or electric);
- tape measure and pencil;
- Grinder;
- screwdriver and screws;
- level;
- chisel, stapler (construction);
- mastic, varnish;
- timber, boards, slats;
- chipboard and plywood sheets.
ADVICE! When choosing a material, pay attention to the absence of knots, cracks and uniformity of the wood. The absence of defects will ensure long service life of future furniture.
Drawing a drawing
Before you start work, you need to think through the future product in detail and make a drawing with all the parts marked:
- It is necessary to take into account height, width and depth.
- Consider the number of shelves and sections, the presence of rods and drawers.
- Decide how many doors there will be in the product.
- Determine where additional fittings and decorative elements will be located.
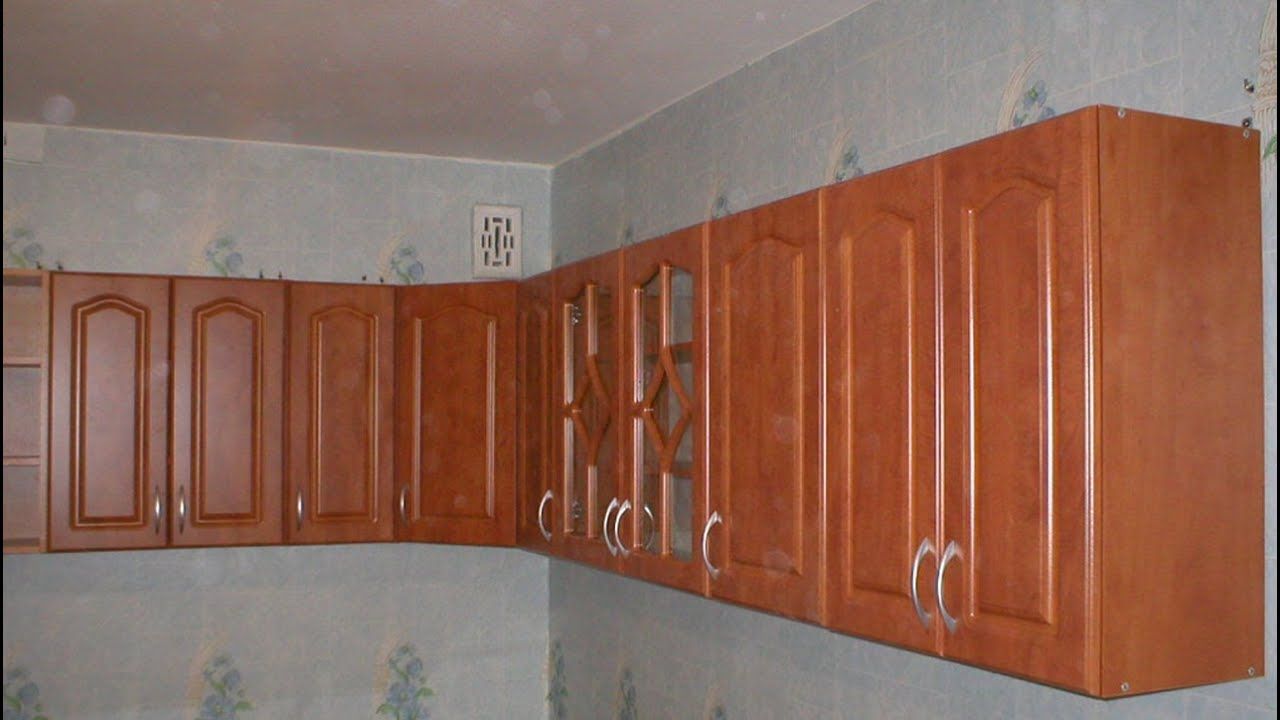
Assembly technology
The assembly of the cabinet depends on its design features. Here's an example of a typical wood cabinet assembly:
 We mark all the details on the material and cut them out.
- We assemble a frame from timber, connect it together with self-tapping screws, and fasten the corners.
- We attach the back wall, floor and “roof” of the cabinet to the frame made of beams. Typically, chipboard sheets are used for their manufacture.
- We attach the slats to the required shelves.
- We mount the shelves along the depth of the cabinet, you can simply place them, or attach them to self-tapping screws for greater strength.
- We make a frame for doors. We cover the frame with the prepared material.
- We fasten the fittings (handles, hinges).
- We hang the doors.
- We attach the legs and the bar (if it is supposed to be).
- We check the correct assembly.
In order for the cabinet to serve you for a long time and please you with its appearance, you need to treat its parts with varnish. Sand the surface of the wood.Check for cracks; if there are any, you need to putty them and go through the grinder again. After this, apply 1-2 layers of varnish using a brush or sponge (the second layer is applied after the first has dried). Polish the dry surface.
What to choose: DIY cabinet or custom-made
Furniture manufactured in production does not always meet the price = quality standards. To be sure of the strength of the finished product, as well as to receive an exclusive piece of furniture, you can make the cabinet yourself or contact a workshop. Advantages of making furniture with your own hands:
- the cost of the item will be cheaper than in a store or workshop;
- the design will be matched to your premises;
- you can decorate the closet in any design.
It’s up to you to choose whether to make the cabinet yourself or turn to professionals. In any case, you will become the owner of an individual product according to your own standards.