How to Attach a Countertop to Kitchen Base Cabinets
 Replacing a countertop during a remodel or installing a table top for new kitchen furniture can be done independently. To do this, you need to have some skills in working with plumbing and electrical tools.
The content of the article
How to attach wood and MDF countertops
Installing a working surface of a table made of materials based on timber or other wood components, such as shavings or cardboard, has the same procedure and principle of operation.
Preparation and fitting
Depending on the wishes of the consumer, the material, thickness and degree of protection against moisture are chosen. For example, chipboard for countertops comes in different thicknesses and designs, both moisture-proof material and simple one. The thickness of wooden and other products also differs. An important element of the working surface of the kitchen table will be the coating, which should not be exposed to moisture. For this purpose, chipboard and MDF products are laminated with special decorative materials, and wooden ones are varnished.
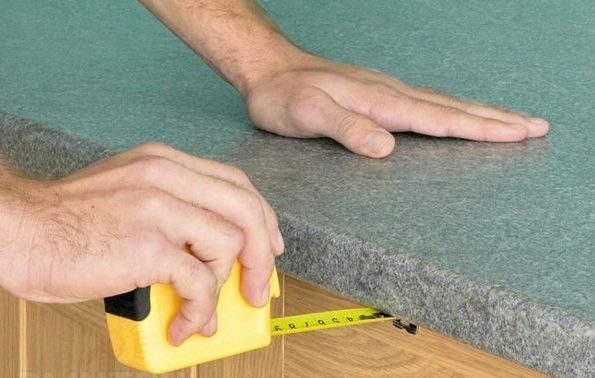
Dimensional countertops are made in accordance with the dimensions of kitchen cabinets. The width is made 40–50 mm larger than this value for cabinets installed on the floor. This is due to the need to protect the facades of the furniture of the lower row from drops of water accidentally flowing from the working surface of the table.
The length of the tabletop is made greater than the size of one or several assembled cabinets by 20–40 mm. But this is only in the case when the working surface of the table does not rest against anything and has free side walls. If the kitchen table is connected to a stove, refrigerator, or is angular, then the size must correspond to the distance to the adjacent attribute and have a gap (2–4 mm) for installing an aluminum strip that will protect the end of the tabletop from moisture and dirt.
ATTENTION! If the work table has an outer side wall, it is recommended to make the table top with a rounded edge so as not to get injured when moving around the kitchen!
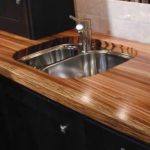
Creating a hole for a sink
Installing a countertop involves the need to insert a sink into it, and sometimes a hob. This work will require:
- marking tool;
- drills;
- jigsaw.
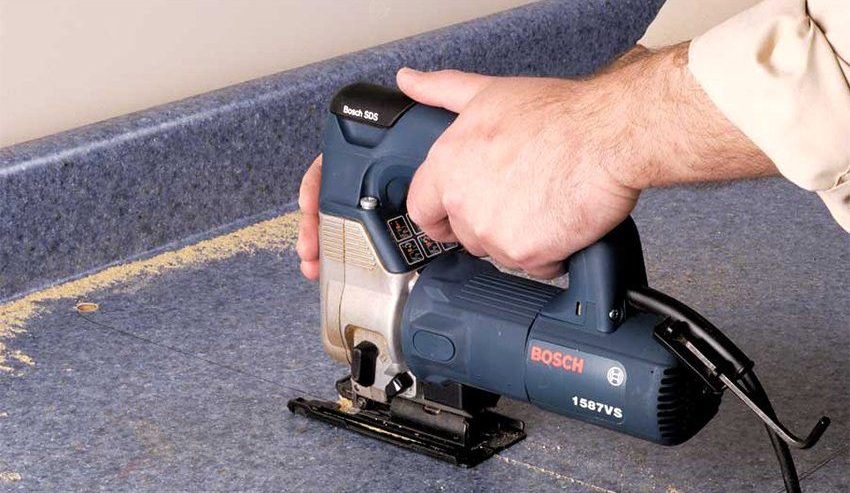
IMPORTANT! Using power tools may leave scratches on the surface of your workbench. To prevent this from happening, place cellophane under the working support of the jigsaw!
Inserting a sink into the work surface of a table is a very important job that requires the following steps:
- First of all, mark the installation location. To do this, turn the sink upside down, place it in the required place and trace the contours with a pencil or marker. Then another contour is drawn, 10–20 mm (depending on the shape of the side of the product), less than the outer size of the sink.
- The inner contour is the boundary along which the cut is made.First, three holes with a diameter of 3–5 mm are drilled in this line to freely place the power tool blade.
- Carefully cut out the marked part using a jigsaw. Before completing this stage of work, it is necessary to fasten the internal cavity to the tabletop in such a way as to avoid possible chips when completing the cut. Or enlist the help of a second person to support the part being cut out.
- The end of the countertop is treated with silicone sealant, the sink is inserted into the prepared place and secured with special clamps. This stage of work is carried out after installing the work surface in the standard place of the kitchen unit.
REFERENCE! Sinks made of artificial stone do not have clamping fasteners. The large weight of the products allows you to fix the sink with sealant.
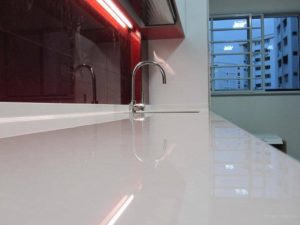
If the design of the sink does not provide for the placement of a mixer and it needs to be installed separately, then for this purpose use a core drill (crown) for wood of the required diameter.
Tabletop installation
Before installing the work surface of the table, the floor cabinets are leveled using the 2-meter rule with a water level. Adjustment is made using legs, and in their absence - spacers made of wood or plastic. Horizontalness is checked not only along the tabletop, but also across it.
REFERENCE! Alignment of floor-standing cabinets is carried out after connecting all cabinet modules to each other with self-tapping screws!
After this, proceed to installing the working surface:
- Aluminum plates are attached to the ends, which will join with other elements of the upper part, using screws.
- Holes are drilled in the top strips of the floor cabinets for connection to the countertop.In the absence of such horizontal surfaces, metal corners are installed in the internal cavity of the cabinets, the horizontal support of which will correspond to the lower plane of the desktop.
- The tabletop is moved to the required location, leaving a gap of a few millimeters from the wall. When moving the product, take precautions, especially be careful with the cut-out area for the sink: heavy weight can cause damage to the entire product.
- Using self-tapping screws, secure the working surface of the table. The length of the fastening elements is selected less than the size of the parts being connected: a horizontal bar or corner together with a tabletop by 8–12 mm.
- After this, the sink is installed and fixed.
All that remains is to add a mixer to the workbench and install a siphon with a connection to the sewer.
How to Install a Concrete Countertop to a Kitchen Base Cabinet
When installing a finished working surface made of artificial stone, the planks and corners located inside the floor cabinets are generously lubricated with two-component polymer glue and the product is placed in the required place. After the adhesive has hardened, install the sink.
When making a concrete countertop yourself, you must:
- install a horizontal base made of plywood or other material on floor-standing cabinets;
- make and seal formwork around the entire perimeter;
- reinforce the internal cavity of the work surface, allocating space for the sink with a metal ring;
- prepare a solution with the addition of a plasticizer and pour it into the prepared formwork;
- the upper plane is leveled and covered with cellophane until completely dry (about a week);
- sand or cover the work table with finishing material, then install the sink.

ATTENTION! Finishing a concrete countertop with tiles and grouting the joints will allow you to use the product after the grout has dried. After grinding, polymer coatings are used to protect the product material from moisture.
When you shouldn’t fix it yourself
Certain conditions allow you to refuse to install the work surface yourself. Such circumstances include:
- installation of the product is included in its price;
- unjustified risk of damage to a tabletop made of expensive material;
- lack of skills in working with metalwork tools;
- when installing a new set, when its cost includes the installation of a countertop.
Having studied the installation features and the method of fastening the working surface of furniture in the kitchen, the consumer independently determines the possibility of performing such work with his own hands.