Do-it-yourself additional shelves for your closet
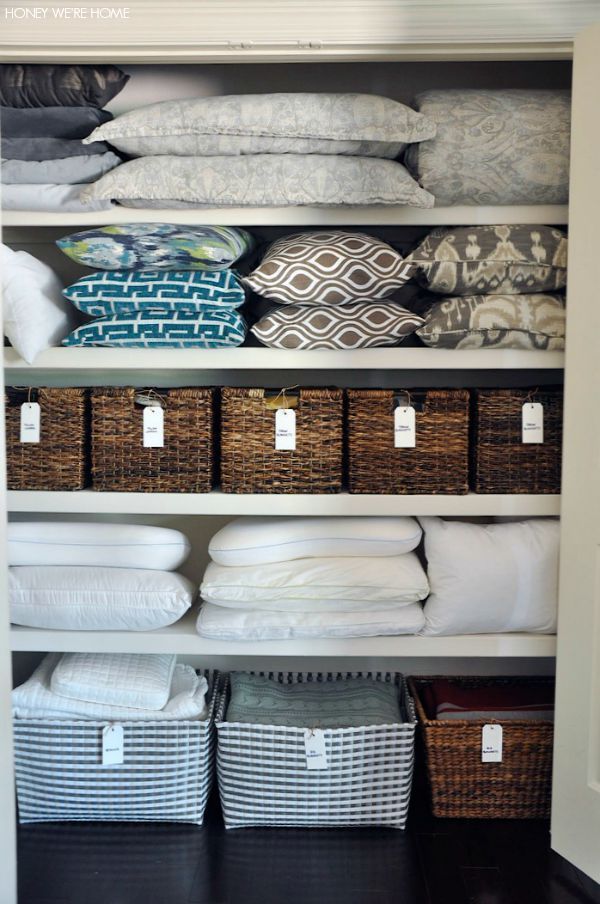
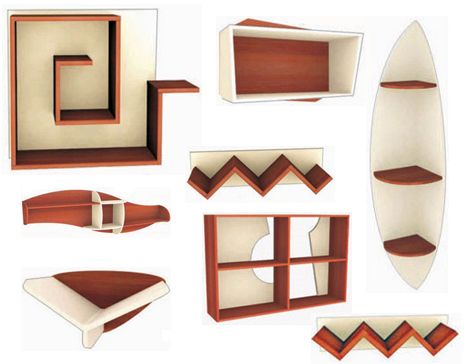
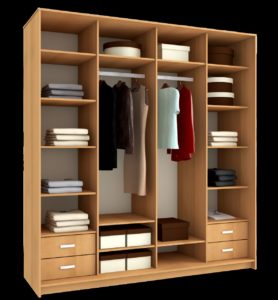 Shelves are essential elements of a closet, as they are designed to properly organize the interior space. In addition to their functionality, it is also important how ergonomically they are located, because this determines whether they will be convenient to use. Sometimes in ready-made cabinets there seems to be enough internal space, but the internal design is so inconvenient that it becomes necessary to install additional shelves.
The content of the article
Preparing for installation of additional shelves in the closet
If there is a need to redesign the interior of the cabinet: measure the distance between shelves, add new ones, create additional partitions, then you first need to decide which partitions are installed. The most commonly used material is chipboard, so-called chipboard.
Material selection
Chipboard is the optimal material for internal partitions and cabinet shelves.Using it, you can easily create a shelf of the desired size and shape by making appropriate marks on it or cutting it, which is then cut out. But chipboard also has a weak point - its flexibility. So if you are planning a shelf made of chipboard that will bear a large load, then you will need to give it additional rigidity later. To do this, a wooden strip is attached to the shelf, running along the rear and front edges.
Cut to size
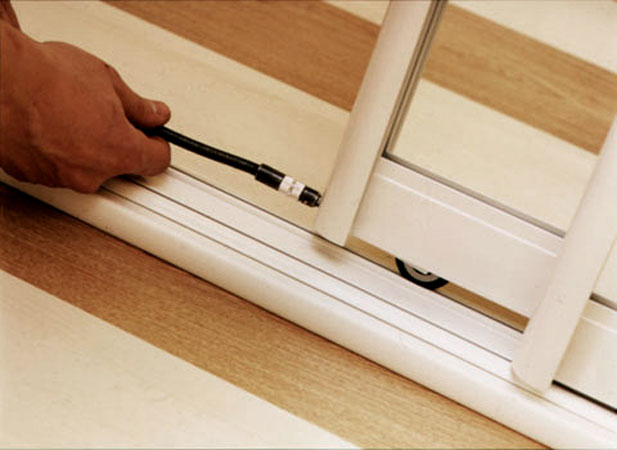
Before you start making your own shelves, you should measure the dimensions of the cabinet in the place where the element will be installed. Be sure to check the perpendicularity of the rear plane of the cabinet and the side walls. A square is used for this. Then two parameters are measured: depth and width - this will be the size of the shelf. You may also want to make the width of the shelves different. Then you need to set this parameter yourself. The most important:
- The width of the shelf must strictly correspond to the width of the cabinet - otherwise the shelf will not fit into it or will fall through. To install the shelf comfortably, you can make it 1 mm smaller than the width of the cabinet, but no more.
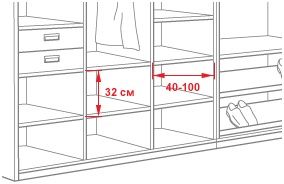
- The depth can strictly correspond to the depth of the cabinet with the door closed or be less. It is necessary to ensure that this size does not turn out to be too large, even by an insignificant amount, otherwise the door simply will not close tightly.
In order to make a shelf, you can contact a specialized store - they will cut it according to the dimensions provided. If this procedure is carried out at home, you will need:
- Measuring tools - rulers and angles.
- Drill with drills of different diameters.
- Screwdriver and fasteners.
- Edge tape and iron for gluing it.
- Material for making shelves and a simple pencil for marking.
Edge tape finishing
When using a chipboard, in the process of cutting to the required dimensions, an edge is formed that has an unsightly appearance. In addition to being unsightly, uneven edges will cause clothes to cling to them all the time, which will lead to damage. To eliminate this drawback, use a special adhesive edge tape. Thanks to the wide color selection of this tape, it will not be difficult to choose its tone to match the slab. It is attached quite simply - you just need to attach the tape to the end of the sawn shelf and go over it with an iron. After this, it should be securely fixed.
Varieties of arrangement and fastening of shelves
Immediately after the shelf is cut, the question arises - how to attach it? The presence of vertical bulkheads gives two possible mounting options:
- along different axes - it is important to maintain parallelism;
- along one axis - the key point will be to create a reliable fastening between the shelves.
The first method is the simplest compared to the second.
Application of furniture corners
 The corner used in furniture production is a very common and convenient accessory. The material used to make the corners is plastic or wood. Installation is so simple that it does not require special skills. Each corner is fixed with a self-tapping screw at two points - directly on the shelf structure and on the vertical wall. This type of fastening is not popular among professionals today. A significant drawback is the protruding parts of the fastening.
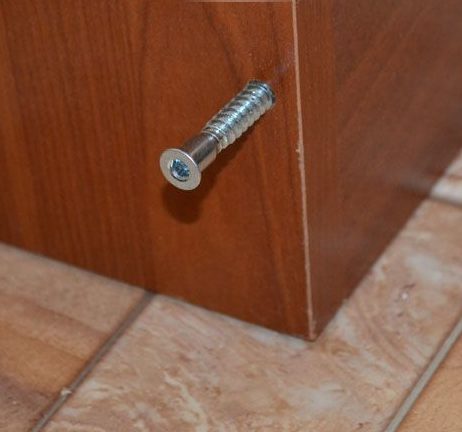
Screw tie
As a type of fastening, a screw tie consists of a screw and a corresponding barrel. The screw, screwed into the hole of the barrel, provides reliable fastening between the shelf and the side wall.
The barrel is installed in a pre-drilled hole. Here you should calculate how much you need to move the hole away from the edge, so that later the screw stroke is enough for a reliable connection. The difficulty of this fastening lies in the alignment of the barrel hole with the mating part of the screw, especially for non-professionals.
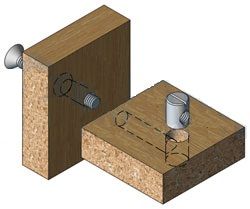
ATTENTION! The disadvantages of this connection include the visible part of the screw head on the outside of the vertical wall of the cabinet. But this can be smoothed out somewhat by using furniture plugs.
Using a dowel
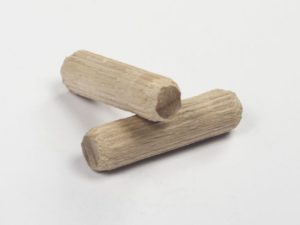 A dowel is a type of fastening made of wood. In order to make it, you need to insert wooden cylindrical blanks of small diameter into the hole of the shelf, deepening it approximately halfway. The second part of the dowel fits into holes corresponding in diameter, depth and location, drilled in the side wall of the cabinet.
Euroscrews used
Euroscrews are used in budget class furniture. Using this type of connection, you can easily fasten elements together, but as a result, numerous holes with recessed screw heads are formed on the outer surface of the wall. They are also covered with plugs, which still affects aesthetics. The use of this type of fastening is advisable only where there will subsequently be no need to redesign the interior of the cabinet.
Conical coupler
This type of fastening is suitable for thick elements ranging from 25 mm to 38 mm.To use it, screw a barrel-shaped body into a cut chipboard. Next, the screw is installed into the side wall from the inside and the conical part is placed into the corresponding hole in the barrel, where it is then fixed with a rod.
ATTENTION! The disadvantage of this design is that the shelf installed on such a connection is not able to bear a large load. The conical part of the screw may simply not withstand it. But the advantages include the fact that the front side of the side surface remains untouched.
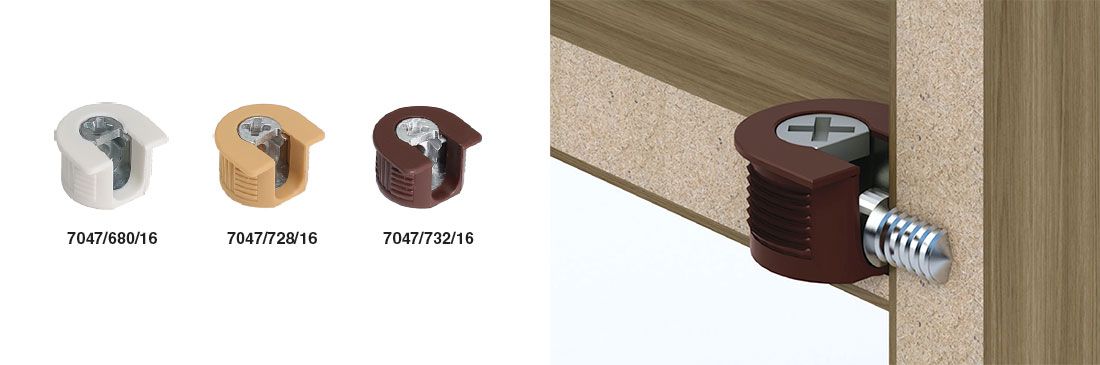
Eccentric coupler
The eccentric clamp is currently the most popular in furniture production. Its popularity is due to the fact that this type of connection is practically invisible (both from the inside and outside), provides sufficient strength and is reliable during operation. The eccentric fastening consists of three parts: a stand, an eccentric and a fitting.
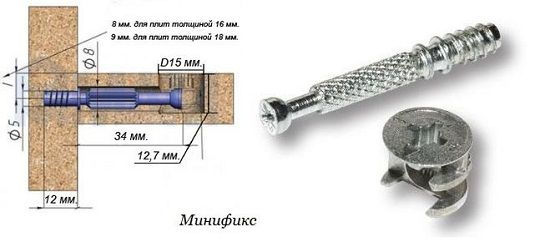
Incoming parts may differ slightly, as a rule, in geometric parameters, which allows, if necessary, to ensure a certain load on the shelf and the reliability of the service of the entire structure. So the stand can be made either in the form of a self-tapping screw or in the form of a screw. But the variable length of the eccentric allows you to achieve the necessary strength and withstand load.
The complexity of installation is caused by the need for precise fitting of parts. A coupling is installed in one panel, into which an eccentric is screwed, fixed on the other panel. When the eccentric hits the head of the rod as it rotates, it creates a tightening connection.