DIY screen for kindergarten
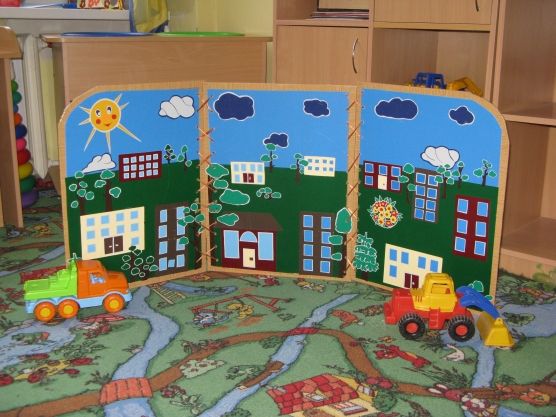
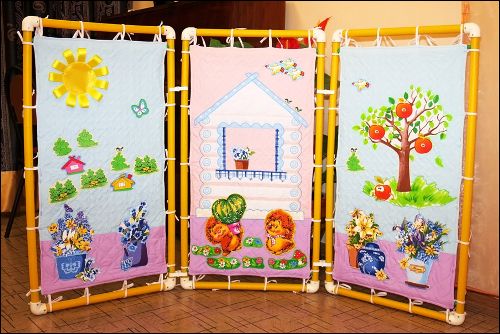
The environment in kindergarten should have a beneficial effect on the organization of the educational process and increasing children's interest in it, as well as their comprehensive development. Considering that children spend most of their time in a group, the room should contain objects aimed at realizing children's fantasies; this also helps the teacher to conduct teaching more effectively. These include the screen - one of the most effective and functional attributes; you can see a photo of the screen in the article.
The content of the article
Screen for kindergarten - what is it?
A screen is a structure that contains hidden elements that facilitate the organization of various scenes and performances, and is also used for educational, educational and developmental purposes. For example, designed in the style of a doctor's office, it helps teach children how to take care of their health. Numerous tools and decoration in the style of a car repair shop will help little repairmen manage them skillfully.
Design Features
The developing subject-spatial environment to which the screen belongs, according to the Federal State Educational Standard, must be:
- safe;
- transformable;
- accessible;
- variable;
- content-rich;
- multifunctional.
 With the help of the design, it is possible to hold the attention of children for a long time, develop intelligence by identifying unnecessary objects, their classification and generalization. It allows you to organize various tasks for logical thinking, and also trains children’s fingers by attaching objects to Velcro, zippers, straps, etc. The screen makes it possible to tell fairy tales and rhymes, arrange games, study animals, plants, thereby captivating the child and increasing his interest in what's happening. Using the design, you can quickly zone a room, for example, when holding a quiz or so that children are not distracted during classes. The product can be used as a tent by covering it with a blanket, or as a stand by placing educational pictures inside the transparent pockets. Studying complex material is much easier if learning takes place in a playful way.
How to make a screen for a kindergarten?
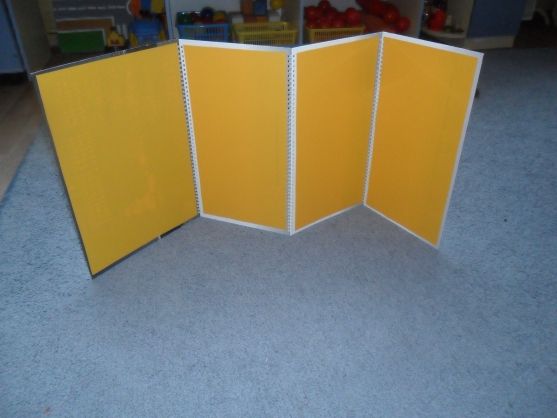
Making a screen for a kindergarten with your own hands is very simple - it requires very little time and inexpensive materials. The main task is to give the structure high strength and stability, because it will always be the center of attention of children and must confidently withstand active use. In addition, it is necessary to avoid heavy elements and sharp corners that can injure children.
REFERENCE. In most cases, the screen consists of 3 parts - a central one and 2 side ones, but this value changes at your discretion. The same applies to fabric, which you can choose together with your children, and then cut from a single piece of material, or you can “blind” it from several colored fragments.
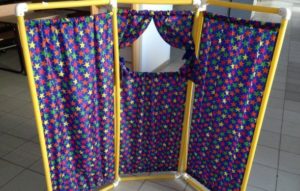
To make the design even more universal, several variations of fabric design will help, which will be attached to the frame using Velcro and changed depending on the need.
Do-it-yourself multifunctional screen: step-by-step instructions
The simplest and most affordable material for the frame is polypropylene pipes, the cost of which is low, but they are strong and durable. To connect their fragments, plastic fittings are used, the fastening of which is carried out using a special soldering iron. The soldering process takes a matter of minutes, so there is no need to buy a tool - you will definitely find one in the workshop of the father of one of the children.
For work you will need: a tape measure, a marker, plastic pipes, a saw for cutting them (you can buy pipes of the required length in the store), a soldering iron, fittings, fabric, scissors, fasteners. The process occurs in several stages:
 Drawing up a drawing of the future structure indicating all dimensions. Next, the required number of pipes of the appropriate length are cut along them - no significant effort is required.
- Manufacturing a one-piece frame. The ends of the pipes and fittings are heated with a soldering iron, after which they are connected and lightly compressed for a few seconds. In order for each part of the structure to move relative to each other, plastic connecting elements are used, which are placed on the pipes and fastened together with a soldering iron.
- Sewing covers. From pieces of fabric, fragments are cut out according to the size of the sections, and it is advisable to stitch their edges. It is advisable to fix the fabric using special fasteners with Velcro or buttons.
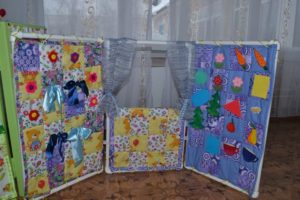
- Painting and decoration.If desired, the plastic elements can be painted, but it is recommended to do this outdoors and then wait until they are completely dry. In this case, it is necessary to use a protective mask and gloves. The screen is decorated with carved figures, appliqués, etc.
To make it easier to organize exhibitions and performances, you can attach transparent plastic or fabric pockets into which to store equipment. In addition, using stretched threads with clothespins and other fasteners will also make the task much easier. If the fabric covers are replaced with garden netting when the product is idle, then children’s drawings, toys and photographs, and various educational materials can be hung on it.
There are no options, methods of assembly and finishing - it all depends on the imagination of teachers and children. If desired, the manufacturing process can be turned into a fun and exciting game where every child will take an active part. In the future, with a functional screen, you can turn useful and interesting ideas into reality, which contributes to the comprehensive and effective development of children.