DIY bathhouse shelves photo options
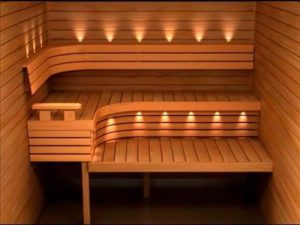 If a bathhouse is built on site independently, then at the last stage the problem of installing bathhouse shelves arises. This is perhaps the most important component of the interior of a sauna room after the heater - a comfortable stay in the steam room and washing room directly depends on the characteristics and functionality of this design. Let's consider the basic rules for arranging shelves in a bathhouse, based on the advice of experienced bathhouse attendants.
The content of the article
What to make bath shelves from
 Particular attention is paid to the selection of materials when arranging bath structures; they will be located in extreme conditions of high humidity and constant temperature changes. It’s worth mentioning right away that they are made strictly from natural wood - synthetic material is not considered. The reason is quite simple, the steam room should have a healthy and environmentally friendly atmosphere, which will help improve well-being when visiting the bathhouse - synthetic materials do not have this property.
But even from wood you will have to choose one that is resistant to moisture and elevated temperatures, does not have resinous inclusions that are released when heated, and meets certain requirements:
- minimal thermal conductivity;
- low resin content or a rock that does not have a resinous component is selected;
- the wood must be densely fibrous;
- durable when used in conditions of constant temperature changes.
The most common materials for mounting regiments in Rus' were linden, aspen, birch and sometimes poplar. At the moment, there is another material brought to us from Africa - this is abashi, which fully meets all the requirements for material for wet rooms.
REFERENCE! Linden spirit in a steam room strengthens the immune system, helps cope with various colds and treats the upper respiratory tract. Birch is a useful and environmentally friendly material, but its main disadvantage is its tendency to rot quickly. Oak has excellent strength and moisture resistance, but it is used extremely rarely due to its high cost.
Shelf design
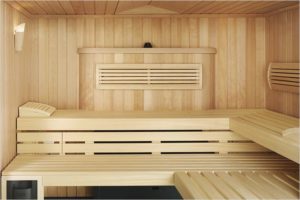 Bath shelves have no design features - they are an ordinary bench, often built in several tiers and attached to one of the free walls or in a corner area. No decorative elements are installed on them, since there is a high probability of injury during paired procedures.
REFERENCE! Arranging bath benches with a radial design significantly saves space in the steam room.
The structure of the bath shelves includes:
- frame - acting as a support;
- decking is a structure made of boards attached to the frame on top.
For the frame, the timber is selected individually, the thickness should be optimal - it should not break under the largest person visiting the bathhouse, but not less than 50x50 mm.
The most common is a structure in the form of wide benches with vertical supporting elements, sometimes in several tiers. Finnish technology is less commonly used, which involves simple fastening to the wall using oblique struts. The advantage of this technology is the ability to arrange several benches on hinges, which, if necessary, will be retracted against the wall.
Dimensions and shapes of shelves for baths
If you don’t know which steam room designs are suitable in your case, then when arranging them it is better to rely on standards and correctly apply the basic linear parameters. This is how you can ergonomically arrange even a small steam room space.

So, the most popular width parameters are:
- the seat that is used in the steam room is small in size - 40 cm, it is considered narrow and not very comfortable;
- the standard size is 60 cm - such shelves are installed in rooms whose area is considered average;
- a convenient and fairly large option is a width of 90 cm, but in a small room such a design will take up most of the usable space;
- if the area allows, then you can arrange shelves on which you can not only sit comfortably, but also lie - 150 cm.
If you have built a large bath complex and there is enough space in the steam room, then the structures can be built of absolutely any size.
How to make simple shelves for a bathhouse with your own hands
The simplest option is to mount several tiers of simple shelves that will be installed near a free wall.The dimensions are selected based on the area of the room, but when installing several tiers of the structure, it is worth understanding that for comfortable use the lower tier should rise 60 cm above the floor. The distance between the upper bench and the ceiling surface should be comfortable for the tallest person visiting the steam room to sit.
How to choose a place
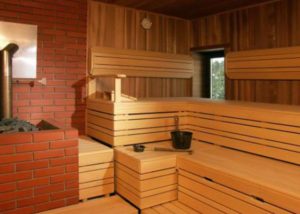 The place in the steam room for the shelf is selected after the material, type and dimensions have been decided. It is advisable, even before starting finishing work, to draw up a detailed drawing on which the place for the heater, water tank, and other bath accessories will be determined. Only after this a free wall or corner is selected in which the structure will be installed.
IMPORTANT! Not allowed install racks to the wall with window, as high temperatures can cause glass to burst and cause injury.
Choosing the method of fastening the boards
The strength of any structure directly depends on the fastening elements on which it will be installed. At the moment, there are three most reliable options:
- self-tapping screws, the heads of which must be recessed into the wood by at least 0.5 mm;
- nails on the outside;
- wooden wedges.
The first option is very common; in most cases it is used by home craftsmen when constructing various types of wooden structures. The second method is not so popular, but is sometimes used. The third option is carried out by specialists - reliable and environmentally friendly. It involves arranging mounting holes into which oak dowels are driven.
Making shelves for a bathhouse - step-by-step instructions with photos
When building benches in a steam room with your own hands, you need to adhere to the following algorithm of actions:
- prepare material and tools;
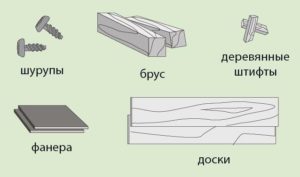
- decide on the installation location;
- cut the block and boards into elements of the required size;

- mount a frame with vertical posts;
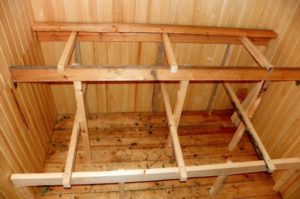
- fix the flooring from the boards;
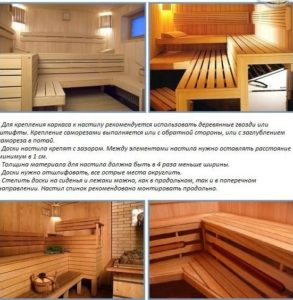
- treat the wood with antiseptic compounds that will not cause harm to health when heated.
ATTENTION! If the highest bench is located at a height of more than 1.5 meters from the floor, then for greater stability and strength of the structure, you can install special braces, which will additionally hold the wooden flooring made of boards in a horizontal position.
Is it worth making multi-stage bath shelves?
 In a Russian bathhouse, you can’t do without shelves with several tiers - when the room is heated, hot steam rises to the ceiling, and in the floor area the temperature remains low. When constructing elements with several stages, it is possible to choose the optimal heating temperature for yourself.
IMPORTANT! If the sauna is heated using a regular heater, then the main steam cake with a temperature above 100 degrees is formed right under the ceiling.
Of course, when building several tiers, you will have to spend much more time than on a simple narrow bench. But if you are often visited by guests who like to steam, and the room is not very large, then you simply cannot do without 2-3 tiers. In addition, such structures are subject to good ventilation, which facilitates rapid drying of boards and bars.
It’s not difficult to build shelves in a bathhouse with your own hands; all you need to do is understand the installation principle, follow the step-by-step guide and be able to use simple carpentry tools. Properly selected materials will contribute to high-quality paired procedures aimed at improving well-being.


