DIY shoe shelves
 For owners of small-sized apartments, one of the serious problems is the issue of placing shoes in the hallway. This issue is especially acute for families with children. They understand better than anyone what shoes are, which are scattered throughout the apartment.
To preserve and maintain order in the house, it is not necessary to purchase shoe racks in furniture stores; any person can make such products. This does not require any expensive materials or tools; there are many available materials from which you can build shoe shelves.
The content of the article
What can you make a shoe rack from?
 To make such a structure, you can use a variety of materials, including wood, metal, and polymers. In addition to those listed, there are models for manufacturing that use plywood, chipboard, metal profiles, including pipes.
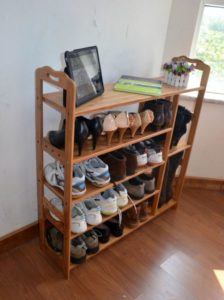
How to make a shoe rack out of wood
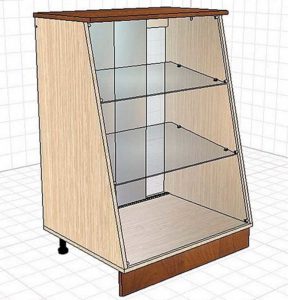
 Before you start building such a structure, you need to draw a sketch of it; this can be done on paper or on a computer, using special CAD programs.
Having such a sketch will allow you not only to work out its appearance, but also to calculate the amount of necessary material and fasteners, in other words, to draw up a specification for the product.
Necessary materials
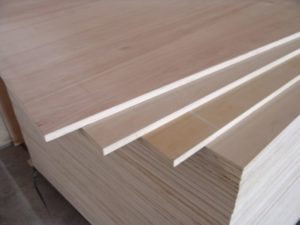
 To make your own wooden stand, you need to purchase the material specified in the sketch. It can be a solid board, a sheet of plywood, chipboard. To construct the back wall, you can use a fiberboard sheet.
The wood, in the form of a solid mass, must be dried; if you use raw wood, you can be sure that after a while the bedside table will work. To connect the parts of a shoe rack together, you can use corners made of metal and support bars. As a rule, self-tapping screws are used as fasteners.
Required Tools
 To process the parts of the shoe rack and assemble it, you may need the following tool:
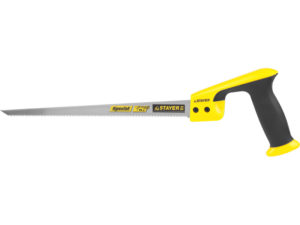
- wood saw, manual or electric:
- plane;
- screwdriver or screwdriver;
- abrasive sandpaper on fabric or paper;
- measuring tool and marker.
Drawings of shelves for wooden shoes
As noted above, to assemble a shelf with your own hands, you will need a drawing of the future product. You can do it yourself. To create it, you can use samples from furniture catalogs or look for ready-made sets of drawings.
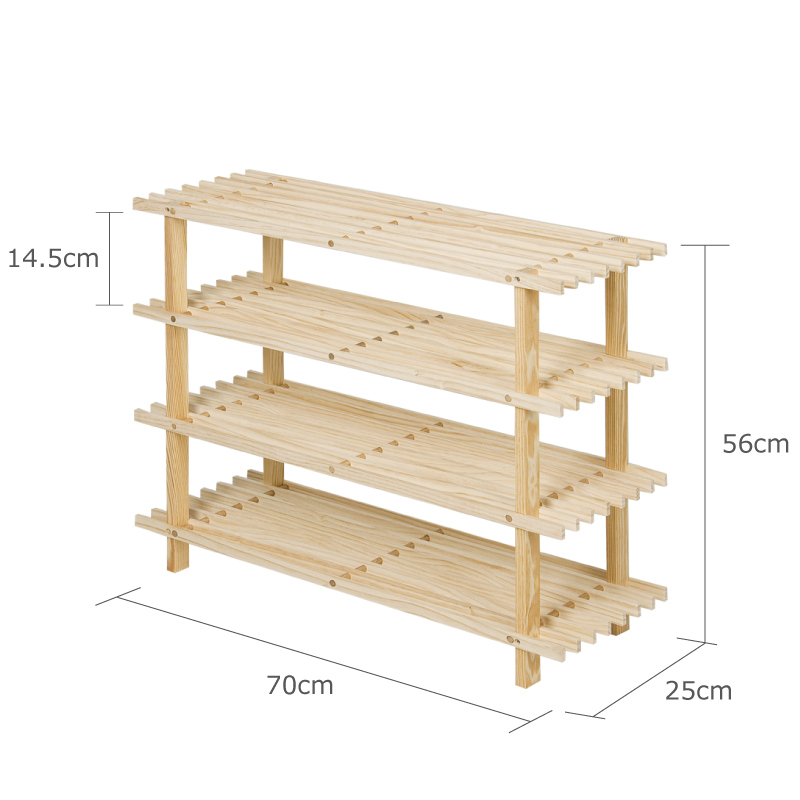
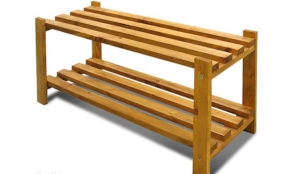
Standard wooden shoe rack step by step
 To make a standard design, you will need to prepare a wooden board; its optimal width is 250–350 mm and thickness 20–25 mm.To create support beams, you need to prepare a square-section wooden beam with a size of 25*25 mm.
The shelf manufacturing process will look like this:
- From the prepared boards it is necessary to cut out the side walls, each 800–900 mm long.
- After this, it is necessary to make support beams and crossbars.
- Shoe shelves must be cut to a length of 600–700 mm.
- All received blanks must be sanded. This is necessary to remove burrs that remain after processing the hacksaw.
- To install the shelves, you need to install support bars; they are screwed using self-tapping screws.
- After this, the finished shelves can be installed on the fixed beams.
After completing the assembly, it makes sense to cover it with varnish or paint, this will save the structure from contact with water, which can drain from the shoes.
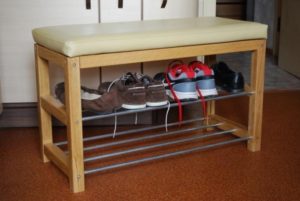
On a note! From such a cabinet you can quickly make an ottoman on which you can sit while putting on your shoes. To do this, just lay a layer of foam rubber on the top shelf and cover it with artificial leather.
Wooden shoe rack with hidden fastening: step-by-step guide
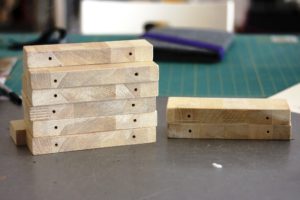
 To fasten the side and transverse shelves to each other, not only self-tapping screws are used, but also hidden fasteners. This type is used for the production of furniture in mass production conditions. To install such fasteners you will need a wood drill and a perk. Using a simple drill, make a hole in the sidewall and in the panel that will be connected to it. Another drill will be needed to countersink the hole for the bolt head. This diameter should exceed the first one by 1–2 mm. The exact size can be determined by measuring the dimensions of the head using a caliper.When drilling, it is necessary to strictly observe the horizontal operation of the drill, otherwise the hole may come out and the shelf will be damaged. Using a perk, make a hole for installing a nut from a set of hidden fasteners.
The bolt head has a recess intended for installing a decorative plug.
The build process looks like this: a nut is installed in the hole for the nut, and a bolt is inserted through the punched hole, thus creating a reliable connection between the side and transverse shelves.
When performing the operation of installing hidden fasteners, you must carefully measure all locations of hidden fasteners. As a rule, two such connections are used to attach the sidewall and shelf. The distance from the edges must be at least 30 mm.
Assembling a shelf in the hallway from wooden boxes
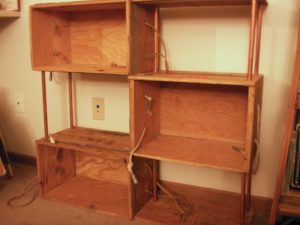 Another interesting solution is to make a shoe shelf from ordinary shipping boxes, which can be found near any store. The only condition is that the board from the box should not be too thin, for example, like on a fruit container. Therefore, you can use those that transport products packaged in glass containers.
Such boxes allow you to store shoes of any type, for example, high boots or felt boots.
How to make a shoe rack with your own hands
 As already noted, when making a shoe rack, you can use a variety of materials, including finished products, for example, container boxes intended for transporting glass containers or other products.
The sequence of operations in the manufacture of glass containers is as follows:
- Development of a sketch necessary to calculate the amount of material and fasteners required.
- Production of the necessary blanks - side walls, support bars.
- Preparing places for fastening shelves.
- Assembling the product based on the developed sketch.
- Treating the surface with paints and varnishes, this kind of treatment, allows you to protect the surfaces of the shoe rack from moisture that flows from the shoes.
DIY glass shoe rack: step-by-step guide
No one will argue with the statement that glass is often used to create home and office furniture.
Fortunately, modern technologies for producing this material provide it with sufficient strength to withstand both dynamic and static loads.
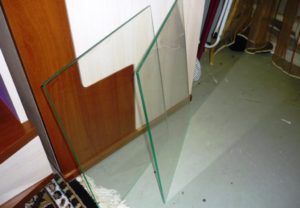 To make a shoe rack, it makes sense to use tempered or laminated glass (triplex). Acrylic materials can be scratched by sand that accumulates on shoes.
To make the simplest shelf, you need to prepare three sheets of glass with approximately the following dimensions: 900 * 300 * 10 mm. The distance between them can range from 250 to 300 mm, this distance is quite enough for installing bulky winter boots. It is also worth paying attention to the following points:
- Glass shelves can be made with or without side walls. It should be noted that the use of glass sidewalls ultimately complicates the design.
- You can make sheets of glass yourself, or you can order them from a glass workshop, which will provide the required dimensions and shape of the shelves.
 Several methods can be used to assemble such a structure. In order to avoid drilling glass, and this is a rather complex process that is difficult to perform at home, you can use the following scheme, cut pieces of metal or polymer pipes to the height of the distance between the shelves, and install plugs on them. An adhesive is applied to the surface of the plugs and placed in accordance with the sketch.
You can make side structures from metal or wood and equip them with fastenings to hold the shelves. If you still manage to get holes, you can install pins and attach fittings to them to hold the shelves at a given height.
Important! It is necessary to remember the gap between the bottom shelf and the floor covering, that is, it is advisable to install support legs.
A shoe rack made of glass requires constant care, since all dirt is clearly visible on its surface.
Interesting ideas for DIY shoe shelves
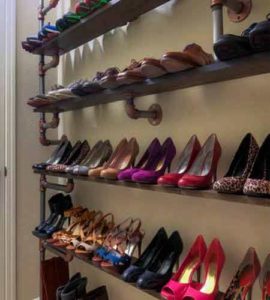 A shoe rack is the type of furniture that can be created using the most daring ideas. For example, use as the main material water pipes and connecting fittings. With their help, you can create both free-standing structures and shelves that can be attached to the wall.
- Some homeowners use thick cardboard boxes.
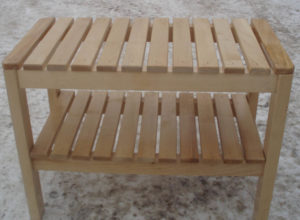
- For a country house, a product made in a rustic style is quite suitable; for this you can use thick boards, and such a shelf can play the role of a bench for evening relaxation.
- To store shoes in the hallway you can use empty bottles too.
In other words, when arranging this furniture, the homeowner can use almost all available materials.