DIY shoe rack
Every family is different and their homes are different. A large number of shoes remain unchanged. Stored at home winter, summer, demi-season, sports and evening shoes. In spacious apartments, owners can install a special cabinet for storing it, and in small apartments with a narrow corridor, every centimeter counts.
The best option is to make a shoe rack according to the size of the corridor and the number of family members.
The content of the article
What is the use of the item
A closet can significantly save space in the hallway. Shoes will not be collected in groups at the exit, on the mat or anywhere else. There will be no need to regularly sort out out-of-season shoes, hide them in boxes and on the mezzanine or sofa. At any time of the year, all shoes will be at hand.
Some shoe racks provide drying. In such cases, the cabinet consists of lattice shelves, and a tray is installed below to collect moisture and dirt. You will no longer need to clean your shoes immediately upon returning home or regularly sweep the hallway to remove sand.
Shoe racks are easy to use and can become part of the interior. In addition, special storage can protect shoes and boots from deformation and drying out.
By type, all shoe racks are divided into:
- open;
- closed.
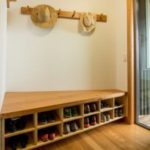
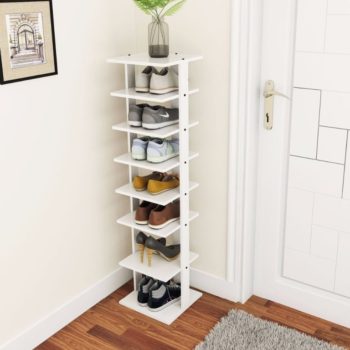
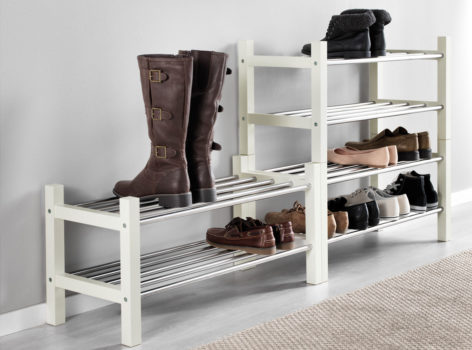
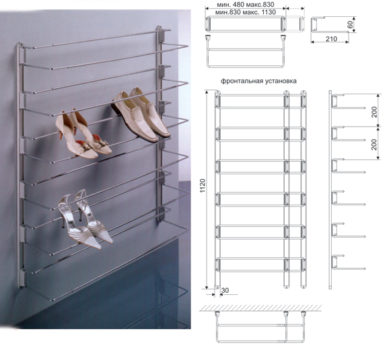
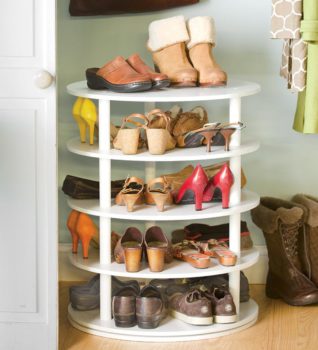
Open ones are made in the form of racks or shelves. They can be tall or act as shelves under a bench or a drawer for small items. The advantage of open storage systems is ventilation of shoes. But some people think that open shoes do not look aesthetically pleasing.
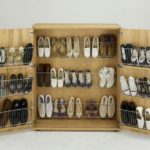
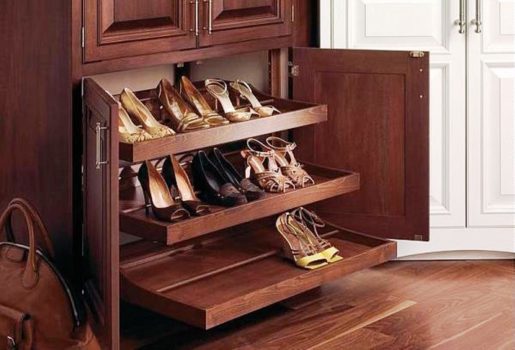
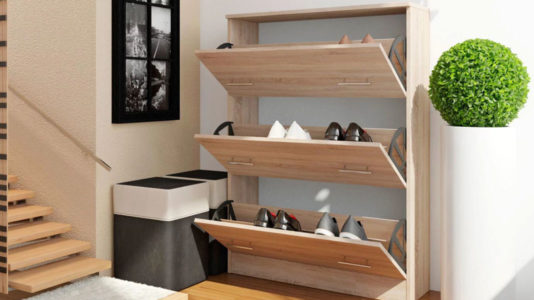
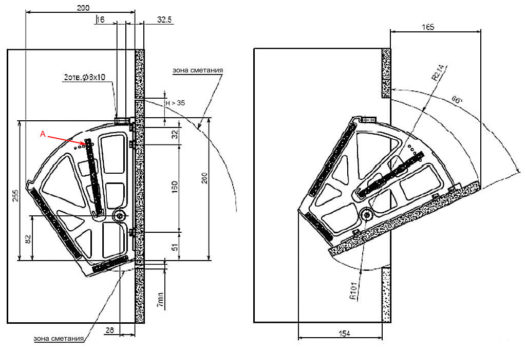
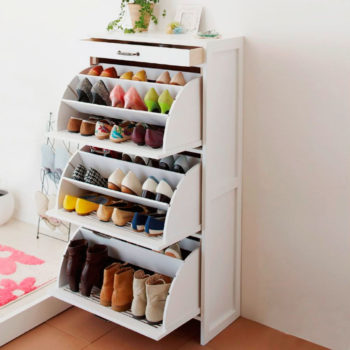
When closed, shoes are stored horizontally or at an angle. This could be a cabinet with doors or with sliding drawers. It can provide separate sections for each pair or general shelves for the seasons. A cabinet with corner storage takes up less space and is suitable for small corridors. Only cleaned and dried shoes are stored closed, which means an intermediate shelf for drying is needed.
How to choose a size and make a drawing
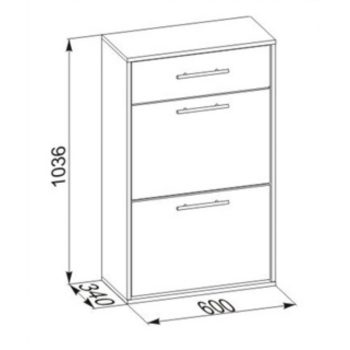
To make a shelf yourself, you need to draw a drawing.
The construction of a drawing consists of the following stages:
- Determine how many pairs of shoes will be stored at a time. If the shoe rack is seasonal, it may be smaller. For boots, boots, and shoes, you will have to make a spacious closet.
- Select appearance and design: open, closed, petal or with drawers.
- Distribute the location of shoes in the closet. Separate shelves must be provided for boots. You can schematically draw the location of the shelves and their sizes. Here you can take into account seasonality or frequency of use.
- Calculate the dimensions of the shelves and sections and mark them on the drawing. After this, it is easy to calculate the size of the cabinet. Visually you can “try it on” to the room and understand whether adjustments are needed.
- If the size suits you, it is laid out on shelves, walls, partitions and doors. The size of each part is sketched.
- You must immediately provide all the accessories and consumables: nails, handles, retractable or other mechanism.
With a ready-made drawing and a list of what you need, you can go to a hardware store to purchase.
Instructions
The parts were purchased, the shelves were cut to size. You can start assembling. To prevent the edges of the shelves from scratching your hands, it is recommended to treat them with a special edge. This can be done to order or at home if you have the equipment. Another option is to sand the sections smoothly and coat them with varnish after assembly.
The cabinet begins to be assembled from the frame: connect the side walls, bottom and top. Places for shelves are outlined, fittings for fastening the shelves are installed. When the frame is ready, screw on the back wall and legs.
Shelves and doors are installed last. If a rotating mechanism is installed in the cabinet, the places for its attachment are first marked. Shelves are mounted to the mechanism, which are pre-cut to size. Then the mechanism is screwed to the side walls and the façade is installed.
When the cabinet is ready, you can start decorating it: cover it with varnish, paint, self-adhesive film.
Making a shoe rack yourself is not that difficult. If you don’t have the skills to work with wood, for the first time it’s enough to build a simple shelf. A separate shelf will relieve your apartment of excess clutter, organize your shoes and help keep them clean.