Assembling a crib with a drop-down side
 Sometimes there are situations when it becomes difficult to assemble a crib for a child, and nothing in the instructions is clear. Therefore, you have to look for help on the Internet.
The content of the article
How to assemble a baby crib with a drop-down side
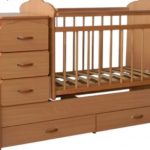
Before starting work, you need to select a design. It all depends on the amount of free space, the age of the child and the budget. If the room is small and the baby is newborn, a regular small cradle will do. If the room has the necessary space and the child is over 1 year old, you can choose a design with additional bedside tables and drawers. As soon as the child grows up, the bedside table can be removed. This will increase your sleeping space.
Important points.
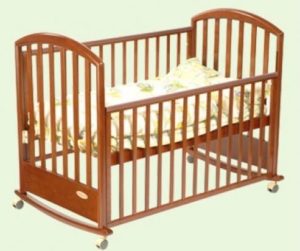
The crib consists of the following parts:
- Frame (back and bottom sides).
- Headboard.
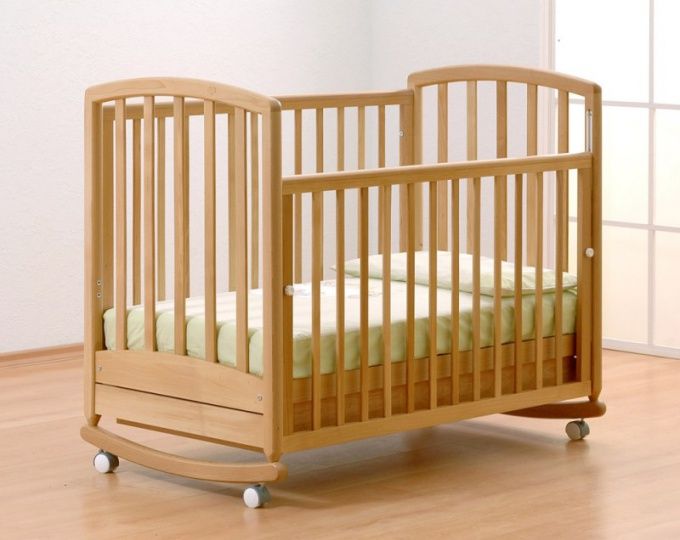
- A place to sleep.
- Support elements (wheels or legs).
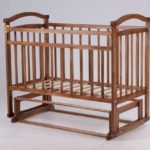
- Pendulum.
- Fastenings.
All of the above parts are sold ready-made. You just need to collect them. Sometimes models include chests of drawers, drawers and mechanisms that adjust the height.
Important points
Don't forget to prepare a place for the crib. It is recommended to cover it with a light cloth so as not to lose small details and not scratch the floor.
You need to be careful when assembling the crib. If the pendulum system is not secured properly, the child may be injured.
Cribs with a pendulum are a little more expensive than regular ones.The final price depends on the size and number of additional parts.
Attention! Children's beds are made from environmentally friendly materials (wood, plastic). Therefore, they are not harmful to health.
Step-by-step assembly instructions
To assemble the structure you need the following tools:
- Screws.
- Screwdriver.
- Plugs for screws.
To assemble the bed, we need:
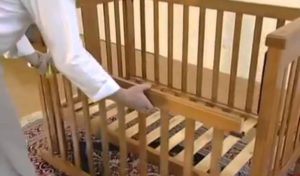
- First, the frame is assembled. To do this, install the side panels on the legs, and screw the back panel to them using screws (2 on each side).
- After assembling the frame, you can install a place to sleep. It can be either a solid element or in the form of boards that are fixed with a cord. We mount it using screws.
- We find the grooves on the sides of the bed. We attach the front part of the bed to them. After this, you should install several additional fasteners on the sleeping area.
- Now we need to turn the structure over and install the support elements. If there are the necessary grooves, simply insert the wheels into them. If not, you can make the support in the form of arcs.
- We install all additional parts of the bed (drawers, bedside table), if they are included in the kit.
- We install the pendulum. To do this, you need to attach the plates to the sides of the structure.
- We install plugs so that the screws do not scratch the child.
- We fix the bed.
Attention! The finished structure should include instructions for assembling the bed. She will help if it is not clear what to do next.
Assembling a bed for a child with your own hands is quite simple. You need to do everything according to the instructions.