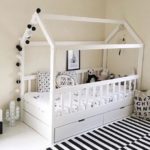
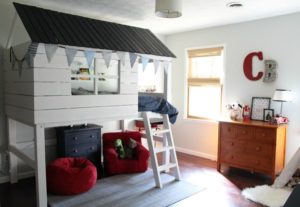
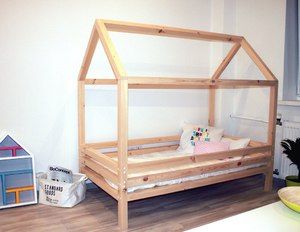
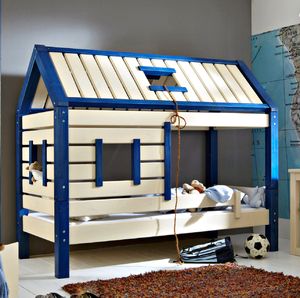
DIY bed-house
 In the modern world, original children's beds are becoming the most popular and in demand. Their selection is presented in huge quantities on the world market. Everyone can find a children's bed to suit their taste and color, taking into account all the child's preferences.
The content of the article
How to make a house bed with your own hands
Beds can be presented in the form of cars, boats, animals, ships, airplanes and much more.
But what’s better than a children’s bed made with their own hands, into the making of which the love and affection of parents who so want to please their child is invested. Therefore, it is possible not to purchase furniture, but to make it yourself. This is especially true for a house bed. Since such furniture is not difficult to make, and this process will not take too long. If you have never made a snowstorm with your own hands, you don’t have to worry that you won’t succeed. Since to make a bed-house you do not need any special skills.
Selection of materials for manufacturing
Depending on the shape of your furniture, select the appropriate material. For the frame of your bed you will need timber.The cross-section of the timber should be 5*5 centimeters. How much material you need depends on the dimensions of the future furniture.
If you want to make an inexpensive house bed, you can make the furniture in the shape of a tent. If you choose this option, then you will need to make the walls and roof in the form of a frame, for which you will need a canopy. On canopy day, any light fabric can be used.
You can make a canopy yourself to save your budget. It can also be sewn to order for you if you do not have free time to make a canopy yourself.
The walls and roofs of a bed in the form of a house are usually made of plywood or ordinary boards. From plywood you can make any part for a future bed. If you decide to make it from plywood, then experts recommend purchasing birch plywood, the thickness of which is 0.7 or 1.3 cm.
If you do not want to make parts from wood, then drywall is an excellent option. From plasterboard you can make a niche for furniture, as well as decorate in the shape of a house. To do this, you will need to cut out openings from drywall for future windows of the house, as well as an opening for the door to the house. The place to sleep is installed inside the resulting house.
Attention! The easiest way to work is with drywall, because it can be cut with an ordinary stationery knife without putting too much effort. The disadvantage of drywall is that it is difficult to seal seams and joints during finishing installation.
Required Tools
In order to make house-shaped furniture with your own hands, you will need the following tools:
- knife;
- hacksaw;
- screwdriver;
- drill;
- a simple pencil;
- ruler;
- square;
- sandpaper;
- set of self-tapping screws;
- set of bolts;
- panels;
- slats;
- special glue for wood.
How to take measurements and drawings
The manufacture of a bed-house should be approached with all responsibility. It is necessary to think through everything carefully and prepare the correct diagram and take correct measurements of the future furniture.
In the drawing, in accordance with the measurements taken, it is required to correctly enter the number of parts and elements that will make up the bed-house. You also need to write down the dimensions of each part, as well as the method of fastening.
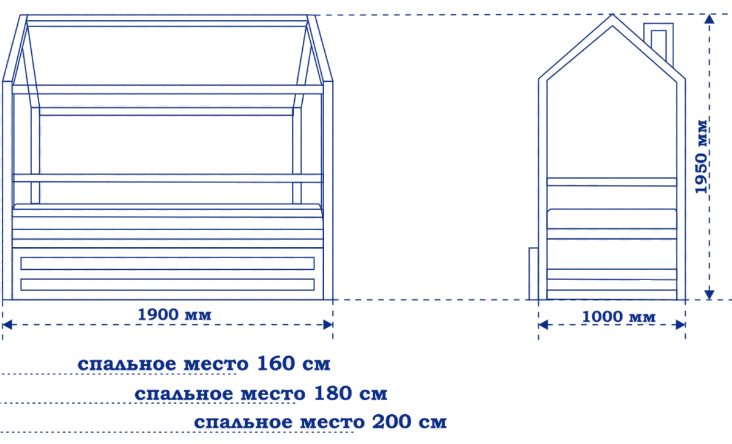
Please note that the size of the frame is similar to the size of the mattress. Therefore, before you make furniture, you must first purchase a mattress for the bed.
The size of the bed is directly related to the age of your child for whom the furniture is made. If the bed is made for a preschool child, then the dimensions of the bed-house should be 1300*750*1400 mm. For school-age children, the bed dimensions are 1600*900*1700 mm.
Important points before assembling the house bed
Before starting to assemble the bed, parents need to decide in advance whether the bed will have drawers or whether it will be without them. Some parents prefer the space under the bed to be free, while others prefer to make the furniture as functional and spacious as possible. Therefore, such parents give their preference to a house bed with built-in drawers.
Before assembling furniture, you need to decide on the choice of drawers built into the future furniture. Drawers can be of two types: on wheels or on guides. It is recommended to make drawers on guides, as this is a more advantageous option, the floor will not deteriorate and the structure will be more durable.Also, you should decide how many drawers will be installed at the bottom of the house bed.
Parents should also make a choice on a specific furniture design for the child. You will first need to decide on the choice of shape for the place to sleep. If you have a small child, it is recommended to make low single-tier beds. If you have more than one child, then it is better to make two floors in houses with stairs.
Worth remembering! Such furniture should be absolutely safe for your child. In order for the crib to be more stable, it is necessary to make the sleeping place without legs so that it is on the floor. Having made this choice, you can rest assured that such furniture will withstand any weight. The advantage is that the child will not fall from a low crib.

Bed house yourself: step by step
Before you start making a bed-house, you must first make a base for future furniture.
Crib base
First you need to make a base. To do this, you need four bars, the length of which should be 1300 mm. This design will serve as a vertical support for the bed. After you have fixed and secured the block, you need to cut off a small part at the top of each block at an angle of 45 degrees. This procedure is needed for a future roof with slopes.
Before sawing a piece of beams, you need to mark the part of the cut with a pencil using an ordinary ruler. It is necessary to cut down using hacksaws.
Roof for home
In order to make the roof of the house, you will need four bars, the length of which should be 730 mm. After the beams are secured, you need to cut a part of the beam on top of each beam at an angle of 45 degrees.Don't forget to go over the places where you cut the beams with sandpaper so that your child doesn't get hurt on them. 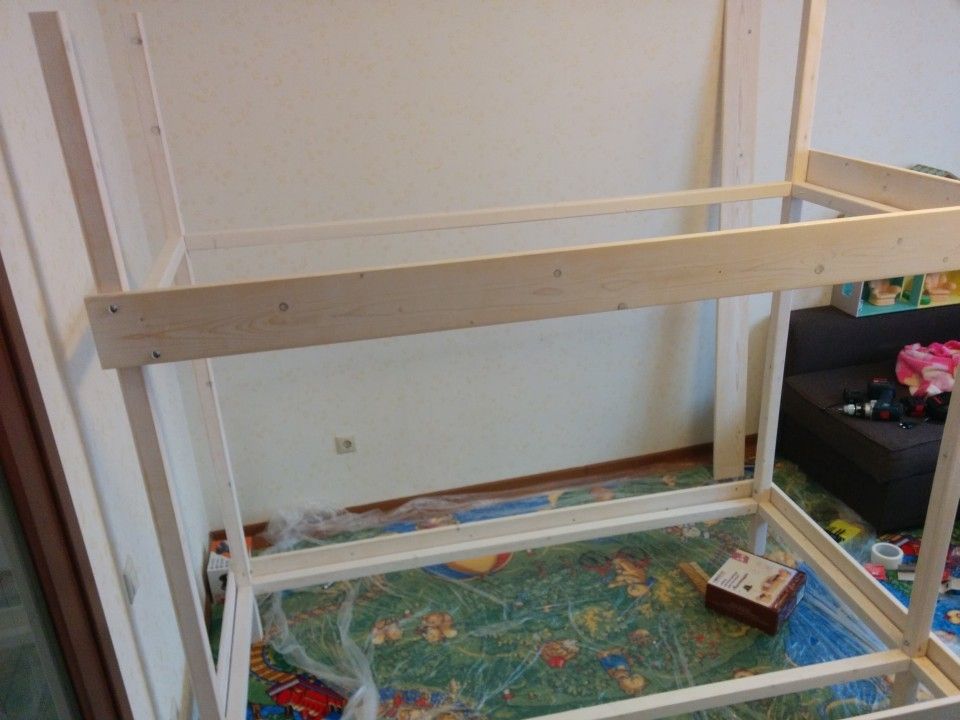
The support is made from scraps of beams. Everything should be attached to the roof ridge. It is necessary to take glue and attach the upper part of the ridge to the entire blank of future furniture.
Vertical joints and supports will need to be glued. Moreover, this procedure must be repeated several times. After all, the upper part of the house must be mounted on self-tapping screws, the length of which should be 40 mm. Self-tapping screws should be screwed in at least 4 mm from the line of the two roof components.
After completing these steps, we will see the final outlines of the entire structure.
Frame attachment
In order to complete the work with the end of the house, you need to screw a block to the bottom of the structure. The length of which will be 830 mm. This beam will serve as a baluster. Which will support the entire weight of the house.
It is recommended to use a tie to assemble the side components, since the connection will be almost invisible and will look more elegant and beautiful.
For such an inconspicuous installation, you need to drill holes in the bottom of the furniture (in the block) using 11 mm drills. The drilled hole should be in the middle of the crossbar. Remember that the hole should be through. 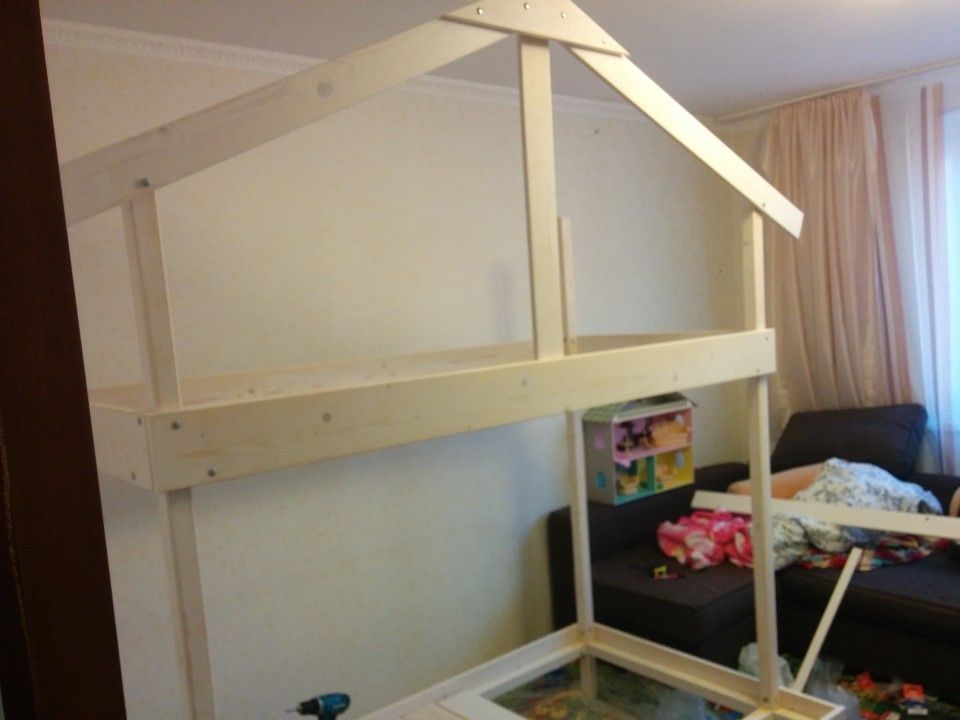
Then, you will need to drill a hole in the middle of the block itself using a 6 mm drill. You need to place a screw in the resulting hole, and then secure it all with a tie.
You can also use long screws instead of short ones. But it is necessary to pre-treat them with an adhesive substance.
Assembling the base of the house
In order to make the base of the house, it is necessary to use thick beams.Such bars should be identical in size to the sides of the bed. From the inside, thin strips must be screwed to the beams using self-tapping screws.
It must be remembered that the screws must be placed at the same distance. Such plates are a support for the manufactured frame of the house, which supports the bottom of the furniture itself.
It is necessary to make templates from the bar in advance, the length of which should be 6 centimeters. It is necessary to make several holes in a wooden block for self-tapping screws. The distance between each hole made must be at least 25 mm.
On the inside of the rack, mark the location for the hole in which the eccentric will be located. This hole is made with a drill, and then screws 10 cm long must be screwed into it. 
Pay great attention to the joints. After all the procedures, it is necessary to pour adhesive liquid into the holes on the lower tier and tighten with bolts.
Reference! This procedure must be done with all components of the structure, and then connect all the parts into a single whole.
Securing the frame for the future crib
It is necessary to attach all components of the furniture well. To do this you will need four bars. The length of each of them should be 1660 mm.
Remember that the length of the beams is equal to the length of the sides of the bed. All components are attached using glue and screws. Strengthen the entire structure using corner fasteners.
Using a photo, you can make your own bed-house for a child.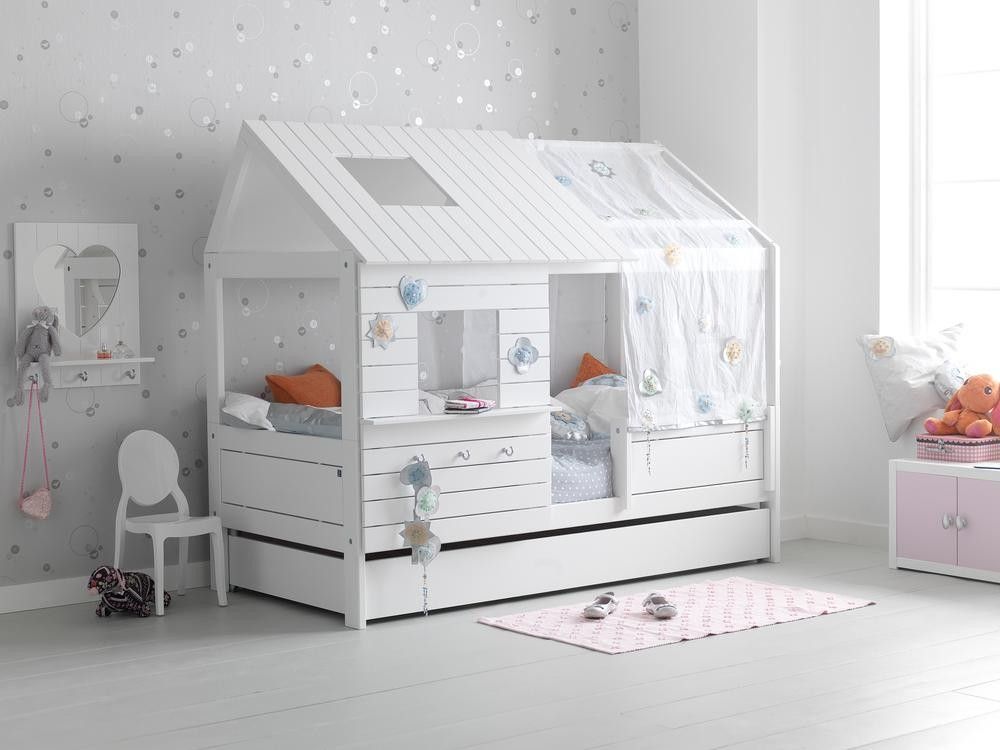
Furniture slatted bottom
The slats need to be secured to the slats. Attach the slats to the four sides of the entire crib component. You need to screw all the parts well, so that the screws do not stick out.For the bottom of a universal mattress you will need to use 14 slats.
Making such furniture for your child yourself is not only good safety, but also the realization of all your dreams for your child.