How to assemble a transformable bed
 You look through furniture stores one after another in search of a suitable bed (in our case, a transformer) and are faced with a situation where there is a large selection, but what you would like to buy specifically is not on sale. Such difficulties can be corrected if you want to design and assemble the product yourself.
The content of the article
Choosing the design and design of a transformable bed
Transformer beds differ in types of construction:
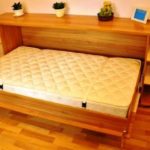
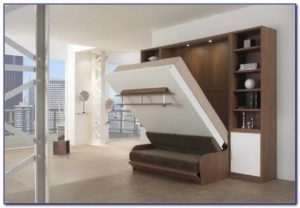
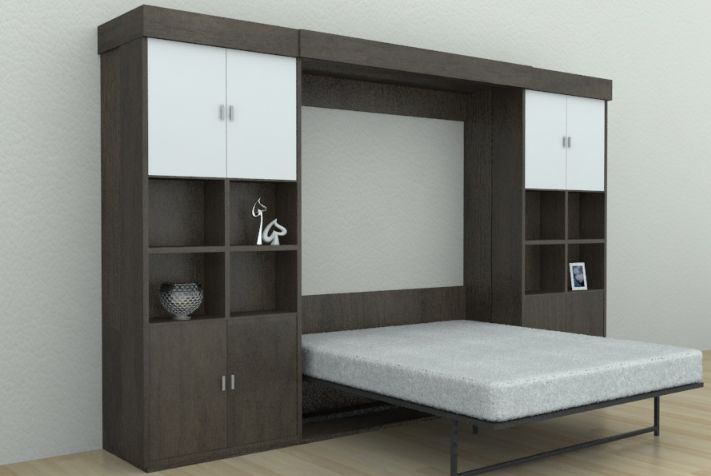
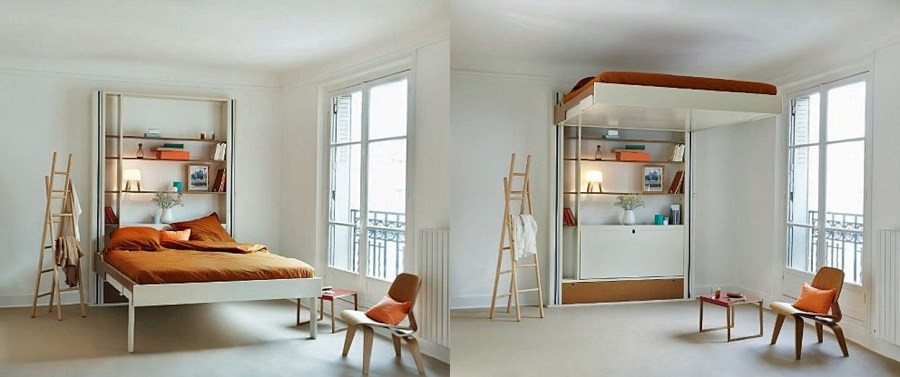
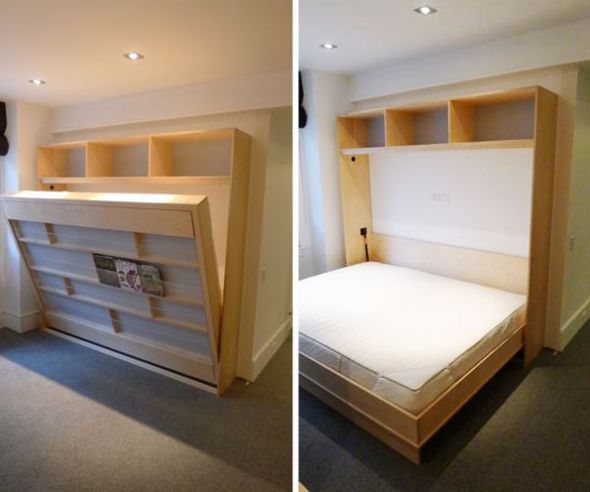
- Wardrobe bed. The most affordable and simplest sleeping option. Even a beginner can handle manufacturing and assembly. It is a bed with a lifting device, pressed against the wall and looking like a cabinet. This type of product is found in another version, when the bed is built into a ready-made wardrobe. However, it is more complex in design, which will require some experience in assembling furniture.
- Dresser bed. The model, which is close to the previous design, is also not difficult to install. It differs in that the product is built not into a closet, but into a chest of drawers or bedside table.
- Table-bed. It is usually used in children's rooms, since in the table, in addition to the bed, there can be various drawers and a cabinet.
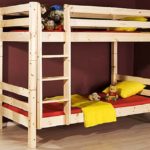
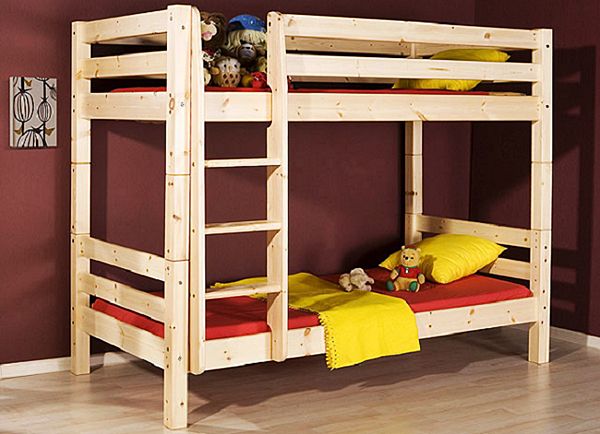
- Sofa bed. The advantage of this design is additional seating due to the sofa, while the bed is folded. It is possible to create a two-tier model.The difficulty of assembly lies in the need to accommodate the sofa located on the front of the folding bed. If you are just a beginner, it is better to entrust the assembly of such a product to a professional.
- Ceiling model. Expensive option. Its advantage is maximum space saving. A very complex design that requires precise calculations of the load. Only a specialist can install this product correctly.
The advantages of do-it-yourself assembly include:
- Saving money. Buying a product in a store will cost much more.
- Space saving. This is especially important for small apartments.
- Availability of drawings of various models, they are easy to find on the Internet. There are also simple furniture modeling programs.
- The opportunity to create your own bedroom project that will meet your needs.
How to assemble a transformable bed: step by step process
Let's consider the method of manufacturing and installation of the most common design - a wardrobe bed.
The product consists of three parts:
- A body with a deep niche in which the stock is located. It can be made from laminated chipboard sheets, they are affordable.
- The base for the mattress is made from timber in one of the variations: a frame plus slats or a sheet of plywood. Chipboard or MDF sheets are attached to the bottom of the base, forming the façade of the product.
- The lifting system connects the wardrobe and the bed. Depending on the type, it can be spring or piston. The spring mechanism requires taking into account the weight of the structure. A piston lift is more durable and reliable, but will cost you more. Since this is an important part of the bed that bears the main load, we recommend purchasing it in a factory-made version.

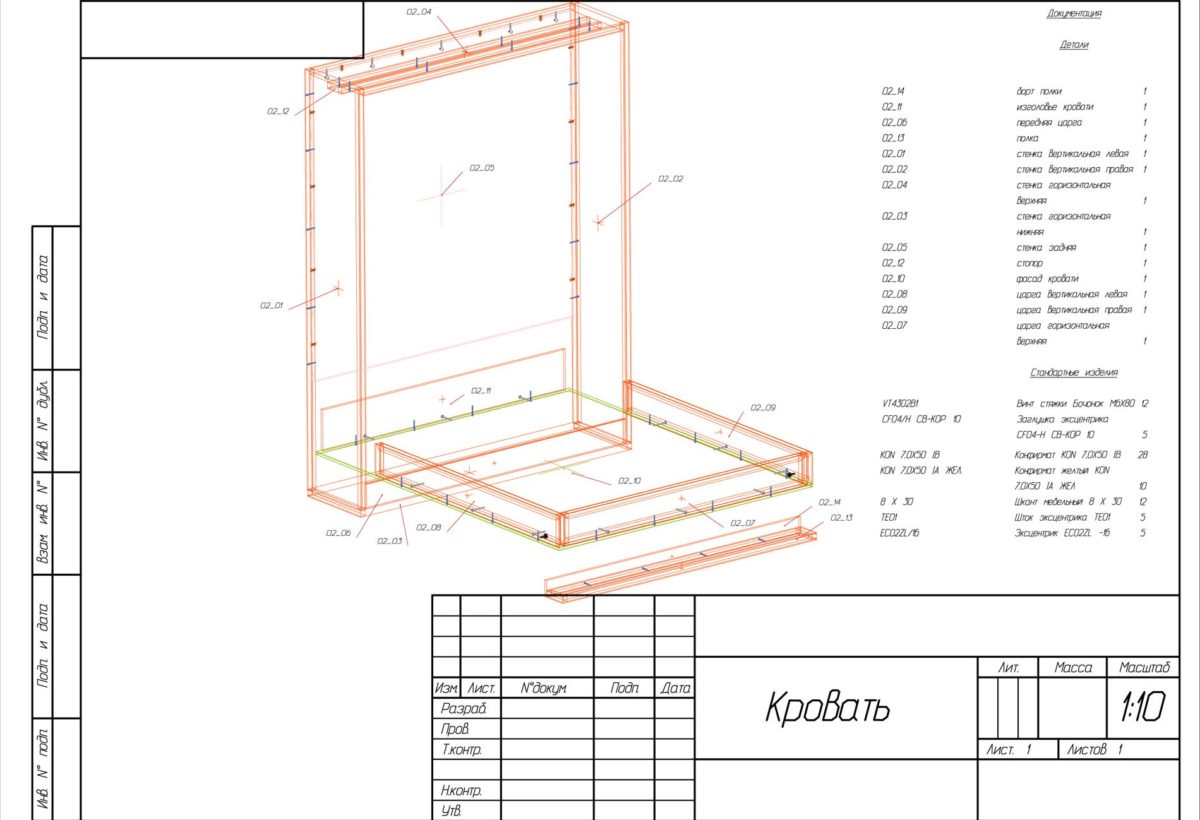
Your first step is to create a detailed drawing of each element of the device. To do everything error-free, download a design program - they are available on the Internet. Or you can choose a ready-made scheme on the Internet.
IMPORTANT! Do not forget that the project is drawn up taking into account the size of the mattress.
Then select construction materials based on the above recommendations.
Determine which jobs you can do yourself and which ones you can entrust to professionals.
ATTENTION! We advise you to cut the laminated chipboard in a workshop to avoid chipping the material and possible defects; this work is inexpensive. To protect the parts, each of them will be covered with special tape. This service will save you money, since to deliver a whole sheet of paper to your home you will have to hire a car, and if you lift it up the floors, you will need loaders.
Tools for work:
- Impact electric drill.
- A set of drills: regular, with a pobedit tip and a confirmed one.
- Screwdriver
- Hacksaw or jigsaw.
Manufacturing is carried out in three steps: assembling the frame, then the stock and creating a single structure from them. First stage:
- Secure the metal strip to the wall with anchor bolts. Or use 4 steel angles (1 mm thick) and attach them to the wall with dowel nails. The base of the closet will be two strong boards (about 2 meters high, selected according to the length of the bed). Secure the cross boards between them, along the edges, at the top and bottom, using glue and self-tapping screws. Another fastening option: holes are drilled on the end sides with a confirmatory drill, every 100–150 mm. Tie screws are used to tightly connect the boards.
- Sheath the finished frame; the sheathing is secured with self-tapping screws and adhesive joints.
- Fix the housing to the wall. The corners are attached to it with self-tapping screws.
IMPORTANT! The depth of the box should be identical to the thickness of the bed. In order not to make a mistake in the size, leave a margin (a few centimeters). The cabinet can only be mounted on a solid wall (brick, monolithic concrete).
Second phase:
- Reinforce the plywood that serves as the base for the mattress from below with four boards (lengthwise and crosswise) to avoid deformation. When connecting parts, use tie screws. To increase comfort, it is possible to supplement the base with various sides, but the lifting system must remain free. It needs to be tried on the box and adjusted.
- To strengthen the structure, fasten all four corners with strong metal corners.
- Screw the lifting mechanism to the box with studs or bolts. To make the connection sufficiently rigid, use washers and engravers.
Third stage:
- The lifting mechanism is connected to the cabinet using studs or bolts.
- Combine the stock and body with loops, secure the free end of the folding part with special fasteners. These fasteners keep the bed folded.
- Cover the ends of the boards with self-adhesive film. To fix it tightly at the end, use a hot iron, then wipe thoroughly with a dry cloth. Cut off excess tape and sand it with sandpaper.
IMPORTANT! Paintwork should be carried out before fixing the bed to the closet.
Transformable bed decor
There are various ways to decorate and enhance the appearance of your bedroom. The installed furniture can be additionally equipped with various cabinets and shelves, which will increase the functionality of the product. In children's rooms, it is popular to create patterns and combinations of several colors using acrylic paints.If you are unable to draw, stencils (there are many of them on the Internet) will help you create your own design.
The outer part of the sleeping furniture can be supplemented with overhead fittings or imitation handles to match the wardrobe. Additional lighting details - LEDs and lamps - will give the furniture a greater effect. A smooth sheet is used as upholstery for the façade; a swinging shelf is installed in the upper part, forming legs when the bed is lowered.
ATTENTION! We do not recommend decorating the outside of the product with ordinary mirrors, as they may not withstand the load. Choose acrylic mirrors, they are more reliable and more durable.
As you can see, assembling a transformer product is not so difficult; you only need desire, patience and strict adherence to the drawings and instructions. We hope that our article has comprehensively helped you understand the issues of making and installing a bedroom. Good luck to you!