DIY plywood chair
 A person always strives for comfort; sometimes the simplest thing in the house becomes irreplaceable, such as a chair. Sit with a newspaper or just read a book, or maybe by the fireplace, wrapped in a blanket, watching the fire, which can be more pleasant. If sometimes such moments are not enough, it’s time to think about purchasing a chair or making it yourself.
The content of the article
What types of chair designs and plywood are there?
There are a huge number of modifications of plywood chairs, but all products are divided into two types:
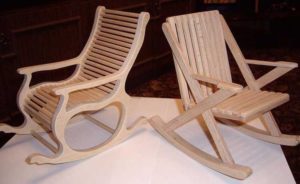
- rocking chair
- chair, stool.
All products with a swinging base can be assigned to the first one. We can list them endlessly, but let’s focus on two designs.
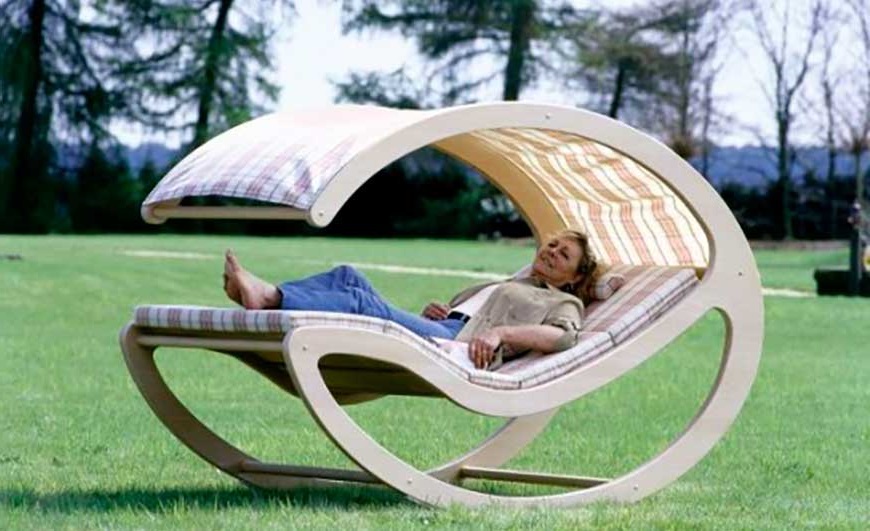
Rocking chair. The most comfortable invention of man. Just sit or lie down and enjoy the gentle rocking.
Products such as stools, due to the creative ideas of designers, are not always durable and reliable. Like this design, for example.
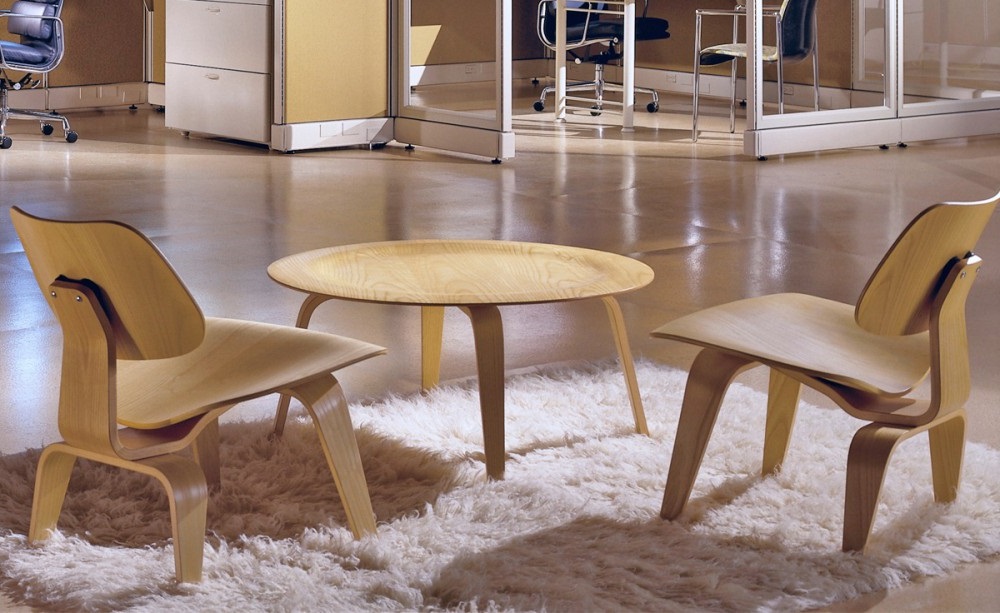
It may look nice, but you shouldn't make such an item yourself.
What is needed to make a plywood chair
It all starts with an idea, developing a project drawing and preparing materials with tools. First of all, you need to create a layout; stock up on cardboard for designing the future product.
ATTENTION! Make patterns out of cardboard, ratio 1:1, then use these cut-outs to draw cutting lines on sheets of plywood. This will save time, material and money.
Tools and materials
After the design model of the chair is ready, we proceed to creation, for this you need:
- A sheet of plywood (15–20 mm thick, choose sheet sizes based on the drawing).
- Jigsaw and wood blade.
- Sanding machine or sandpaper.
- Glue (Epoxy glue in this case is the best choice).
- Bolts with nuts 6–8 mm. (Can be replaced with small screws, but not reliable).
- Stationery set (pencil, eraser, ruler, etc.).
- Paints and varnishes.
- Drill or screwdriver.
- Vise or clamps.
IMPORTANT! Plywood does not like moisture; it should be stored in a dry, ventilated area. At high humidity, the sheets will begin to swell and delaminate.
Which plywood to choose
When choosing plywood, you need to take into account the size of the product and the load that the chair can withstand:
- Carefully inspect each sheet in the store for signs of swelling or peeling due to improper storage.
- Children's furniture can be made from sheets 5–7 mm thick.
- For larger structures, such as a bench, use 15–25 mm thick plywood or, if necessary, reinforce the structure with 2 layers.
- Select sheet sizes according to the drawing. This will save your budget and there will be less waste.
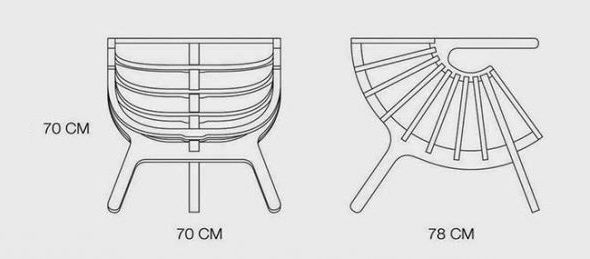
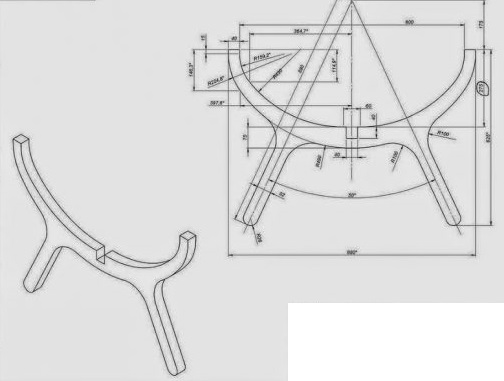
DIY plywood chair on three legs
For production you need 1 sheet of plywood 2.5 m * 2.5 m and 15 mm thick. It is possible to use a smaller sheet size. The design of this chair is quite simple and does not require special skills; all components are cut out and attached according to the drawing.
First of all, we create a model from cardboard or thick paper; you can assemble a product from cardboard and see how it will look in the finished version. Next, we transfer the stencil to a sheet of plywood, outline it and cut it out.
Cutting plywood is a very finicky process; due to its fibrous nature, the sheet can flake and break; you must use a jigsaw or do it manually.
IMPORTANT! Lay out the stencil with the details on the sheet compactly. This will save material and reduce waste. Working with an electric jigsaw is very dusty, wear a respirator and protect others.
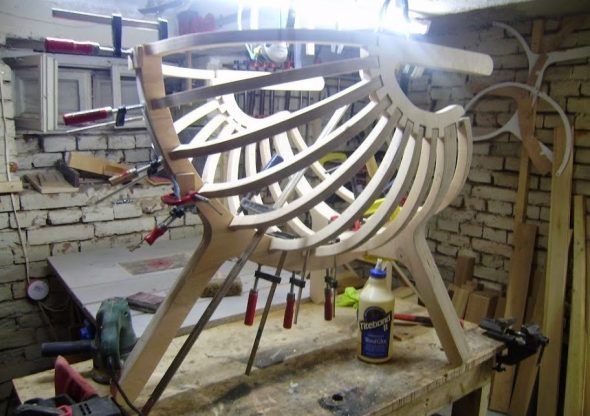
After cutting, sand all parts using a machine or sandpaper. In the places where the parts are attached, it is necessary to drill holes for the bolts. Treat all components with paint and varnish and begin assembly. At joints without the need to use bolts, make a connection using glue.
Upon completion of assembly, seal all joints and residual holes with putty or fill them with furniture glue, then paint the finished product in the required color or varnish it.
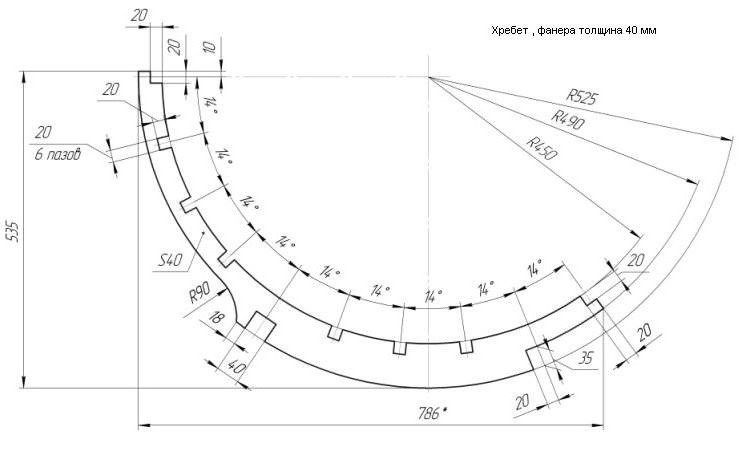
Plywood rocking chair
Creating a rocking chair is no different from the previous one, only the foot changes, instead of a strong support we create a smooth slope. As with any design, it is necessary to create a drawing of the future product. To create a chair we will need:
- Plywood sheet (Parameters according to the original drawing)
- The minimum sheet thickness for this product is 15–20 mm.
- Beam 30*50mm (length according to drawing)
- Self-tapping screws
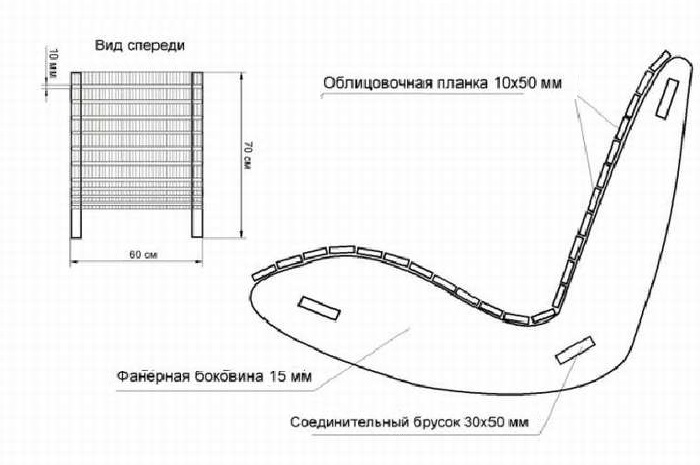
The entire drawing is transferred to the pattern and a stencil is created. Next, using prepared samples of cardboard or paper parts, components are drawn on a sheet of plywood.Do not forget about the correct cutting of the material and careful treatment with paint and varnish.
ATTENTION! For a more aesthetic appearance of the product, drill holes for the screws so that the caps do not protrude outward.
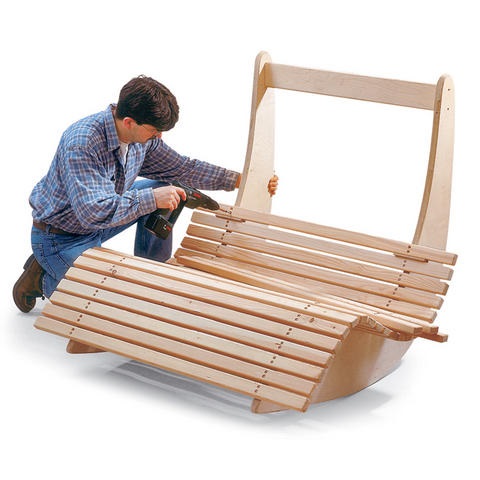
All parts of the chair are attached to 2 supports using self-tapping screws, then the remaining holes are covered and painted.