DIY Adirondack chair drawings
 Every person needs a cozy place to relax in nature. In their own country houses and dachas, people often put up simple benches or even chairs intended for outdoor gatherings. Often such simple designs are inconvenient. They do not allow you to comfortably spend a long time in the open air; they are difficult to transport and take up a lot of space during storage. For such purposes, an Adirondack lounge chair is ideal.
The content of the article
What is an Adirondack chair?
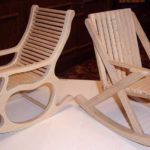
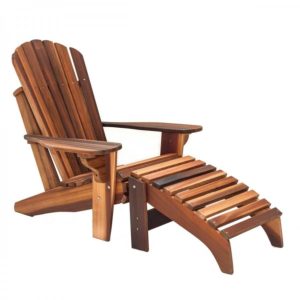
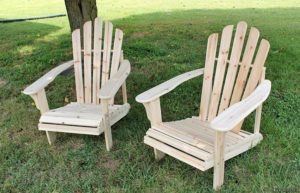
The Adirondack is a relaxing chair unique in its comfort, created by a simple American artisan with his own hands - Thomas Lee. This simple design of slatted wooden boards with installed wide armrests allows you to spend a pleasant evening with friends or with a cup of warm coffee.
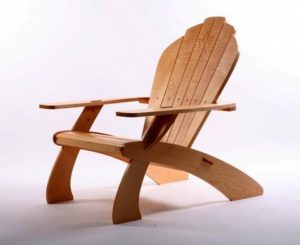
When folded, it does not take up much space - which, undoubtedly, is another plus for this type of chair. Thanks to a simple standard drawing, you can give the chair an exclusive appearance, limited only by the imagination of the creator. A sample drawing can be found on the Internet.
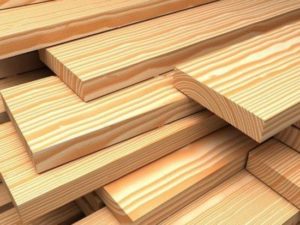
ATTENTION! The wood from which the chair is made must be of high quality! Fruit species and “noble wood” (from the family of oak, maple, etc.) are best suited for such purposes.
In this case, pallets or wooden boxes can be used for small fragments of the structure.
What is required to make a chair?
 The design of the Adirondack chair allows the product to be manufactured without the use of any special tools or special skills. The Adirondack is based on simple boards on which wooden blocks are nailed to follow the shape of the product.
So, to make a chair you will need:
- Product drawing;
- Boards processed in a special way. It is necessary to sand the material, remove all irregularities and burrs;
- Galvanized screws (4.5x40 mm), bolts (10x60 mm) and nuts with washers;
- Jigsaw for cutting boards;
- Sander and hand router to make work easier and round edges.
REFERENCE! It is not necessary to use a jigsaw, a grinder and a hand router during the preparation and assembly process. all necessary workpieces can be cut using a hacksaw and processed with regular sandpaper
Assembly instructions
First of all, you should find a drawing according to which the parts are made and the entire structure is assembled. If you decide to create something of your own, it is worth considering some technical points in your schematic drawing:
The most complex element is the seat supports located on the sides of the structure. You need to make a full-size template on paper before making them from the material used. After creating a detailed drawing of the entire product, we cut out the design parts and begin assembly.
ATTENTION! Wooden furniture is susceptible to rotting at the joints. Internal surfaces that are difficult to access after assembly are especially vulnerable. Therefore, they should be treated with at least two layers of antiseptic.
 It is worth considering that the parts of the product are connected with screws. Experienced craftsmen select the thickness of the drill according to the thickness of the screws in order to subsequently hide the screw heads under the plug with a plug. To do this, use wood glue and cork cut from an unnecessary board.
So. Let's start assembling:
- We cut out the necessary parts using a jigsaw or a hacksaw;
- We process them using a grinding machine or sandpaper. We remove all irregularities from the surface;
- We make holes for the bolts. When working with the sidewall, it is necessary to align the board with the edge of the table, and then make holes equal in diameter to the thickness of the screw. Using this principle, we assemble both sides of the frame;
- We install the rear legs, placing them perpendicular to the bevel of the support;
- Following the drawing, we connect the side parts of the chair with the main one, and then evenly fasten the slats, except for the one closest to the back of the chair;
- We install the supports and fix them, and then fasten the armrests with screws;
- Following the diagram, we align the back, fasten and screw the remaining parts and eliminate minor defects;
- Using a hand router, we round the corners of the structure;
REFERENCE! Minor design errors can be easily eliminated by slightly shifting the upper cross member, cutting its corner. In particularly difficult situations, you can dismantle the crossbar and adjust the angle of the cutout on it.
Our chair is ready. All that remains is to sand down the markings, remove chips and eliminate other defects. It is highly recommended to coat the product with oil impregnation. This will extend the durability of the resulting structure, preserve its shade and protect from some external harmful factors.