DIY hammock
 The need for coziness and comfort is characteristic of any person. How I want, after another hard day at work, to lie down on a cozy sofa and relax, watch a series. But, if you want to experiment a little and have a little free time, you can make a hammock without any problems - an attribute of comfort. Such a thing will not only relax you, but will also serve as a decorative element in a country house or in a private home. Today you will learn about what types of hammocks there are, what is needed to create one, and how to build a hammock yourself.
The content of the article
The history of the hammock
The Indians living on the islands of the Caribbean were the first to come up with such a simple object. Sleeping on the ground was problematic, so the smart natives came up with the idea of building a so-called hammock, the main part of which was a mesh base and two ropes at both ends. The structure itself was tied to the trees using ropes.

Having seen such a thing, the Spanish residents took note of it without hesitation, and after some time, residents of foreign countries began to use this convenient and easy-to-manufacture structure. Over time, the hammock was modified more and more, and now everyone can choose their own item of comfort for every taste.
What is the best way to make a hammock at home?
 When it comes to what kind of material is needed for a hammock, it is necessary to highlight that absolutely any materials can be used, from lotus leaves to vines growing on trees. In this matter, everything is decided by your imagination and level of comfort. You can build a simple hammock, which will only require a piece of fabric measuring approximately 3 m by 1.5 m and two ropes 3–4 m long, or you can use your imagination and build it in the form of a flying carpet.
But, as practice shows, the most practical option for creating such an item would be a dense material, for example, canvas, linen or mesh.
REFERENCE! Synthetics are also a durable material, but such fabric will not allow oxygen to pass through, and in the warm season it will not be very comfortable to be in a hammock made of such material.
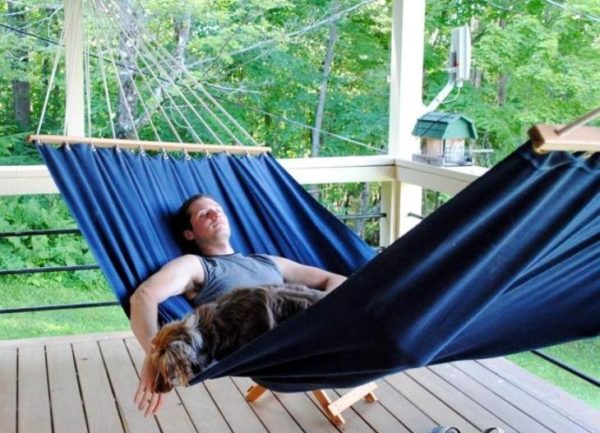
How to make a fabric hammock on a crossbar yourself: drawings
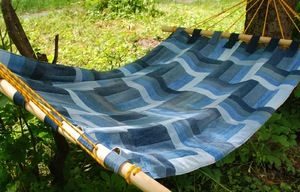
A fabric hammock on a crossbar is one of the simplest hammocks. Its production also does not take much time and cost.
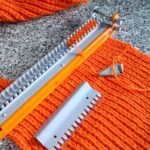
To make such a product, you need to stock up on the following materials:
- a piece of durable fabric (3 by 2.2 m);
- padding polyester (50 cm);
- tow strap (5.2 x 3 cm);
- nylon halyard (4 mm);
- wooden beam (4 mm);
- sandpaper.
Tools you will also need:
- iron ruler;
- crayons for drawing;
- wood hacksaw;
- chisel;
- scissors;
- sewing needles;
- roulette;
- sewing machine;
- iron.
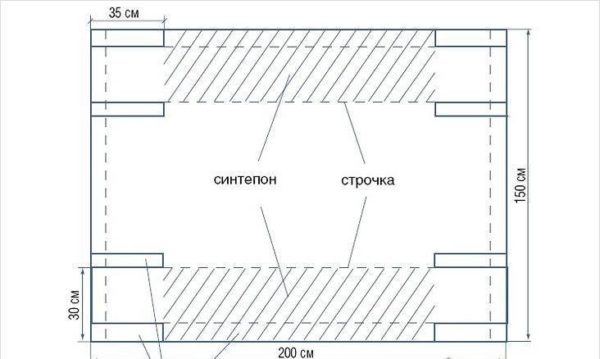
We take the fabric and draw two equal rectangles with sides of 1.5 by 2 m on the inside. We cut out the templates and fold them with their front parts facing each other.
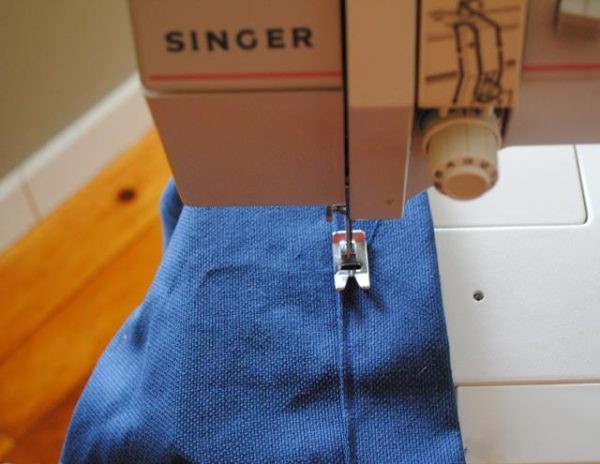
We retreat about 2 cm from the edges, then we sew short parts of the material on both sides. Turn the prepared material outside. Take the iron and iron the seam allowances on one side.
Further:
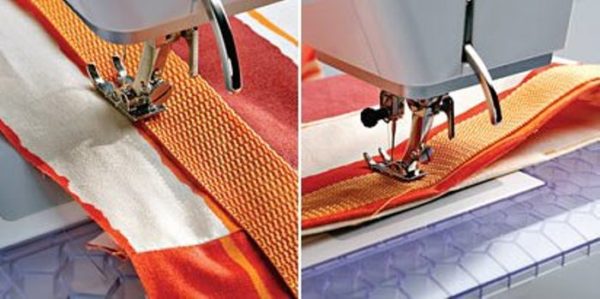
- We attach the sling to most of the part with a deviation of 5 cm from the edges.
- We take 4 pieces of sling measuring 70 cm, then using a sewing machine we sew them to the fastening points, with the front part facing the back. Sew the edges under the grooves for the crossbars.
- We sew the sides of the hammock from the front part with an indentation of 30 cm.
- We prepare strips of padding polyester with sides 25 by 125 cm, then push them into pre-prepared pockets and sew the edges.
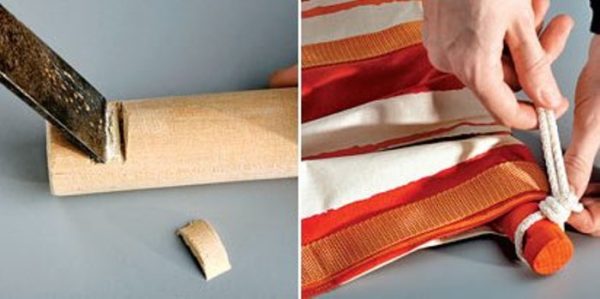
We saw a timber beam in half. We mark 2 cm from both edges and prepare a small notch using a chisel, then clean them with sandpaper.

We insert the bars into the pockets and secure them with a rope. Made! You just need to secure it to the trees and you can relax!
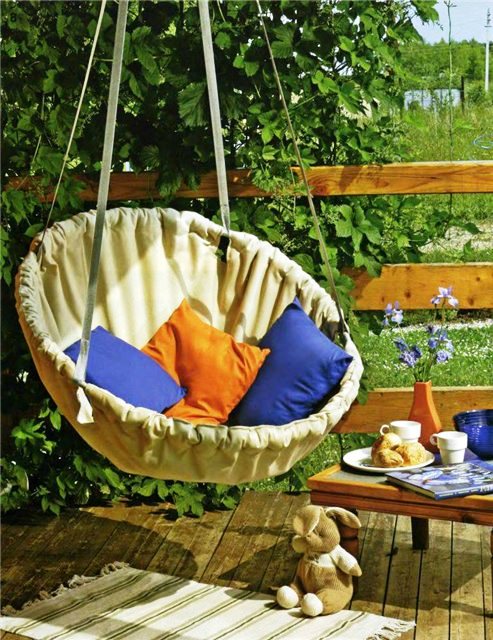
How to make a hammock swing yourself
To create such an unusual and original item we will need:
- a piece of durable fabric (3 by 1.5 m);
- metal hula hoop with a diameter of 90 cm;
- a piece of padding polyester (3 by 1.5 m);
- towing tape;
- chalk;
- iron;
- sewing machine;
- scissors.
To begin, we cut two identical squares from a piece of fabric with sides of 1.5 by 1.5 m.

Further:
- Fold both squares into four.
- We turn them into two circles. To do this, use chalk to mark a circle with a radius of 65 cm from the center and cut it out.
- Mark the holes for the tape. To do this, fold our circle four times, then smooth it with an iron to guide the folds. The first pair of tapes will be at an angle of 45 degrees, the second pair at an angle of 30 degrees.
- We glue the padding polyester. Place it between both pieces of fabric.
- We sew two equal covers on a machine, and then sew them to each other, placing a hoop between them.
- We tie a tow strap to the hoop on four sides, cutting it into four equal parts.

We tie the ends of the tape to any surface at the desired height (tree, pole).
Ready!
REFERENCE! Such a structure does not require a large area for placement and will serve not only as a corner for leisure, but also as an original element of the interior.
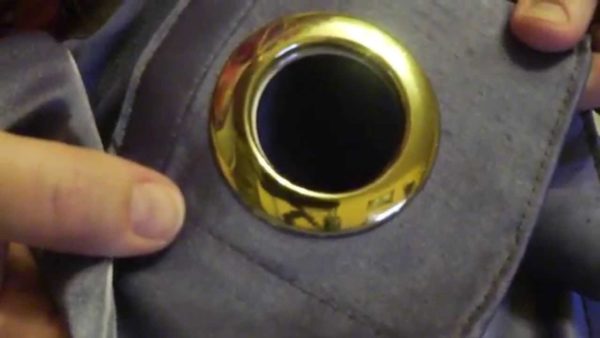
How to build a fabric hammock with eyelets
The eyelet hammock is a modified model of a fabric hammock. Its peculiarity is that it does not include one stretched rope, but a set of ropes extending from one end to the crossbar.
To make it, you will need:
- a piece of durable fabric (3 m);
- 22 eyelets;
- special devices for their insertion;
- 35-meter rope 6 mm wide;
- metal rings;
- drill and drill bit 12 mm;
- wooden beams with sides 30 by 50 mm;
- sewing machine;
- iron;
- scissors;
- chalk.
To begin, we cut off a piece of material, then fold it over 6 cm at the edges and sew it together using a sewing machine. Using an iron, smooth the edges, fold and sew again.
Using chalk, make even marks on the fabric for attaching eyelets. Use scissors to cut holes in the designated places and attach eyelets.
Further:
- We take two wooden beams and, using a drill, drill holes equal to the holes of the eyelets.
- We stretch the rope through the holes in the beam.
- We attach the ring to any hook, lay the hammock on the floor and fix it with a heavy press.
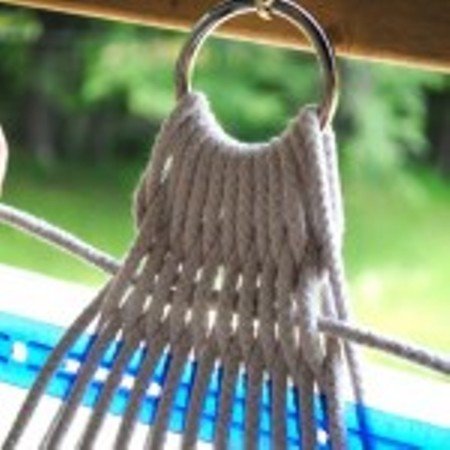
We steam the frame, put each of the lines through the grommet, the hole in the spacer and the ring.
After finishing the work, tie the ends of the rope and hang the hammock.
How and where to place a hammock
There are several ways to place recreational items and decor. One of them is awnings. This design is quite durable, which allows you to relax on a hammock without fear.
In most cases, they are suspended between two trees using strong ropes or ropes.But over time, a hammock on such supports can stretch, so it is important to know at what distance to hang it. The length between the supports must be at least 30 cm of the entire length of the hammock.
As you can see, making a hammock with your own hands is not that difficult. The main thing is to understand the principle of operation of such a design and take the time.