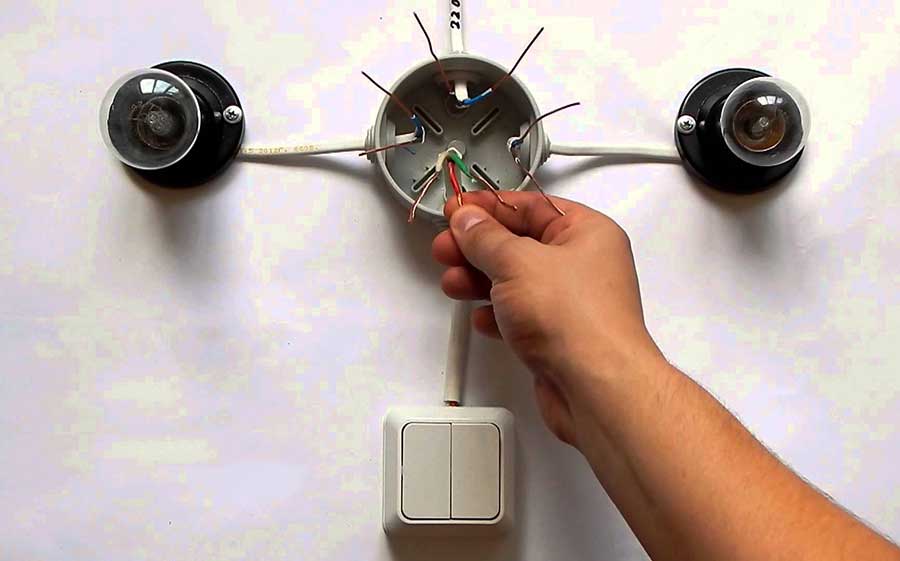
Connection diagram of a switch to a light bulb
In order to correctly connect a light bulb through a switch, it is absolutely not necessary to have an electrician’s “crust”. For these purposes, you need the necessary minimum of tools, materials, and not crooked hands that have grown from your shoulders. There are quite a decent number of different connection types, and today we will get acquainted with the most common ones. Read further in the text for the nuances of how to do everything correctly without resorting to the help of specialists.
The content of the article
Preparatory process
As in any serious matter, preparation is half the battle. In addition to removing power from the section of the network where the connection is supposed to be made, you need to prepare tools and materials so as not to be distracted during the work process.
Safety precautions before starting work
Before you start work, you need to protect yourself and your loved one. Be sure to remove power from the section of wiring where you plan to install and connect. For these purposes, we perform the following steps:
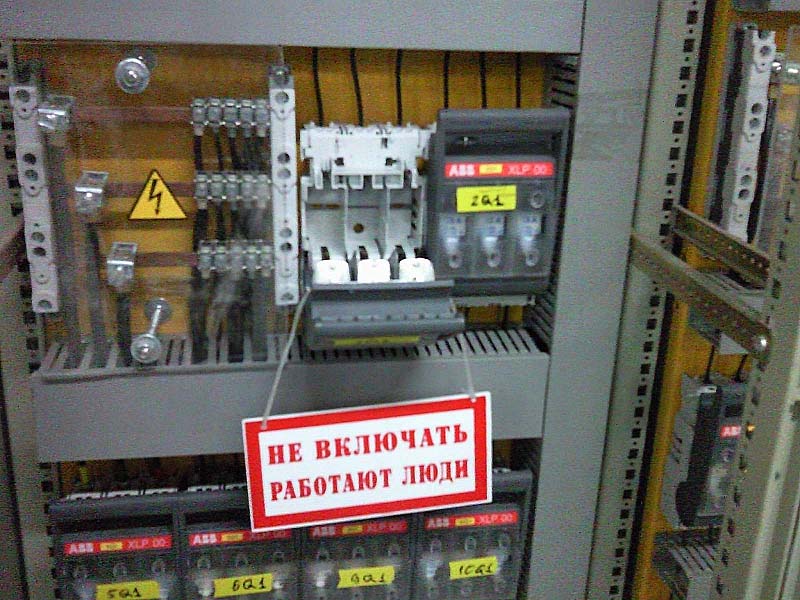
- On the power panel turn off the machine, responsible for the desired area.Finding it will not be difficult - even if you don’t know which one is responsible for what, you can always resort to the proven method of scientific poking.
- If the shield is located, for example, in the entrance, or unauthorized persons have access to it, be sure to post a sign on it: “Don’t turn it on, people are working!” or anything else in the same spirit.
- Using an indicator screwdriver you need make sure there is no power, checking the phases at the installation site.
After completing the above steps, you can safely proceed directly to work.
Tools and materials
Here, a lot depends on the scope of the proposed work - will it be necessary to make grooves for wiring in the walls, knock out sockets for distribution boxes, then cover up traces of destruction with gypsum mortar, and so on. Therefore we will list minimum list of tools, which you will definitely need:

Good electrician's kit
- slotted and Phillips screwdrivers, preferably with replaceable heads and handles made of insulating materials;
- knife, pliers or side cutters, or better yet, all of the above;
- PVC or cotton insulating tape, connecting terminals.
There is a specialized tool with a scary name for cleaning contacts. stripper, but there is no particular reason to buy it separately. As a rule, craftsmen make do with side cutters or a knife.
Wiring Recommendations
If a new cable is being laid, it is better not to be greedy, but to take at least one with a cross-section 1.5 mm, preferably copper and with single core. Multi-core, that is, soft cables, are not recommended. Also, for ease of installation and to avoid confusion, it is recommended to use wires with same colors. The most commonly used color coding for wires is:
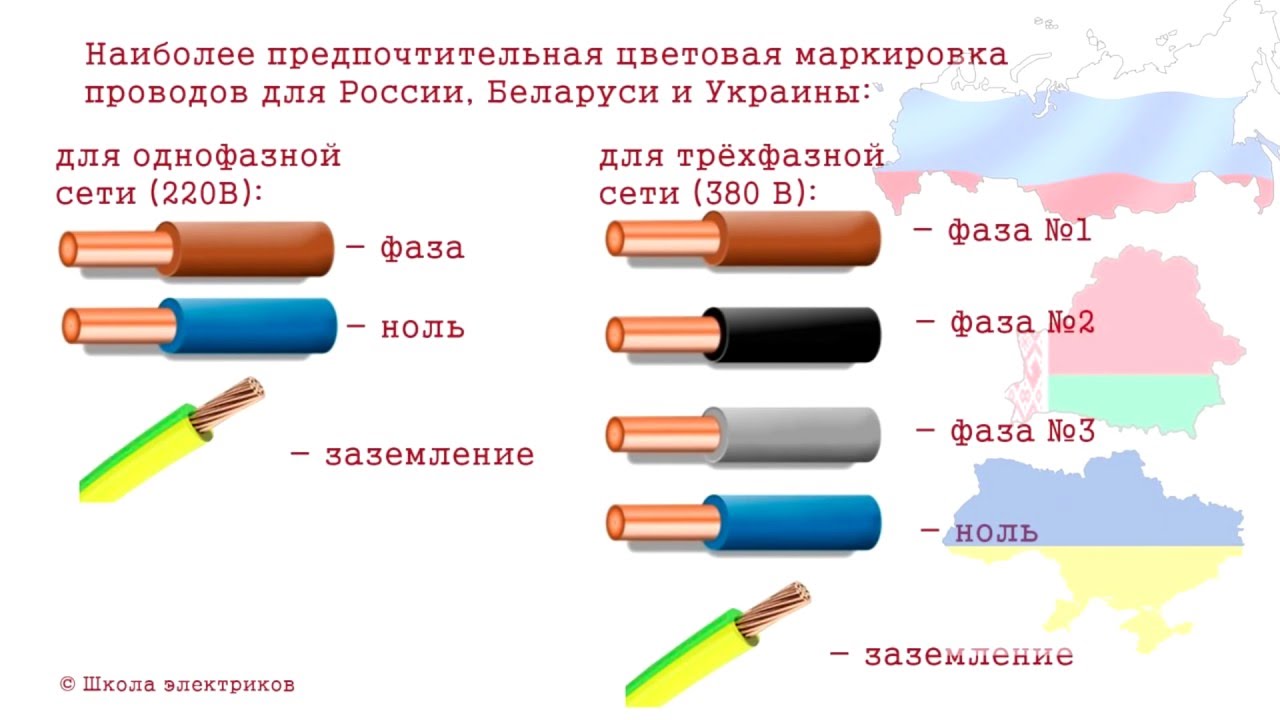
- yellow-green - for grounding, or protective, zero;
- blue – working zero;
- another color, for example brown, is a phase.
Do not neglect grounding if it is provided for in mounted electrical appliances. Use the protective zero for its intended purpose and not for any other purpose.
I strongly recommend that you do not route the wiring anyhow, without observing the specified correspondence of the color of the wire to its purpose. Otherwise, in the future, having forgotten what was connected and where, you can give yourself some work.
If there is old aluminum wiring in the house, do not twist it with new copper. It oxidizes very quickly. Install a new aluminum one, for example APPV-1.5, or completely replace everything with copper, which is more preferable.
Start of installation
So, we’ve decided on the tools and materials. Installation begins with cable pulling and organization distribution boxes.
Application of distribution boxes
To somehow organize the wiring, special boxes are used in which the wiring units are located. The connection is best made using special terminals - this is both more convenient and reliable than twists wrapped in electrical tape. For greater reliability, it is recommended to solder the contacts.
Another advantage of the terminals is the ability to use mixed (aluminum and copper) wiring.
Installation of switches
The first step is to make a seat for the switch in the wall using a hammer and chisel or using a hammer drill. A round one is inserted into the seat socket box made of insulating materials, most often it is mounted on alabaster mortar. The switch is inserted directly into the cup-shaped socket box.
Typically, the switch is positioned so that when the top of the key is pressed, power is supplied to the lamp. When connected correctly, the switch receives phase the wire. In most cases, the incoming phase is located at the top of the switch, and the outgoing phase (or outgoing, in the case of several keys) is at the bottom.
The most common types of switches
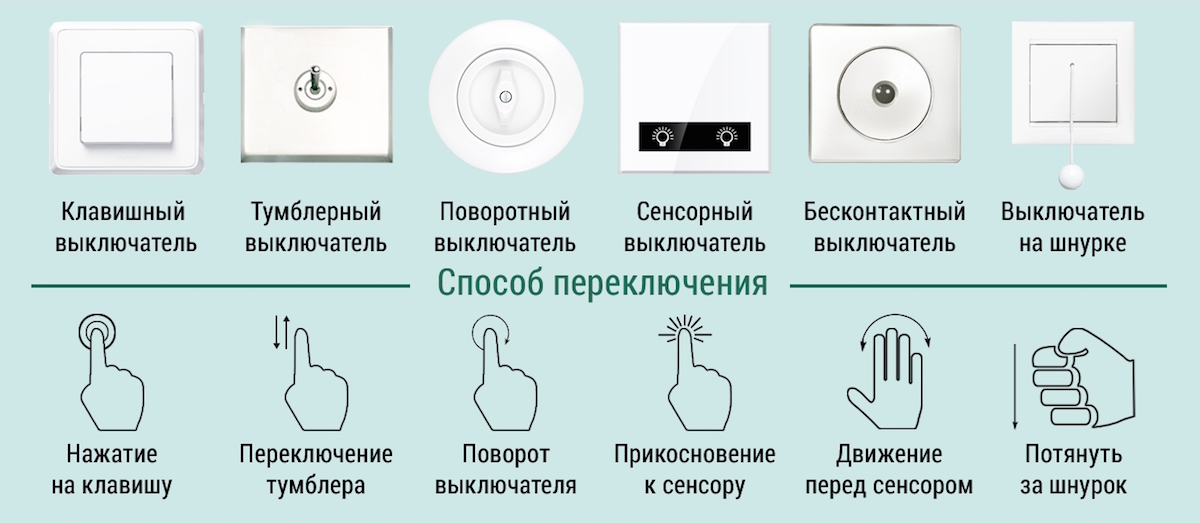
In general, there are quite a large number of them, here we present the most frequently used:
- Single-key, with two positions - on and off.
- Multi-key, allowing you to manage several groups of consumers.
- Dimmer, allowing you not only to turn it on and off, but also to smoothly regulate the supplied voltage, thus controlling the intensity of the glow. Finds application in bedside lamps and table lamps.
- Single pass – pressing the key performs a phase transfer between two wires. It is applied to one, and removed from the other.
- Sensory – there are no keys on it as such. Switching positions occurs when you touch it.
- With motion sensor – is triggered when a person approaches, closing the circuit.
Types of light bulbs
Today the following types are considered the most common:
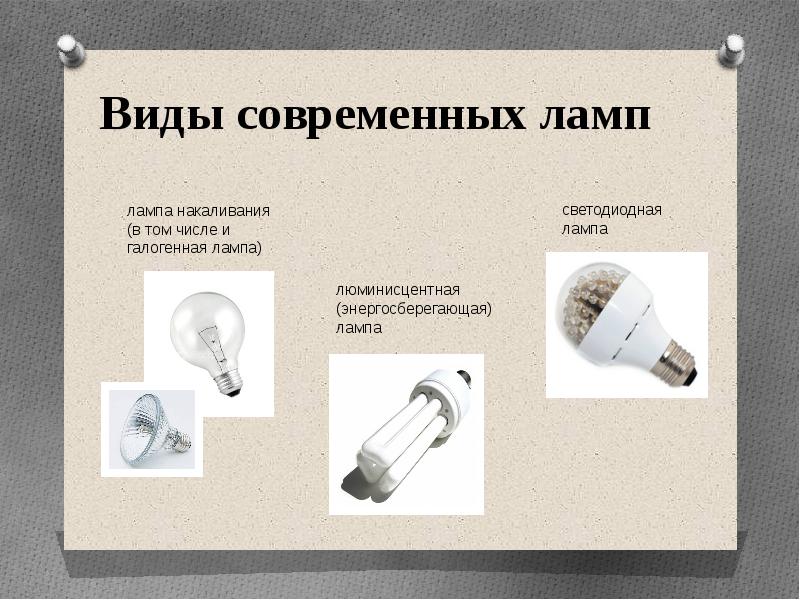
- Incandescent lamps with a glass flask from which air has been pumped out. The glow occurs due to the tungsten filament.
- Halogen — instead of a vacuum, they are filled with a special gas, which increases durability and makes it possible to make them more compact.
- Luminescent daylight is a rather rarely used type of lamp in homes.
- Economical LED – increasingly popular for their reliability and low power consumption. They do not have a filament.
Connection
Further, when considering various connection options, we will omit the protective ground connection (yellow-green wire). Firstly, not all devices have it, and secondly, in principle, it should not cause any difficulties.
The simplest scheme
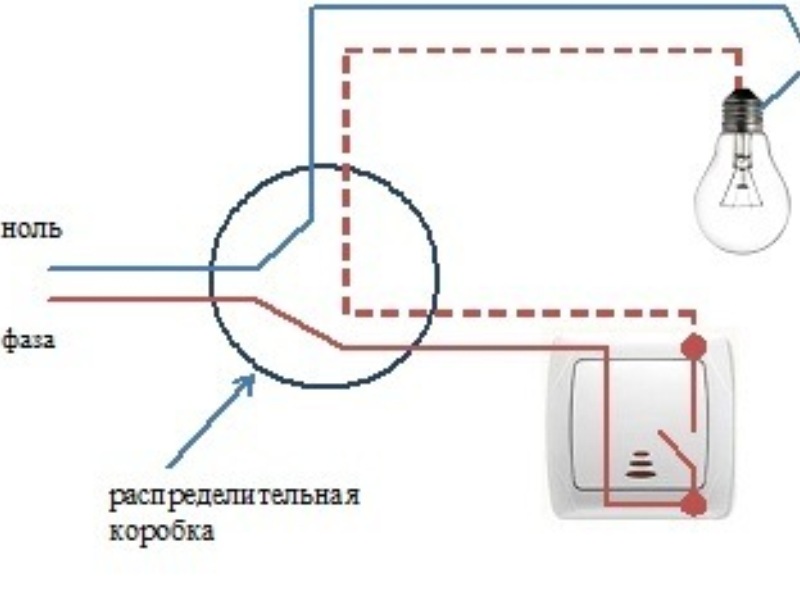
If there are only two wires to which the chandelier is connected (zero and one phase), and there is no desire to lay additional wiring, use a single switch. Here the number of horns on the chandelier does not play a fundamental role, since they will all turn on at the same time. Instead of a conventional single-key switch, you can use a dimmer to smoothly adjust the lighting or a sensor.
The use of a multi-key switch with a chandelier with several arms
If the wiring allows, you can connect a multi-arm chandelier to a multi-key switch. For this there must be several phases. Many modern chandeliers allow you to use the existing lamps separately or in groups.
Possible connection options in groups (with five horns):
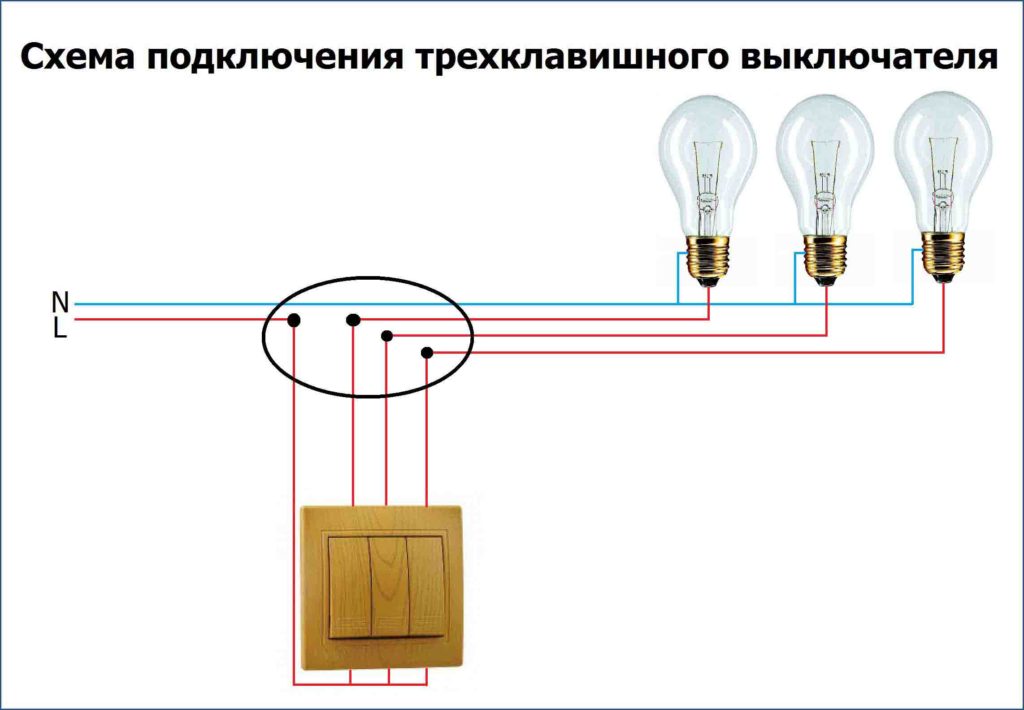
- 1+4;
- 2+3;
- 1+2+2.
In the third case, you will need a three-key switch. You can, of course, be perverted and turn on each horn separately, using five keys, but what’s the point? And where can I get five phases?
Another option for using, say, a two-key switch is lighting control in separate rooms, for example, in the toilet and bathroom.
Using pass-through switches
If there is a need to turn on the light when passing from one end of the corridor to the other, and then turn it off, use single pass-through switches. They are also used on stairs and in spacious bedrooms to avoid getting out of bed.
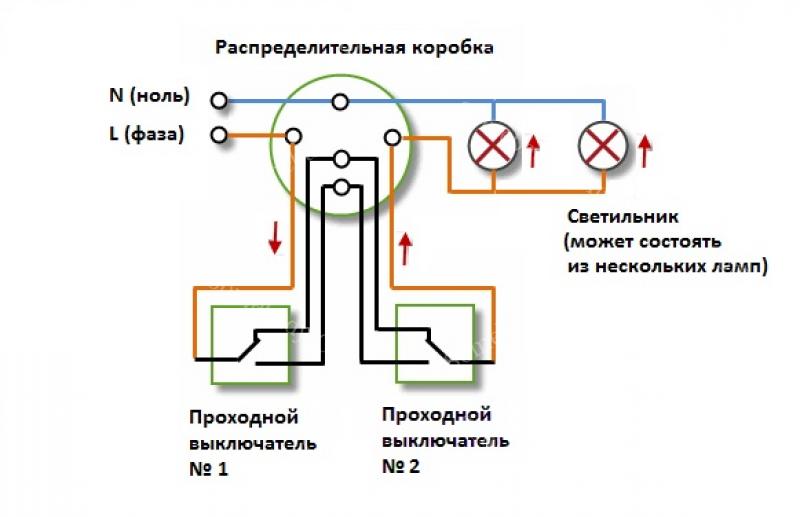
On a staircase with several flights, you can equip a series of such switches, placing them at the bottom, on the landings, and at the top. By pressing one key the previous lamp will turn off and the next one will turn on.
Using motion sensors
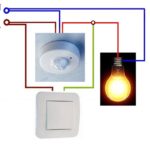
They are mounted in almost the same way as ordinary single-keyboards, with one nuance - The motion sensor requires a separate power supply of 220 volts. Therefore, unlike standard switches, in addition to the phase, a working zero is also supplied to it. This means that when laying a cable to it from the distribution box, you will need not two, but three wires.
As the name suggests, the sensor is triggered when a person approaches, completing the circuit and turning on the lighting.
The methods listed above for connecting a switch to a light bulb are only a small part of the possible options, but they are the most commonly used in everyday life.
This is because without an oscilloscope.
Shurik pull the cord
The article is instructive in principle, but you will have to work on the mistakes. We just, just switched to LEDs. and before that there were “rarely used”…. Three keys - to enable additional functions, for example, who doesn’t like fan noise.....; along with normal lighting use motion sensor at night etc…….
They don't connect switches to light bulbs - that's nonsense.




Did you write such an informative article to order from a kindergarten? And even with mistakes!