How to hang a chandelier on a suspended ceiling
Hanging a chandelier on a suspended ceiling, if all the preparatory work has been carried out before its installation, is a simple matter. But what if you need to replace it or hang it where it was not intended? The situation is unusual, but not stalemate - remove the fabric so that you don’t have to re-stretch it later, because there are little tricks that allow you to solve the problem economically and painlessly.
The content of the article
Requirements for a chandelier for a stretch ceiling
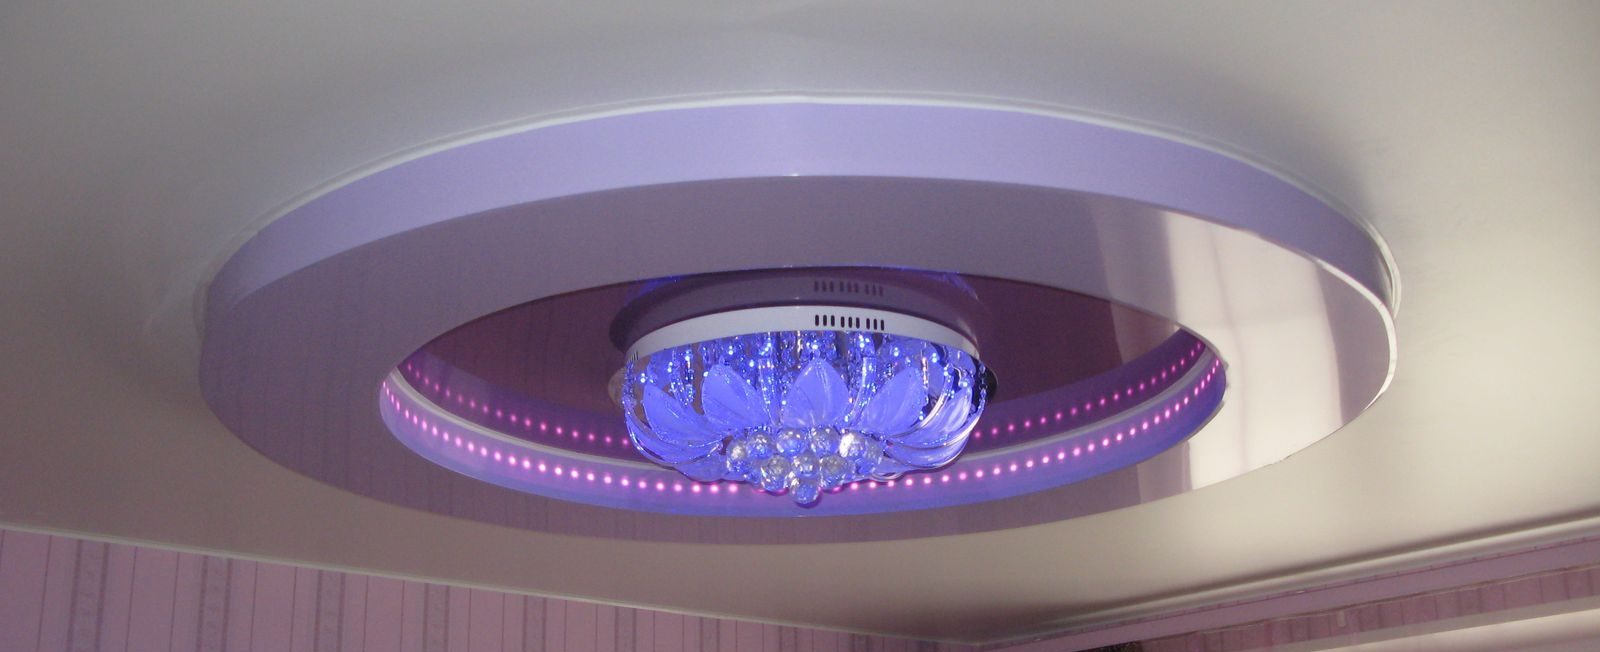
When choosing a chandelier for a stretch ceiling, it is important to take into account its peculiarity - it is made of synthetic materials. PVC darkens and deforms already at a temperature of +55 C. Fabric sheets retain their properties at temperatures below +80 C, which also serves as a serious argument in favor of a thoughtful choice of lighting devices.
General rules follow from this:
- It is advisable to choose chandeliers with shades pointing downwards or in different directions, but not upwards.
- Dish-shaped lampshades must be equipped with a heat dissipator to ensure that the base in contact with the ceiling does not overheat.
- The minimum distance from the chandelier arms to the ceiling depends on the light sources. For incandescent lamps and halogen it is equal to 25–30 cm, for other options - 15 cm.
Well, as for the lamps used in chandeliers, there is only one recommendation - it is better to choose energy-saving or LED analogues. They produce less heat than incandescent lamps.
If you prefer to use incandescent lamps, then their maximum permissible power is 40 W for PVC and 60 W for a fabric ceiling. A halogen lamps that highlight the beauty of crystal chandeliers, they heat up much more. Therefore, for them the maximum permissible power is limited to the range of 35–40 W.
What you will need for DIY installation

When you have to simply replace a chandelier with a new one, which differs from the previous one in the method of fastening, then this is a relatively simple task. To solve this you need to prepare:
- thermal rings;
- glue containing cyanoacrylate;
- drill or screwdriver;
- fasteners;
- tape measure and pencil;
- vacuum cleaner.
If you couldn't find thermal rings, they can be replaced with adhesive tape or reinforced tape. Simple adhesive tape will not work, since it easily comes away from the stretch ceiling when heated.
But if you have to lay a cable, this complicates the task. The fact is that the wires should not be allowed to come into contact with the suspended ceiling - the PVC sheet darkens from such contact, since when the chandelier is turned on, the wiring heats up.
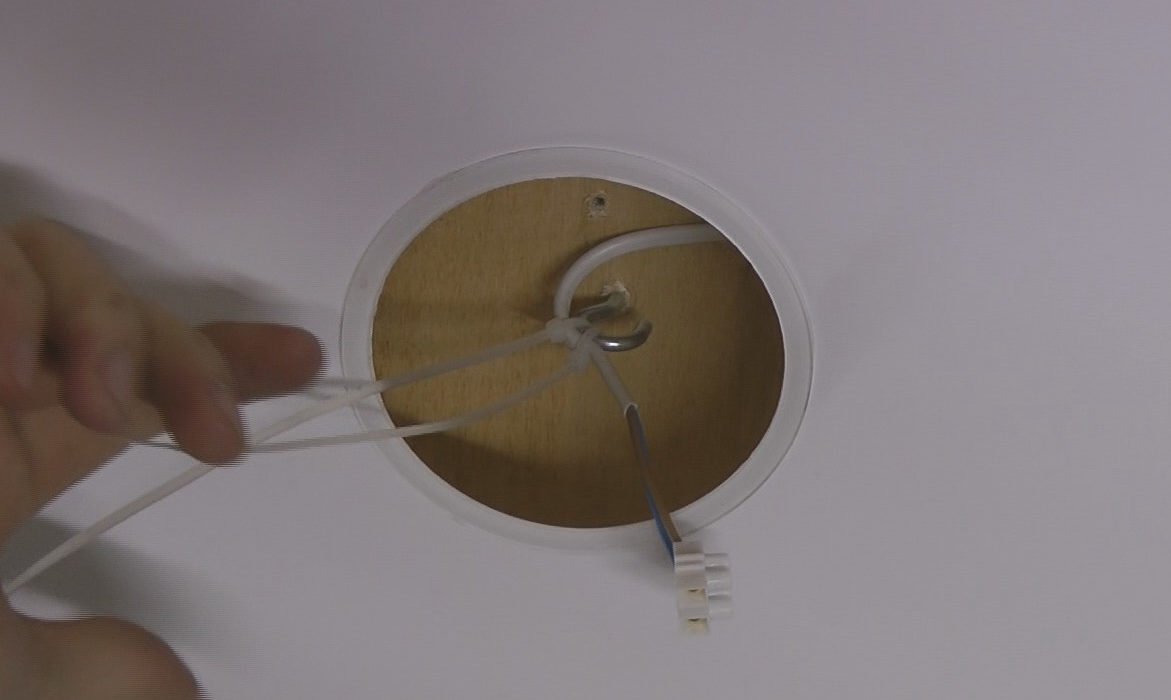
Therefore, there are two ways to solve the problem:
- Pulling a cable without an electrical box and then fixing it on additional hooks with nylon clamps for ties. The method is good for distances up to 100–120 cm, since with a longer wire length it will not be possible to stretch it well enough. This means sagging and contact with the suspended ceiling.
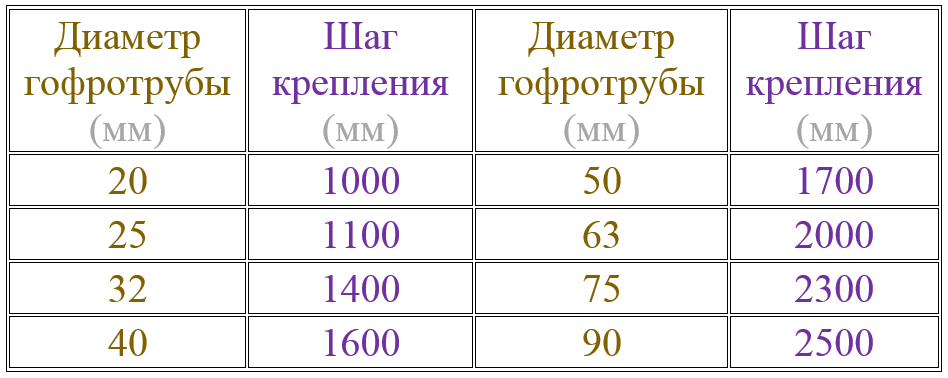
- Pulling the cable through the electrical installation pipe.This will increase the distance between the cable fixation points, but for this you will need to install at least one thermal ring, the diameter of which will allow the pipe to be passed behind the stretch ceiling.
The table will help you determine the optimal distance between fasteners.
Installation procedure
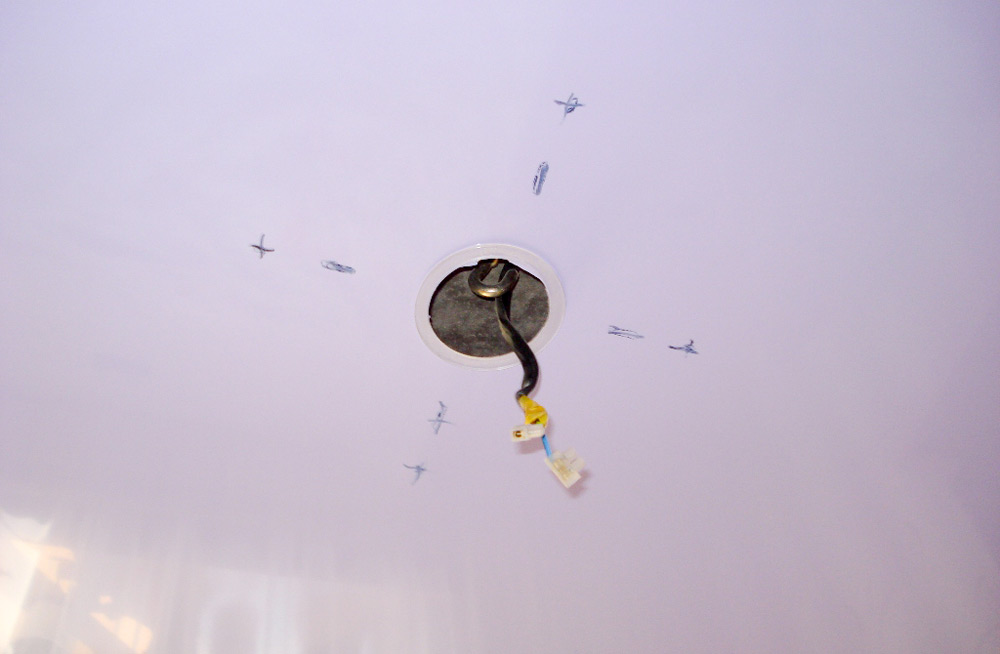
Having collected everything you need, you can begin measuring and marking the places for the chandelier fasteners. For the anchor, this will be just one mark at the place where the cables exit and the hook itself. There will be three of them for the longitudinal strip - the central one (at the point where the wires exit) and two side ones for fasteners. And for the cruciform - five.
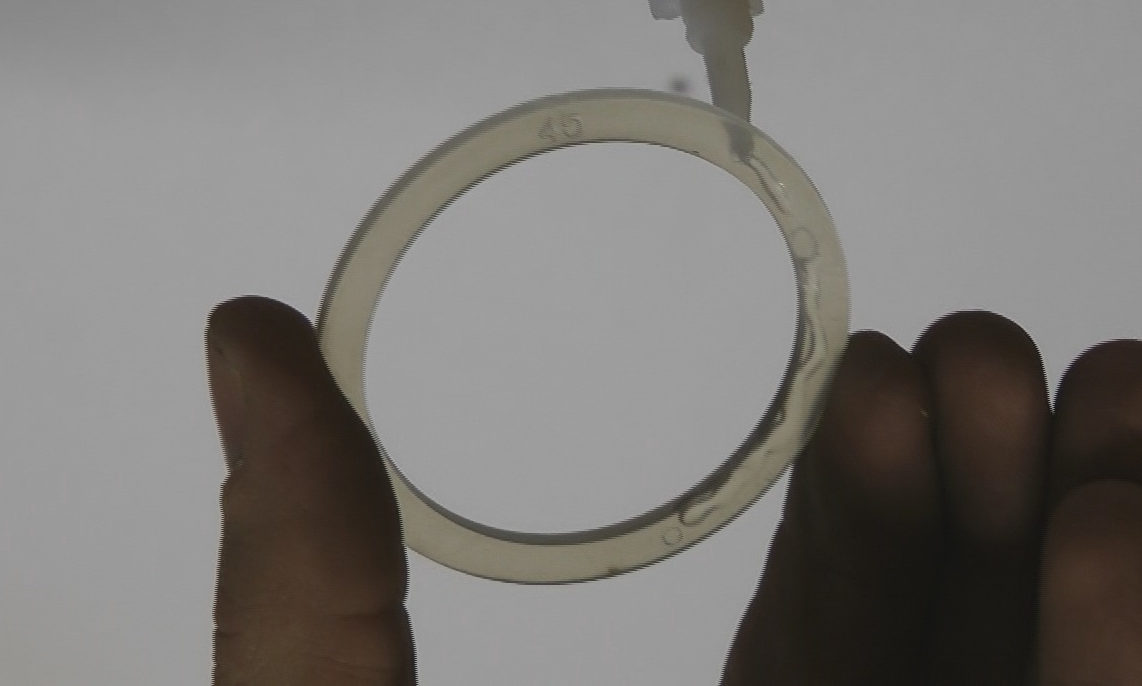
The next step is fixation thermal rings on the stretch ceiling canvas to prevent its ruptures. The amplifier, carefully coated with glue, is attached so that the previously left mark is in its center. After this, you will need to wait until the glue sets and check that the ring is securely fixed to the canvas.
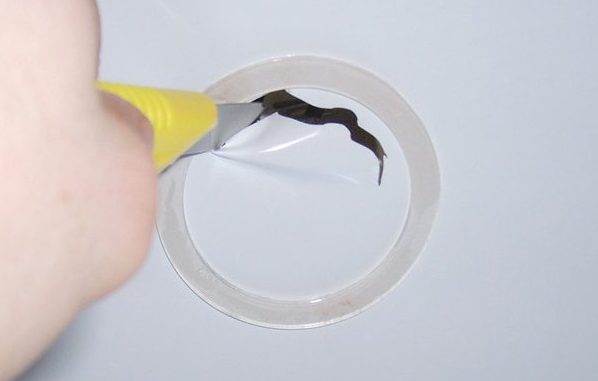
If everything is fine, a hole is cut with a stationery knife, through which the following work will be performed:
- drilling holes for fasteners;
- electrical installation;
- installation of a hook or slats.
After this, all that remains is to screw on the remaining parts of the chandelier.
Parts in contact with the suspended ceiling must be smooth, without sagging or burrs that can damage the fabric.
How to hang a chandelier on a suspended ceiling without a mortgage
Normally, a mortgage or wooden blocks are mounted under the longitudinal and cross-shaped planks on the rough ceiling. But if there is no such base behind the canvas or it is too small, there are two ways out of the situation.
The first is to simply select studs, screws or dowels of the appropriate size.Their length must exceed the distance between the suspended ceiling and the ceilings by an amount sufficient for the structure to withstand the load. Using these fasteners you can already screw the strips. The disadvantage of this method is that the structure is shaky.
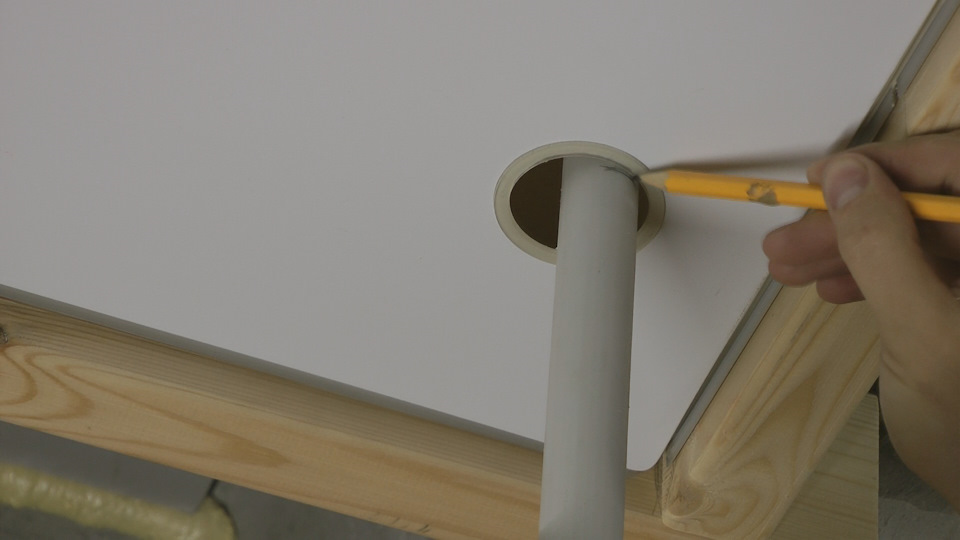
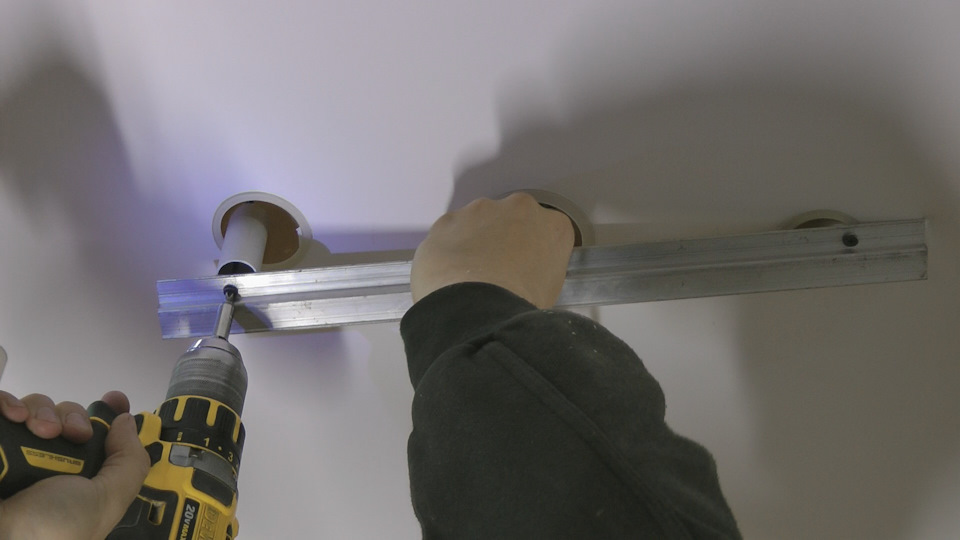
The second option is more reliable. A piece of plastic pipe, the length of which is equal to the distance from the ceiling to the bottom edge, will help ensure this. thermal rings. Before fixing the strip, the resulting limiter is first put on the self-tapping screw, and then the fastener is screwed into the prepared hole until it stops.
As a result of such simple actions, a rigid fixation is obtained. And this despite the fact that the chandelier is suspended from a suspended ceiling without a mortgage.


