How to change the cartridge in a chandelier
Sometimes an incident occurs that when replacing a supposedly burnt-out light bulb with a new one, it also stubbornly refuses to light up. This may indicate a failure of the cartridge into which it is screwed. As a rule, the most common reasons for its breakdown are factory defects or burning of contacts with melting of the wiring. Sometimes carbon deposits appear on the contacts as a result of prolonged thermal exposure during operation of the light bulbs.
Another reason is the transition from incandescent lamps to diode lamps, which differ slightly in size and base configuration. Whatever the reason for the replacement, the procedure is, in principle, the same. Today we will talk about how to change the cartridge in a chandelier.
The content of the article
Replacing the cartridge
The procedure in this case is as follows:
- removing power from the chandelier;
- disconnecting power wires;
- dismantling the chandelier;
- dismantling lamps;
- dismantling old and installing new cartridges;
- connecting the chandelier to the power wires;
- supplying voltage and checking functionality.
The structure of modern lamp sockets
Today, three main types of 220 volt products are common. Their markings are as follows:
- E14;
- E27;
- E40.
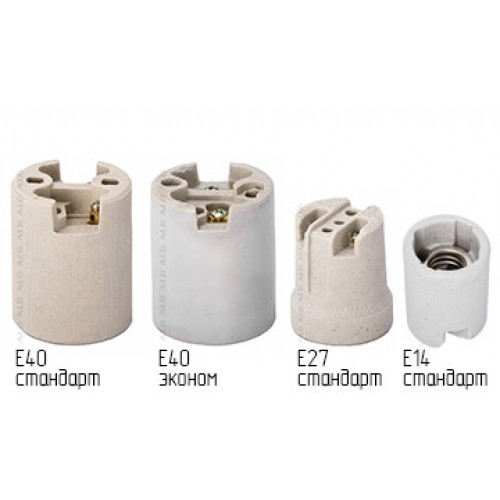
The differences between them are in geometric shape and size.The choice of one or another of them is determined by the types of lamps used in the chandelier and the configuration of their base.
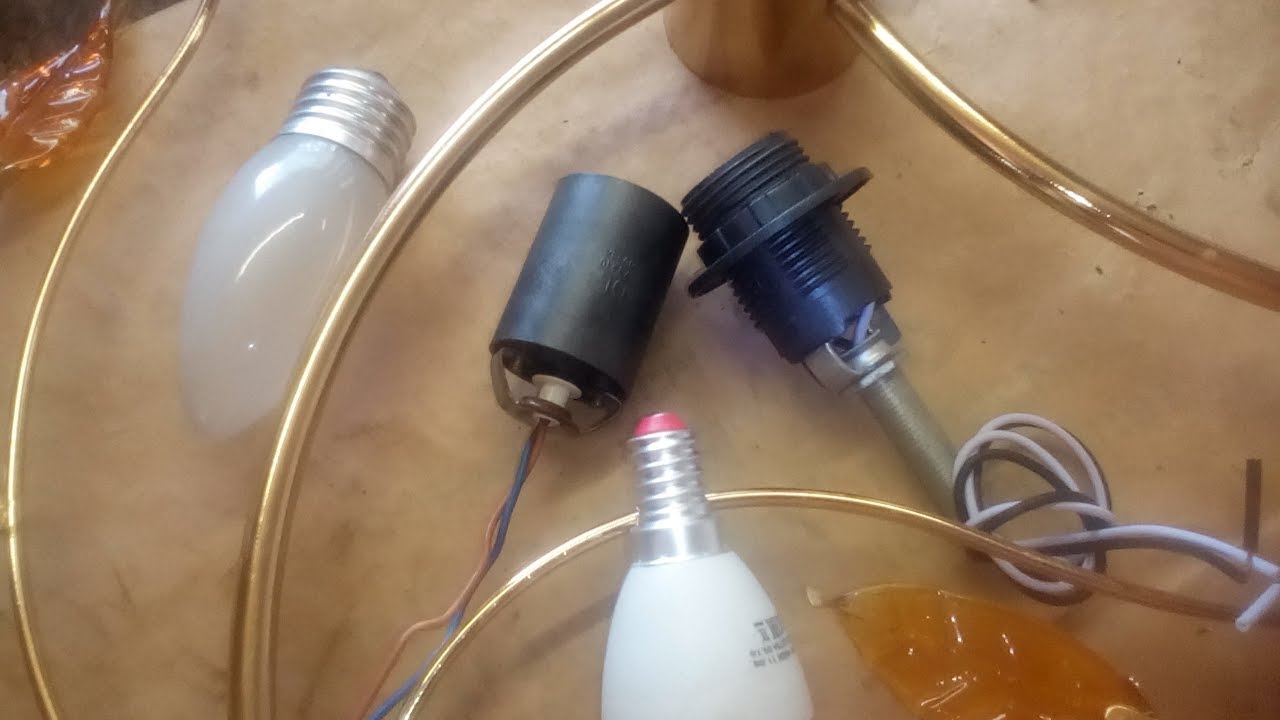
The cartridge is divided into three main parts:
- cylindrical body;
- bottom;
- ceramic liner.
There is a thread in the body into which the light bulb base is screwed directly. Today, materials such as carbolite, silicone, metals, ceramics and plastic are used in the manufacture of cases. Until recently, only ceramics were used, but as a result of heating during operation, the body sometimes crumbled. Plastic has shown itself to be somewhat better, and now the vast majority of products are made from it.
Removing power

Well? Let's start searching?
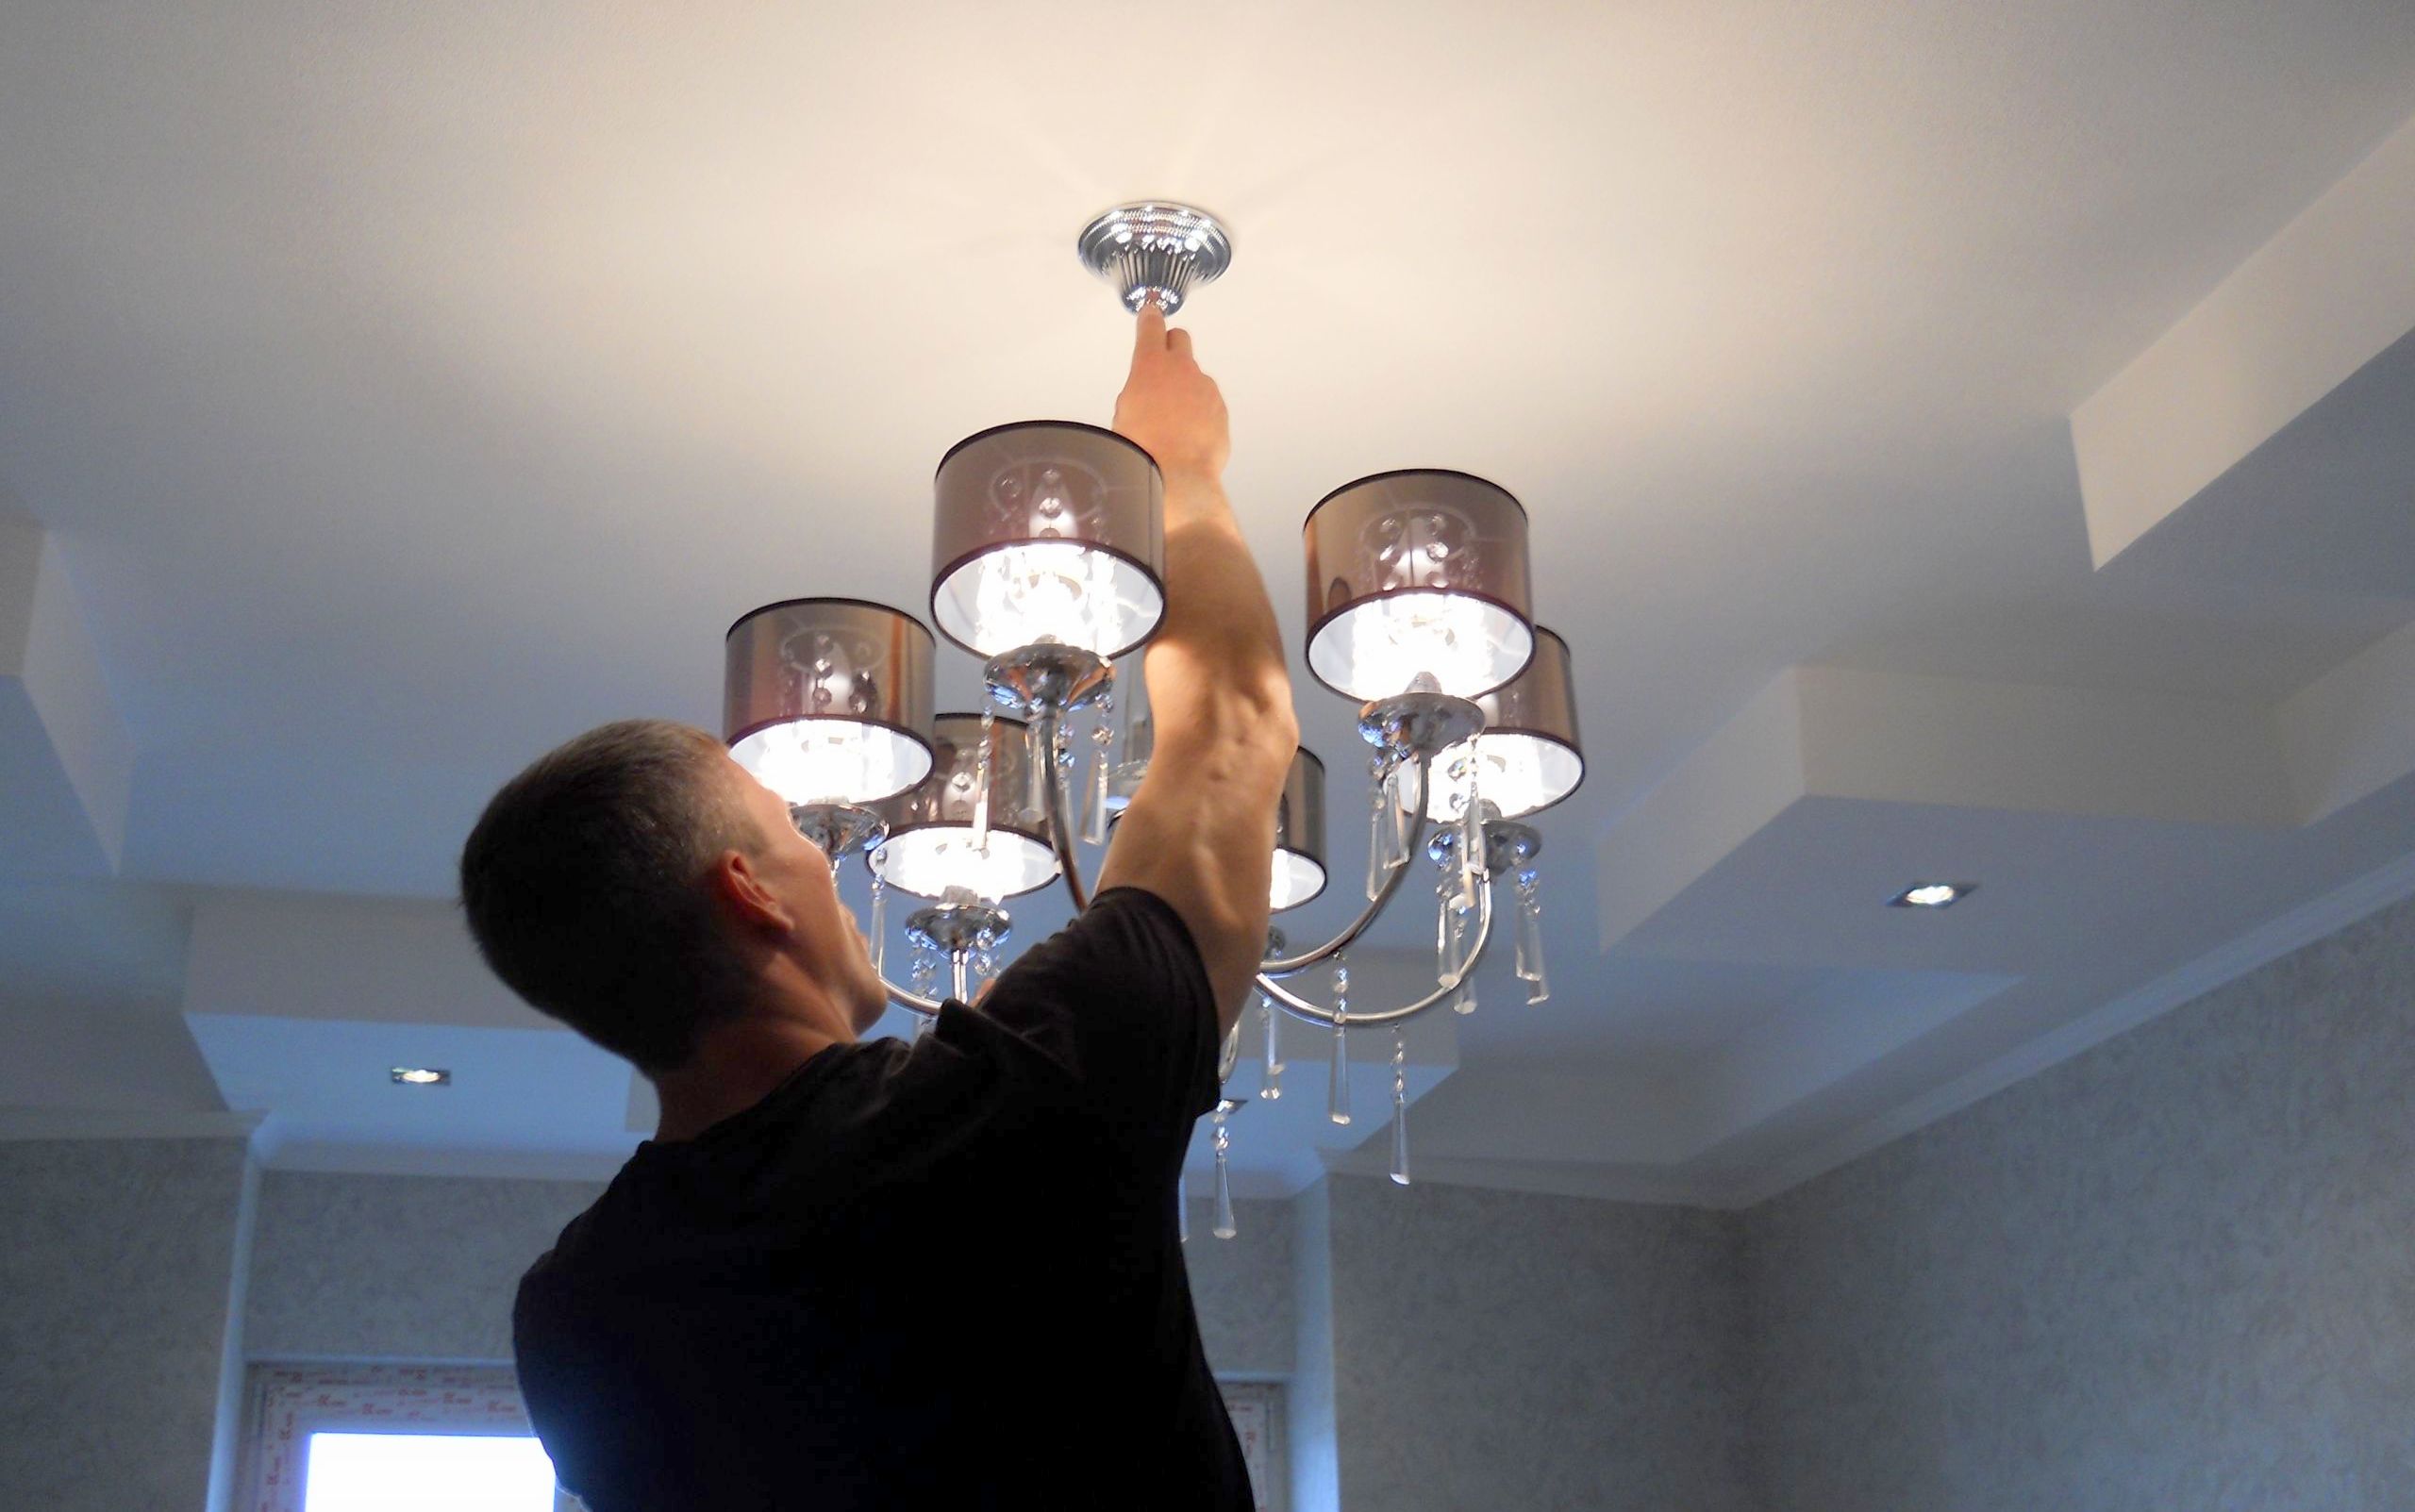
In general, I strongly recommend replacing the cartridge during the day, because at night everything will have to be done by touch - the end results can be very surprising. On the panel with the machines we find the one that is responsible for powering the group to which the chandelier is connected, and remove it. Such a phenomenon that all the sockets on a chandelier suddenly need to be replaced is more like a fantasy, and for sure at least one will work.
How to determine what kind of machine you need? You can use the method of elimination until the chandelier goes out when the switch is on. Although not everyone may like this method, especially if you start such searches in some institution in the middle of the working day and without warning.
Disconnecting the power wires and dismantling the chandelier
There is no special higher mathematics here. Take a stepladder of appropriate length and an indicator screwdriver, disconnect the power wires from the chandelier, after which I strongly recommend insulating them. There are often cases when, after dismantling the chandelier, there is a need to turn on the machine on the panel again.To avoid embarrassment in the form of a short circuit, do not be lazy to pay attention to insulation.
Before starting dismantling, double check that there is no power by flipping the switch and checking the phases using an indicator screwdriver. Next we proceed in the following sequence:
- We unscrew the light bulbs, lampshades, and remove decorations.
- We unscrew the wires from the connecting terminal, or use pliers to unscrew the twist - it all depends on the method of connecting the contacts.
- We separate the power wires in different directions, rewinding them with electrical tape.
- If there is a butterfly-type fastening strip, as on suspended ceilings, loosen the clamping bolt and, if necessary, remove it. It is better not to remove it to avoid fuss during installation.
Disassembling the lamp and dismantling the socket
If the chandelier was working immediately before dismantling, the sockets in it definitely got hot. You need to wait a little for them to cool down and get to work. The first thing to do is twist the lampshades. They are usually attached using plastic rings screwed directly onto the external thread of the cartridge.
Attention! Be gentle as the plastic may become quite brittle with use. It may happen that it will be possible to remove the lampshade, but not to put it in place.
When replacing a cartridge with clamps on screws, loosen them and remove the wires. Sometimes there are designs with terminal blocks. When replacing a ceramic cartridge, the sequence of actions is as follows:
- The plates on the central contact are pressed out.
- Then the screws are removed from the plate located opposite the ceramic base.
- Bend the central terminals towards the side contacts.
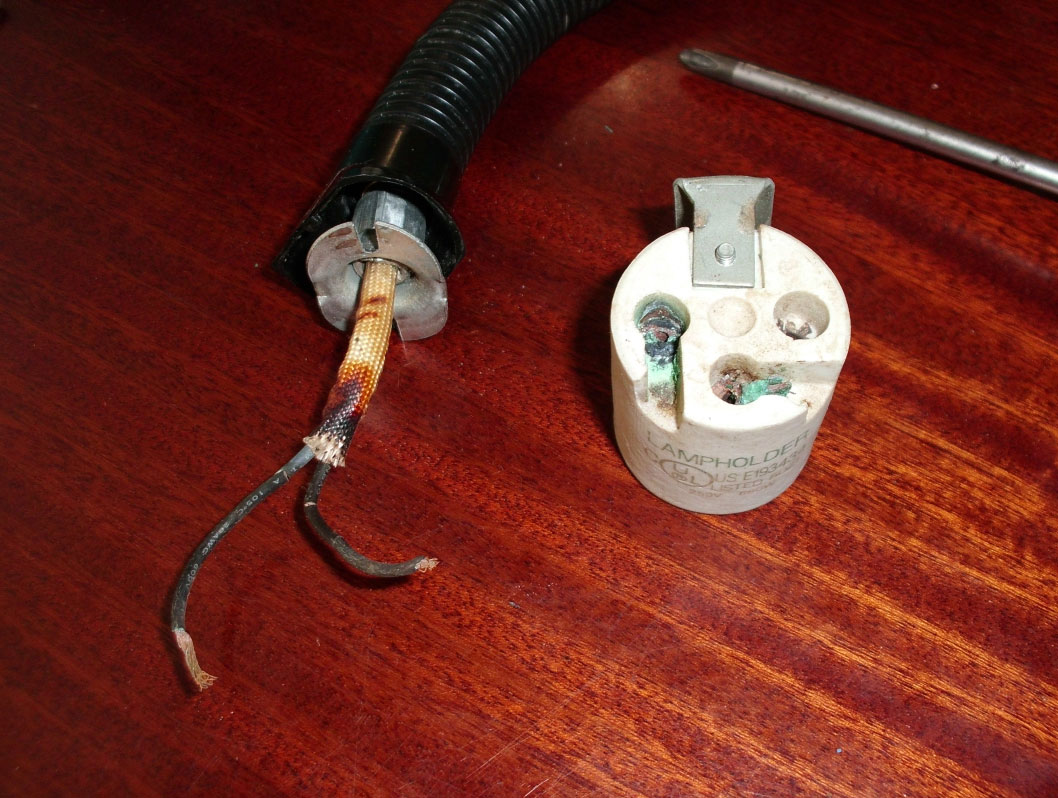
It also happens
On a note! In some cases, it is enough to disassemble the ceramic cartridge, tighten the terminals and clean the contacts without replacing it.
Installing a new cartridge and checking its functionality
First of all, wires are threaded through the bottom of the product. The stripped ends are twisted into rings and then secured using fastening screws and plates. When using terminals, if the wire is stranded, it is twisted for ease of fastening. Please note that the phase is brought to the central contact.
Important! Make sure the wires are securely fastened in the terminals by lightly tugging on them and making sure they are clamped. If this is not done, the wiring may begin to heat up and spark due to poor contact. In this case, the cartridge may become unusable.
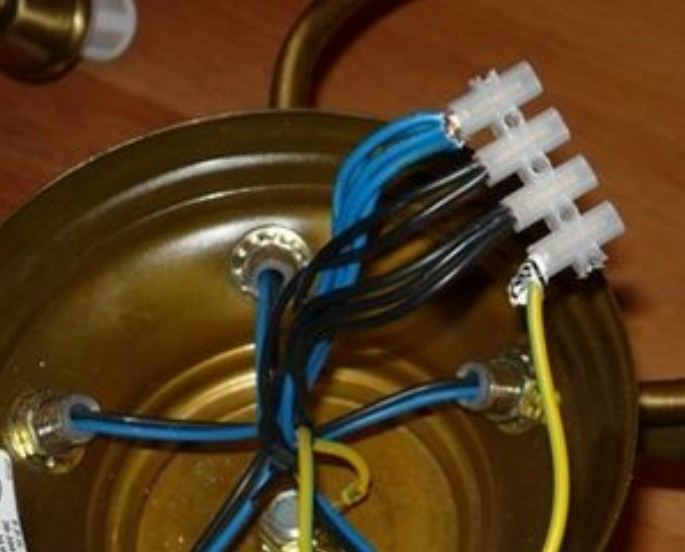
This is what correctly installed wiring to a chandelier looks like
I recommend making sure that the wiring matches the power consumption. Otherwise, it may not withstand the load. After the installation of the socket is completed, the chandelier is assembled in the reverse order in which it was disassembled - lampshades are attached, light bulbs are screwed in, accessories are hung.
Then the chandelier is hung in place, having first removed the insulation from the supply wires and connected it. Having made sure that it is not going to fall, we remove the stepladder, go and turn on the machine - and voila - let there be light, as the fitter said.