How to check a light bulb with a multimeter
It is not always possible to visually determine the functionality of a light bulb. After all, even if the spiral is intact, no one can guarantee that the chain inside is not damaged. It is for such cases that a multimeter was invented - a device that, in capable hands, will always and accurately detect any malfunction. So let's figure out how to use it and use it to track faulty lighting fixtures.
The content of the article
Preparing the multimeter for use
First of all, let's take our multimeter out of the package and examine it carefully. There should be no damage to the case, and the battery compartment should close tightly. We check the quality and integrity of the probes and the wires going to them. If there is no insulation, use electrical tape. Heat-shrink tubing will also do the job well. If there are chips on the probes, we also wrap them.
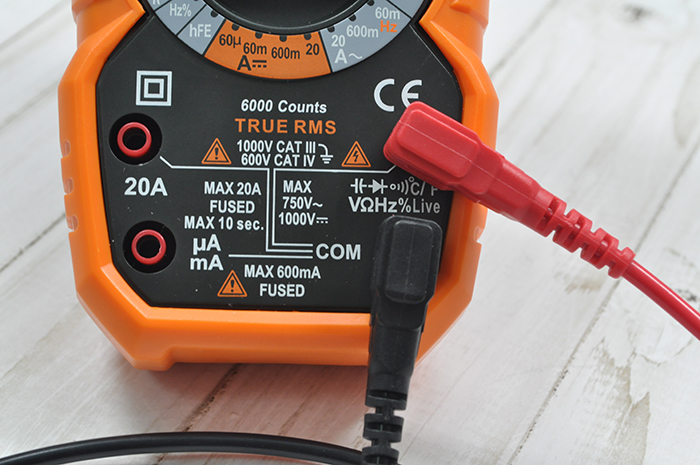
We set the mode switch to work with ohms, opposite the 200 Ohm division. We connect the black cable to the Com socket. We connect the red cable to the socket where there are symbols of the quantities that we are going to measure.
The device should display the number “1” on its screen.If it's missing or something else is displayed, it's time to repair it. We cross the probes with each other. The one changes to a zero. If this is exactly what happens, then work is proceeding as usual. If the numbers are flickering on the screen, they are pale, you need to try changing the batteries. If the attempt fails, the device must be repaired. To start testing the lamp, set the break search mode on the toggle switch. This mode is indicated by a diode icon.
Testing an incandescent lamp with a multimeter
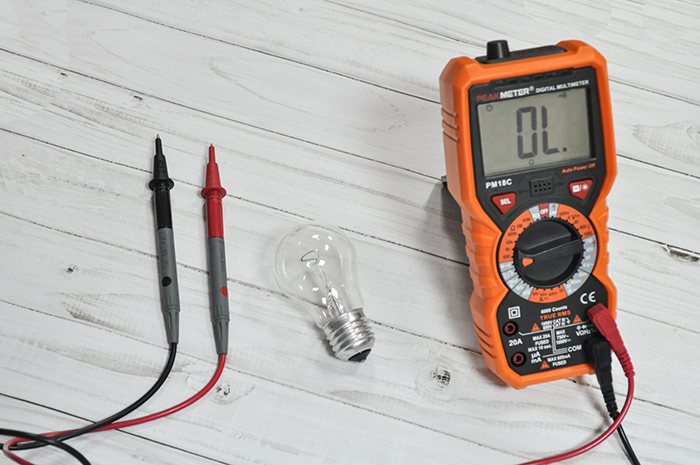
In order to check the suitability of a regular light bulb, we press one of the tester probes to the center of the base at the contact location, and press the second probe to the thread. If the light bulb is fully operational, the tester will emit a buzzer signal, and at the same time numbers from the range from three to two hundred will be shown on the screen.
The resistance of the lamp coil directly depends on what material is used to make it, as well as on the length. To be sure of the test results, the places where the probes will be applied should first be cleaned of oxides with a file.
This method will help you find not only the location of the break in the circuit, but will also show, albeit approximately, how much power the device consumes. If the inscription on the light bulb indicating the rated voltage has been erased, then a multimeter will help you find out. For more accurate results, set the switch to two hundred ohm mode.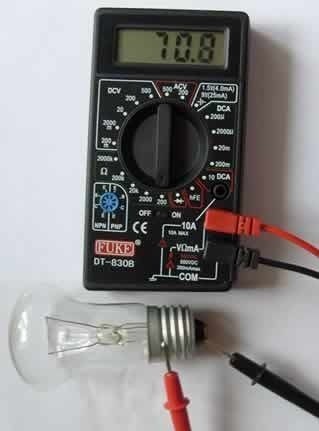
Connecting multimeter probes to test an incandescent lamp
Using the described method, you can check the resistance of the lamp filament. In order not to clutter your head with unnecessary mathematical formulas, use the data in the table below.
Table: power to resistance ratio
| Ω | W |
| 150 | 25 |
| 85 | 40 |
| 63 | 60 |
| 48 | 75 |
| 38 | 100 |
| 27 | 150 |
Reference. The measurement accuracy may have an error of two to three ohms.
Similarly, you can test twelve-volt light bulbs in a car. It must be borne in mind that sometimes these lamps have two spirals. One of them is responsible for the high beam, and the second for the low beam. The same method is applicable for tubular-type fluorescent lamps; they also have two spirals installed at the edges between the electrodes.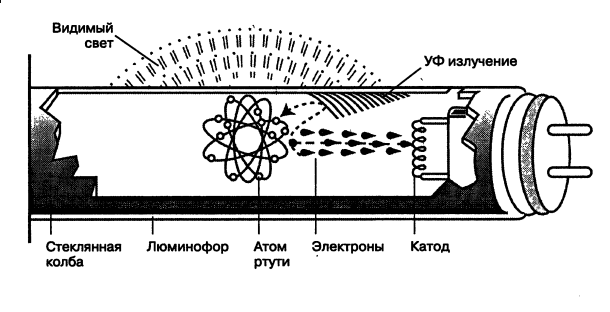
Reference. Compact fluorescent lamps, energy-saving halogen lamps, and LED lamps cannot be checked this way. Their circuit contains additional elements, such as a microcircuit, an electronic unit for connection and startup. Therefore, other methods are used to check them.
Checking the LED lamp
The multimeter allows you to ring color, standard and super-bright diodes.
LED lamp with E27 base
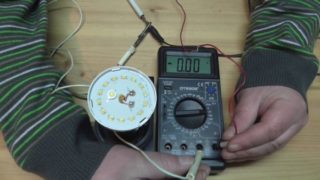
These bulbs are found in most modern chandeliers and other lighting devices. To check for serviceability (or malfunction) of the LED, do the following:
- Using an old bank card (plastic) we get rid of the diffuser, which is located between the housing and the LED itself.
- We gradually move the plastic along the gluing line. To make the seam easier to give in, it can be heated using a technical hair dryer.
- We open the board.
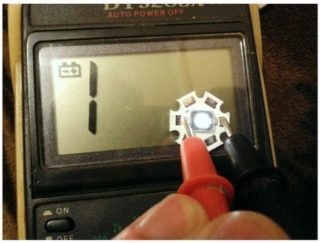
- We press the probe against the LEDs and wait until they begin to glow dimly.
If no glow appears, it’s time to change the light bulb.
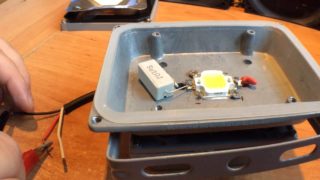
Powerful LEDs
Garlands usually use blue, yellow and white LEDs.Probes are not used to test them; instead, they are placed in transistor sockets. Everything is done as follows:
- First you need to determine what pinout the SMD has.
- At the bottom of the multimeter we find eight sockets.
- We place the probes: for the anode we use socket E, and for the cathode - socket C.
- We open the PNP, a positive charge is applied to the emitter E. If the LED is working, it will light up.
- Next, we change the polarity for NPN transistors. We install the anode in hole C, and the cathode in hole E.
Reference. It is very convenient to check LEDs, which are equipped with long contacts, in transistor sockets.
Checking the serviceability of LED spotlights
Before checking an LED, you should determine what type it is. The following are usually installed inside such spotlights:
- a board with several small SMDs that can be tested by testing, similar to conventional LED lamps;
- a powerful yellow LED with a voltage of ten to thirty volts.
Reference. The high-power LED has too high a voltage for a multimeter; check it using a driver. The characteristics of the driver must match those of the LED.
Testing an energy-saving lamp with a multimeter
Such a lamp may burn out:
- filament coil;
- ballast circuit.
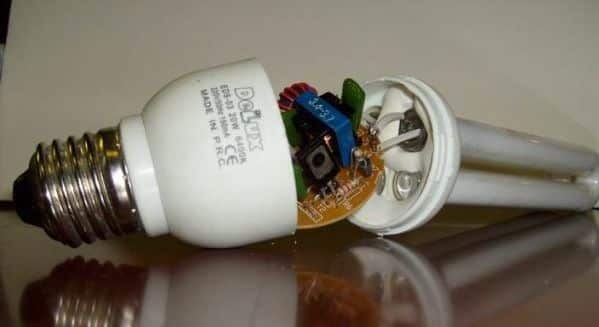
What exactly happened can be understood only by disassembling the device. Taking the lamp in your hands, you will notice a small recess in its lower part. It is marked with arrows in the photo. Carefully, trying not to break the lamp body, you need to place the tip of a screwdriver or the blade of a knife into this cavity. After which the body needs to be slightly raised. The main thing is to do everything carefully so as not to break the flask.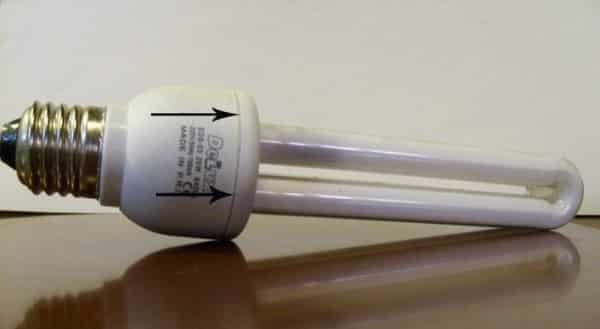
Having disassembled the device, you can see that all the wires inside are simply intertwined with each other, without any thermal connection. Inside you can see a round board, darkened due to overload. There are square-shaped bayonets installed at the edges of the board. These are some kind of terminals. Power wires are connected to them. The wires are simply wound around these terminals.
Important! When you assemble the lamp, don't even think about soldering them. Even if only in a targeted way.
As soon as the wires are untwisted, each of the spirals needs to be tested with a multimeter. This will allow you to determine which one has burned out.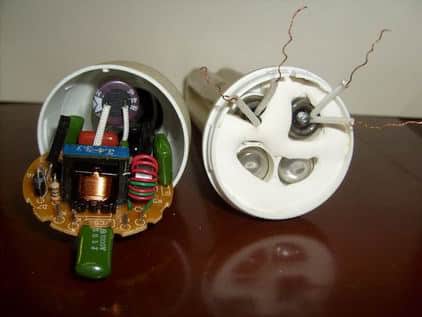
Having determined what exactly is broken in the lamp, we can safely replace the failed spiral with a working one.