The procedure and diagram for connecting the motion sensor to the light bulb
Man is a terribly lazy creature - sometimes he is ready to work hard for a while, only to then do nothing. Constantly strives to automate and simplify something. Even pressing the switch button seems like a difficult task to him. So he decided to make this everyday manipulation easier. To automate the control of light in a wide variety of places, he came up with a device that responds to movement.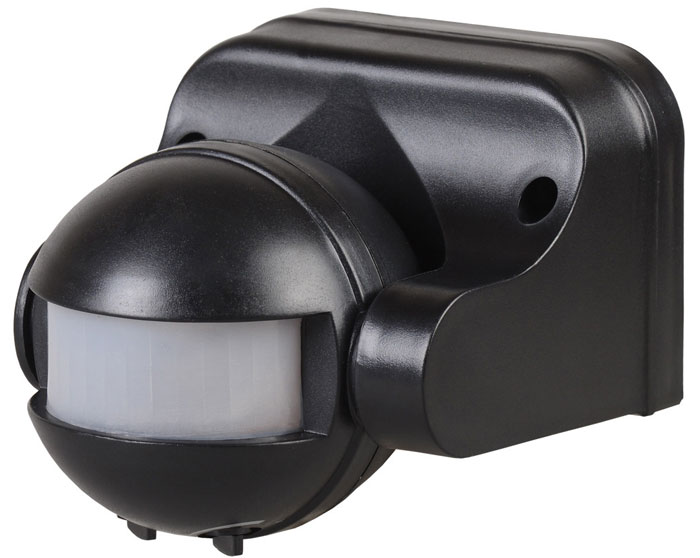
They are often used not only to turn on the light, but also to improve safety. He can make the alarm work if he detects movement in his sector of action. In addition, it can be used to open doors in stores.
What kind of device is this? How to select, install, connect it? Let's try to sort all this out in order.
The content of the article
Motion sensors, their purpose, operating principle
The main task of a motion sensor, like any sensor, is to control the electrical network. Operation can be carried out with an active load or with an active-inductive one. Having detected movement in its area of responsibility, the sensor begins to determine how illuminated it is.If the light level is below the set value, the lighting turns on. This allows the device to work regardless of the time of day. The response threshold is set using special regulators.
Sensors commonly used in the home detect vibrations of electromagnetic waves in the infrared light spectrum. Separately, you can configure the time it takes for the device to start working if it suddenly notices movement in the sector.
By rotating the knob we can set the shutter speed value. The time depends on the specific device model. It can vary from ten seconds to seven or fifteen minutes.
Features of device selection
Before you go to the store and purchase a sensor for yourself, you need to decide on its model and functions, and this directly depends on your goals, the size of the room, as well as the conditions in which it will be used. All devices can be divided into active and passive:
- Active ones work in a similar way to conventional radars. They emit light waves in the infrared spectrum, which, when they hit an object, are reflected from it and then registered by the device. There is a position of the object that is initially specified. If this position changes, it means the object is moving and the sensor is triggered.
- In passive ones, activation occurs from the heat emitted by a person.
- There is also a combined type. It includes the functionality of the first two types.
Active type sensors operate in the ultrasonic range. Sound is limited to twenty thousand hertz. The human ear does not react to such a sound, but animals recognize it perfectly and begin to worry. Therefore, if there are animals in the house, then this type of device is unacceptable.
Reference. Sensors operating at high radio frequencies avoid obstacles encountered along the way, reacting only to the movement of various objects. If such a sensor is installed incorrectly, it will react to swaying tree branches or people walking in another room. Yes, and they cost a lot.
Analyzing all the data, we can come to the conclusion that for home use it would be optimal to install a passive sensor. If the device is spherical, then it tracks everything around it. Models that are mounted on the wall can work at different inclinations horizontally and vertically. As a rule, this is one hundred eighty and twenty degrees.
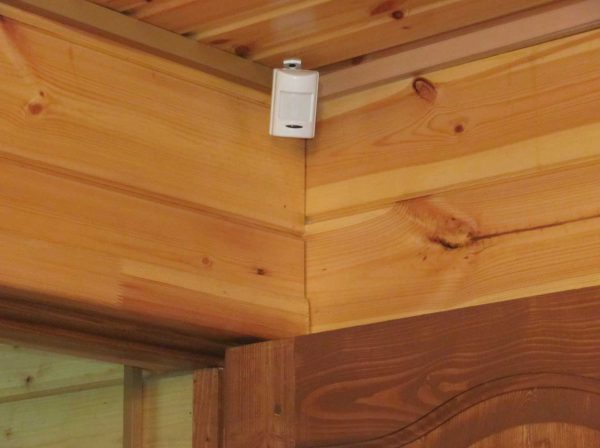
Most existing motion sensors cannot cover the entire room. This forces you to pay special attention to the correct installation location and choosing the right angle of inclination.
Reference. All sensors differ in the distance at which they can operate. Models in the mid-price range work for a length of twelve meters. For use in a private home, this coating is more than enough. If necessary, you can install several to serve a larger space.
Devices can be divided into movable and fixed. With the former, you can independently adjust the angle of inclination of the device, thereby changing the detection zone.
Determining the installation location
In order for the motion sensor to respond promptly and correctly and turn on the light when required, it is important to install it correctly and in the right place. It will be easier to do this if you follow certain recommendations:
- The sensor should be installed closer to the door - it does not matter what type of mounting it is: on the wall or on the ceiling;
- try not to mount the device in the center of the wall, then the door will fall out of sight;
- It is better to install a motion sensor in rooms where there are no windows - if this is not possible, then you need to install it as far as possible from them, otherwise you will need to spend a lot of time selecting the degree of lighting;
- if a room has several entrances, then several sensors need to be installed, and if the device is capable of covering all doors, then one is enough;
- When installed on stairs, the sensors are attached to the very ceiling - this is the most successful placement option.
Mounting options
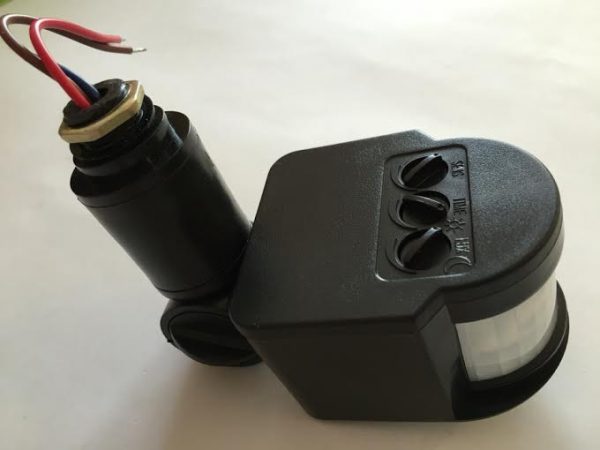
There are three contacts on the device. One of them is zero, the second is for power supply and the third is for outputting current to the light bulb. Depending on how many different elements there are in the circuit, the connection is made according to different schemes. When connecting, you need to focus on the diagram offered by the manufacturer. It can be found in the user manual or on the device body.
Single sensor circuit
This is the simplest scheme. A phase wire is supplied to one contact, the second goes to grounding, and the third is connected to the light bulb.
Installation of the switch to the sensor
This scheme is used if you need to connect a simple switch. This is necessary if the light must remain on or off and it does not matter whether there is a person in the room or not. The switch is connected in parallel.
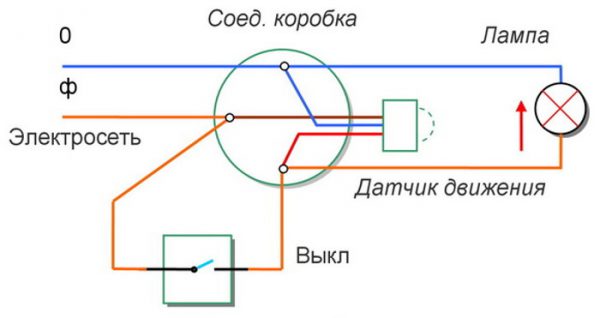
Here it should be noted that the switch is installed only so that the light is turned on or off. In one position it turns off the detector, and in another position the detector is activated.
Multiple sensors
If the room has an unusual shape, then most likely one sensor will not be enough - you will need to install several devices. If, for example, there is only one sensor in a curved corridor, then there will be no confidence that it will work correctly.
In this case, the circuit will contain several devices installed in parallel. Each of them is continuously supplied with a zero phase, after which all the outputs from them are combined into one cable and go to the lamp. When any of the sensors is triggered, voltage is applied and the light comes on.
Important! To prevent a short circuit from occurring in the circuit, all devices must have one phase. Furnishings can make quality installation difficult. Therefore, you should choose a place where there will be the best viewing angle so that nothing interferes with your work.
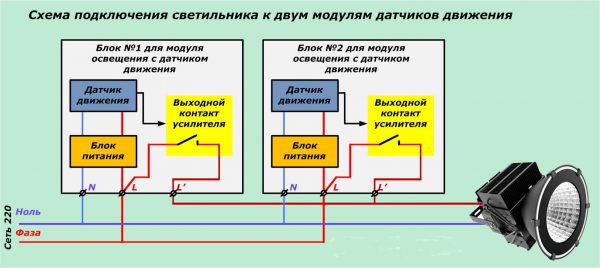
If one sensor must simultaneously control several light bulbs, which in total have a power greater than recommended, then you will also have to connect a magnetic starter to the circuit. The best option would be to replace light sources with LED ones, since they consume much less energy and do not have high power requirements.
Connecting the sensor to the lighting device
First of all, you need to decide where the motion sensor and lighting device will be mounted. We mount the device, having first disconnected the stand from it. We install it on the ceiling or wall.
The sensor should be slightly more than two meters above the floor. We strip the wires that go to it by about ten millimeters. By unscrewing the cover of the device, you can see three contacts, as well as multi-colored wires.The blue marking indicates the neutral wire, the phase has a red-brown or purple marking, and the “ground” is marked in yellow or green.
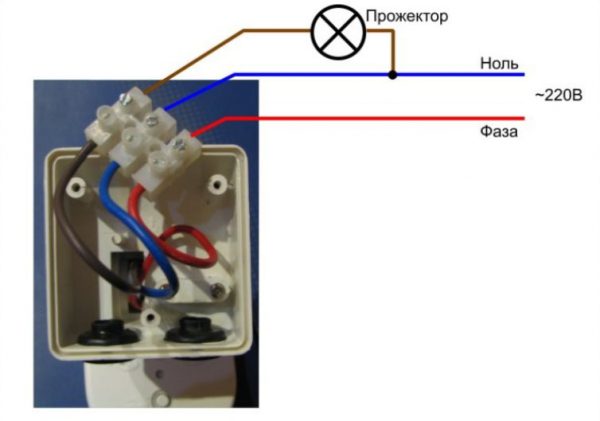
We apply voltage to the sensor, while observing the color markings. We connect the wires supplying current to terminals L and N. We insulate the connection points. If the installation is done using a switch with two or more keys, then we supply power to the sensor with one contact. If you accidentally mix up the phase from the detector and apply it to the lamp, the functionality of the circuit will be impaired and it will not work.
In this case, nothing fatal will happen; it’s enough just to redo the wire connection. The detector is connected to a regular electrical plug in the same way. In this case, it will receive power from the outlet, like any other device. Next, we connect the lighting device to the circuit. The phase that comes out of the sensor is connected to the light bulb. Don't forget about isolating the connection.
Important! All lighting devices used in the circuit should not be higher in power than the threshold value of the detector, otherwise it may burn out.
How to set up and adjust the sensor
Having finished installing the entire circuit, it’s time to start setting up the device. Initially, you should set it up for the response time - how long should pass from the moment the sensor detects movement until it sends a command to the light source. This value can be adjusted from one second to ten minutes.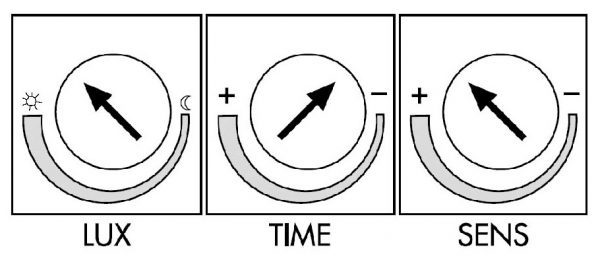
To correctly set the response time, you must adhere to the following recommendations:
- it takes no more than three or four minutes to illuminate the stairs - usually no one stays in this place for a long time;
- It takes ten to fifteen minutes to illuminate a room - a person can stay here for a short time or stay for a long time.
It is important to set a short pause before turning on the lighting, after the sensor has detected movement. This value is also set in the range from a second to ten minutes, everything depends on the speed at which the person moves. Since no one usually walks in the corridors, the delay can be minimal.
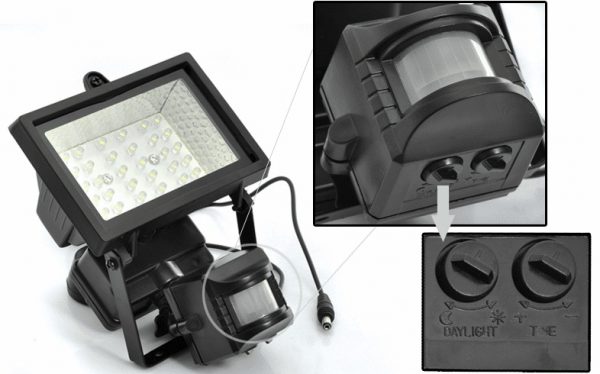
The devices have a LUX switch - it sets the illumination value. It should be based on those periods when the room is darkest. If there are many windows in the room, then the value is set to either average or even minimal. To calibrate the sensitivity of the sensor, there is a SENS switch. The setting is made based on the distance of the sensor from the detection objects, as well as the size of these objects. In case of false alarms, the sensitivity value should be reduced.

