Why collect plastic bottles for the holiday season?
Waste disposal is a rather serious problem that arises for owners of summer cottages, especially since most communities for some reason are not equipped with garbage cans. Of course, waste paper and household waste can be burned, and organic matter can be buried in beds or used for a compost pit. But what should we do with plastic bottles? It is strictly forbidden to burn them, and burying them in the ground is completely dangerous: plastic takes many hundreds of years to decompose. There is only one way out - to find a rational use for plastic bottles.
The content of the article
Watering the garden
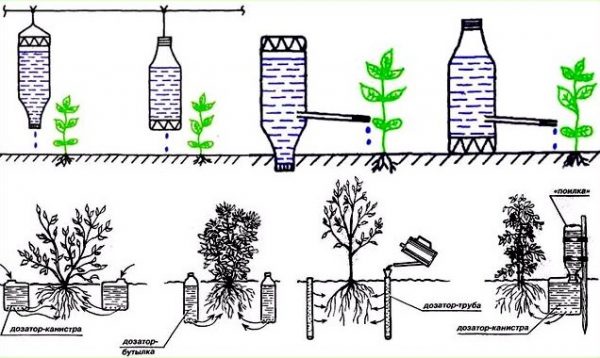
An ordinary plastic bottle can be turned into a real drip irrigation system. It is enough to make holes in it in several places and bury it with the neck up along with the plant when planting. The water will come out of the container a little at a time, and therefore the seedling will receive a sufficient amount of moisture for growth.
There are many options for implementing such an irrigation system, and each person chooses for himself what will be more convenient for him. In fact, digging into the ground is the best option, since you don’t have to invent and install crossbars, thereby taking up such precious space in the garden.
Containers for seedlings
If you prefer to grow seedlings for planting yourself, then you can save a little on purchased containers and make similar ones from PET bottles. 1, 2 and 3 liter containers are best suited for this.
There are several ways. The simplest one is to cut off the neck of the bottle, fill the resulting container with nutritious soil, sow seeds or plant seedlings. In fact, nothing complicated.
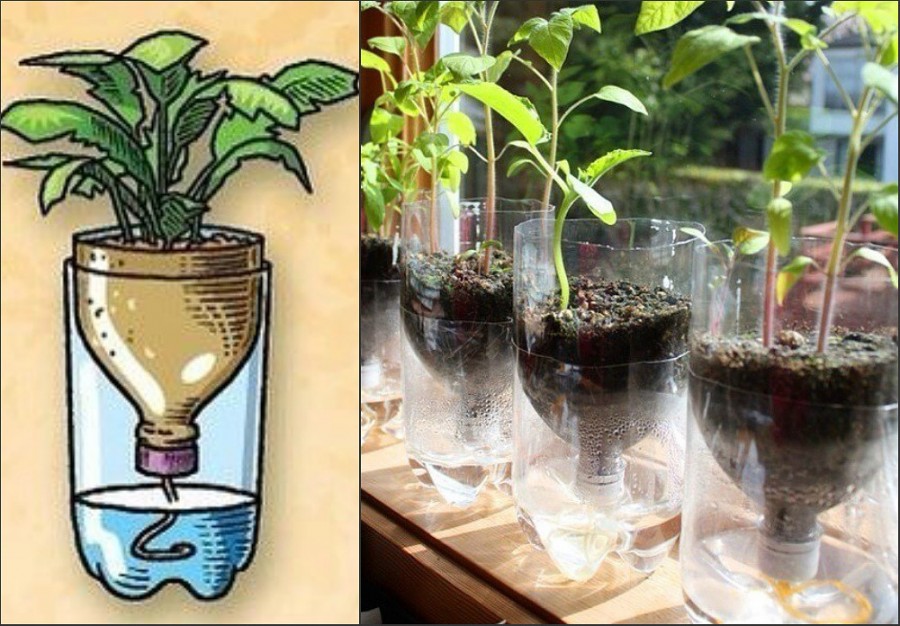
The second method is more complicated, but it is also much more practical, since it will be a functional pot with an automatic watering system and a greenhouse effect:
- We cut the bottle in half, but do not remove the cap. It is in it that you need to make one hole (using a hot awl, nail or needle).
- From the back of the lid we stretch a synthetic thread or cord and make a knot - this will be the wick.
- Screw the cap onto the bottle and turn it down. Insert into the second half of the bottle.
- We pour soil and sow seeds.
- Pour some water into the lower part.
- We insert the upper part with the plant back into the lower one. The end of the cord should touch the water.
And to create a greenhouse effect, you need to cut another bottle of the same volume and cover the plant with the bottom part.
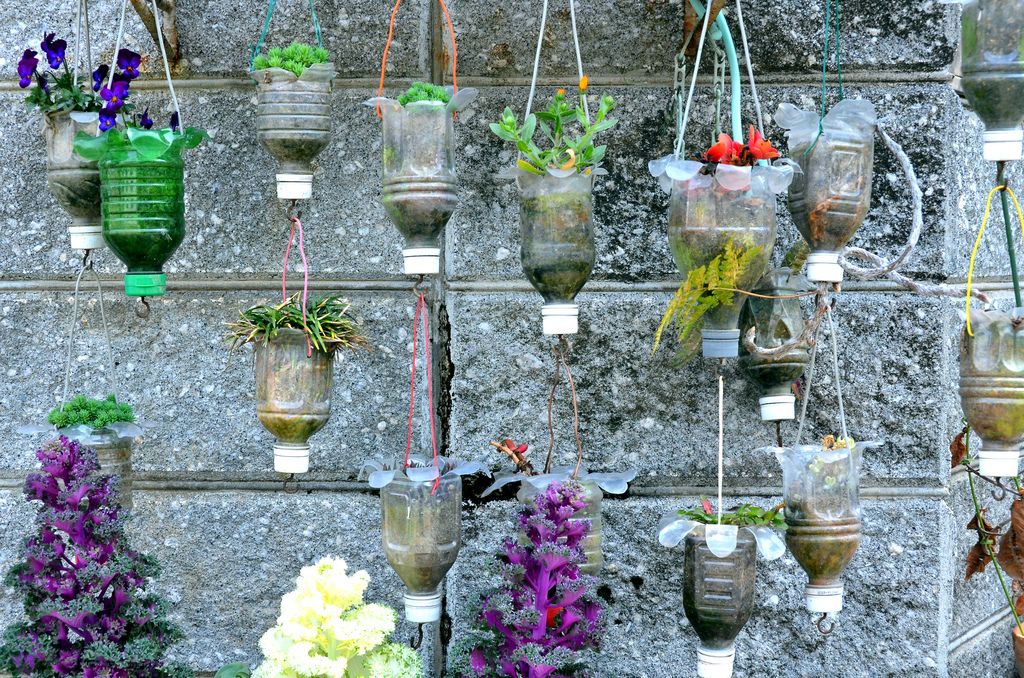
vertical garden
As soon as you start to get annoyed by a gray fence or a blank wall at your dacha, the idea of a vertical garden made from unnecessary plastic bottles will come to the rescue. In this way, you can not only use PET containers, but also create additional space for the crop. In such structures it is convenient to grow greens, strawberries, climbing flowers, peppers, tomatoes and even potatoes.
Bottles can be used in different ways:
- Horizontally. In this case, the container is cut lengthwise.
- Vertical. Only the upper part of the bottle is cut off, and the lower part is filled with soil and seedlings are planted.
It is best to assemble a vertical bed by securing all its parts to the fence with wire, twine or other strong material.If this is not possible, the structure is suspended on a strong cord and hook, connecting all its components.
To make your vertical garden lively, bright and cheerful, PET containers can be painted in multi-colored shades. This is especially true if there are small children in the family - they will probably like this idea!
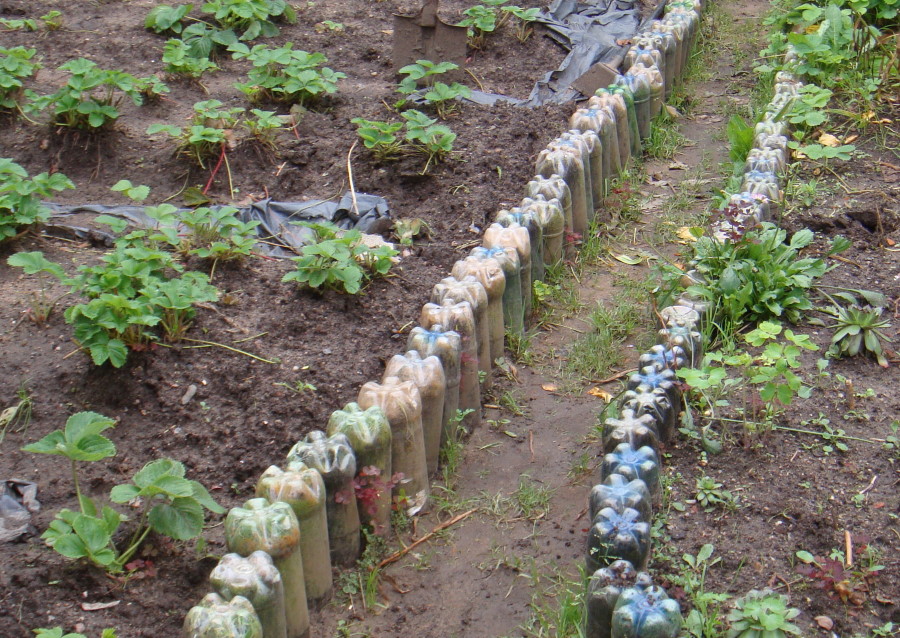
Fencing for beds and flower beds
Do-it-yourself fencing made of plastic bottles allows you to properly arrange the site, defining its individual zones, and prevent the displacement of the fertile upper layers from the place where the seedlings are grown.
This border is very quick and easy to make:
- mark the area for planting and dig a small trench around the perimeter;
- pour sand or even earth into plastic containers (preferably one size) to make them more stable;
- Dig bottles into the trench 1/3 of the way, neck down, and cover with soil.
Garden broom
To create the tool you will need 5-7 2-liter plastic bottles, a suitable handle, some strong wire, two nails, a hammer or screwdriver, a utility knife, an awl, and scissors.
- The neck of one bottle is cut off, retreating a couple of centimeters from the top.
- The bottom is cut off in the same way.
- Using scissors, the workpiece is cut lengthwise, starting from the bottom. The width of each strip is no more than 1 cm, but it is desirable that they be the same. Do not cut to the very end; about 5-7 cm should remain on top.
- All other containers are cut in the same way, but two remain untouched.
- You need to do the same thing on two bottles, but without cutting off the neck. All the cut pieces are “strung” onto the first one, and the second one fastens the entire structure from above so that it is more durable and compact.
- Now the entire product needs to be stitched with nails in two places in a horizontal plane and all layers firmly tied with wire.
- All that remains is to insert the handle and strengthen it with nails or screws.
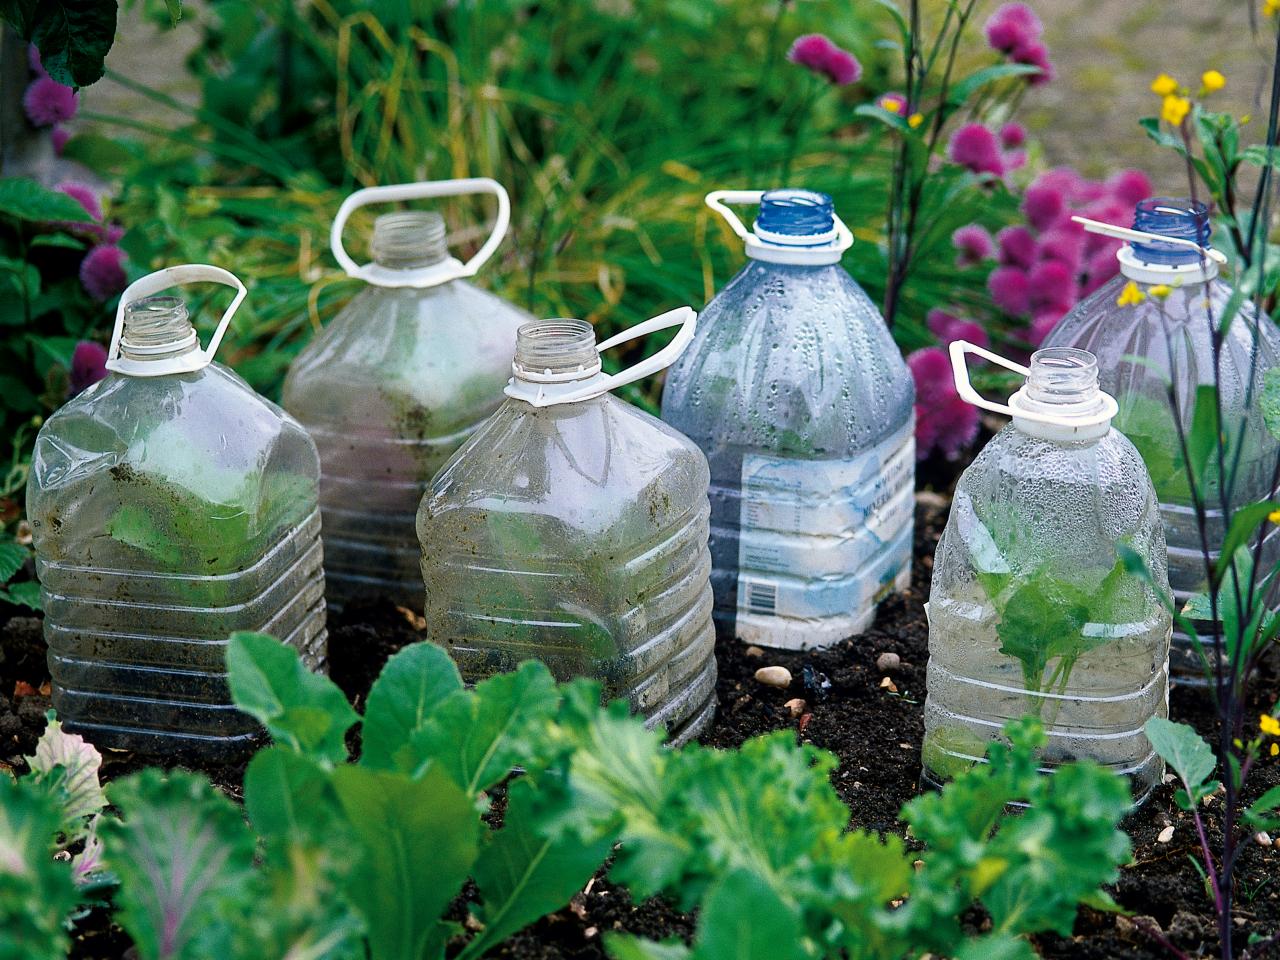
Mini greenhouse
For these purposes, it is better to use PET bottles of 5 liters or more. A smaller container is not so versatile, because the plant will form, and, therefore, a small container will interfere with its growth.
To make such a mini-greenhouse, just cut off the bottom and insert it into the ground. There is no need to throw away the lid: it will also come in handy. During the day it can be removed so that the seedlings get used to the temperature and harden.