Do-it-yourself grill from a gas cylinder
In the summer (and in general at any time of the year) it’s nice to eat kebab, washing it down with one of the drinks. The grill can be built from stone or bricks, but it is much more interesting to cook goodies on something that has a prestigious look. Reliable, durable and quite decent-looking barbecues are made from gas cylinders. The process of making them is simple, and today we will figure out exactly how to make such a device without much noise and dust. Let's consider the simplest option.
The content of the article
Arguments in favor of the balloon design
The material from which the cylinders are made is ideal for our purposes, it dignity:
- Possibility of use at high temperatures.
- You can not only fry meat, but also bake vegetables, fish, and also, with minor modifications, use the grill in smokehouse mode.
- Relative fire safety and ease of use, because after the cooking process is completed, there is no need to fill the coals with water - cover it with a lid and it’s done.
- Cheapness of materials, and, as a consequence, of the finished product, since if you buy sheets of metal as thick as the walls of a cylinder, it will be much more expensive.And it is quite possible that a used-up gas cylinder is already waiting in the barn.
- Comparative simplicity of making a barbecue. There will be no need for any global transformations during the work and it will take little time.
From shortcomings Only two can be noted:
- The design turns out to be quite bulky and massive, but this is a question of who ate and how much porridge. And the fact that the grill itself is large is perhaps even a plus if there are a lot of guests and you need to cook the appropriate amount of meat.
- Some people don’t like the semicircular shape of the bottom of the barbecue; it’s supposedly inconvenient when lighting firewood.
Some people have complaints about the shape of the container itself, and, consequently, the grill - they say that the aroma of the meat is not fully revealed. I think this argument is far-fetched - everything turns out tasty and aromatic, as if it was cooked on an ordinary stone grill. And the food is baked very evenly.
What you need for work
In addition to what I will now list, in the process of work you may need something that is not included in the list. So don’t throw rotten tomatoes at the author if you haven’t indicated something. From materials You will, of course, need the cylinder itself, as well as:
- steel pipes and angles;
- the door hinges, please note, are also steel, no brass;
- if the design provides for a chimney, then a pipe with a right-angle elbow with a diameter of 100 mm will be required;
- nuts, bolts or studs for fastening the structure;
- heat-resistant paint and primer, emery, solvent, accessories in order to improve the appearance of the product (this is optional).
From tools you will definitely need:
- welding machine with electrodes;
- grinder, and discs will be needed for cutting and cleaning;
- electric drill with metal drills;
- roulette;
- center punch, chalk, marker for marking;
- brush for applying primer and/or paint;
- wrenches and pliers.
Which cylinder is best suited
In this case, it all depends on your gastronomic interests. If you plan to have a lot of guests, it is better to take a 50-liter container. Firstly, on such a grill you can use skewers for the entire length, and secondly, you can place a fair number of them.
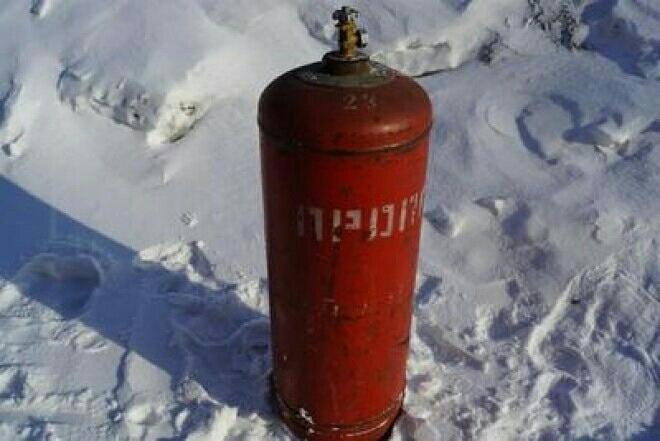
If you require a compact design with low weight, then it is better to opt for a cylinder with a capacity of 27 liters. General requirement – although the thickness of the walls of the cylinders can be 3 mm or more, if they are damaged by corrosion, look for something else for the grill. Metal corroded by rust will not last long, especially in high temperatures.
Step-by-step description of the process
Conventionally, the progress of work can be divided into four main stages:
- dismantling the valve and preparing the cylinder;
- marking and cutting containers;
- production of the stand and assembly of the structure;
- decorating, priming and painting.
Now we will take a detailed look at the progress of the process point by point.
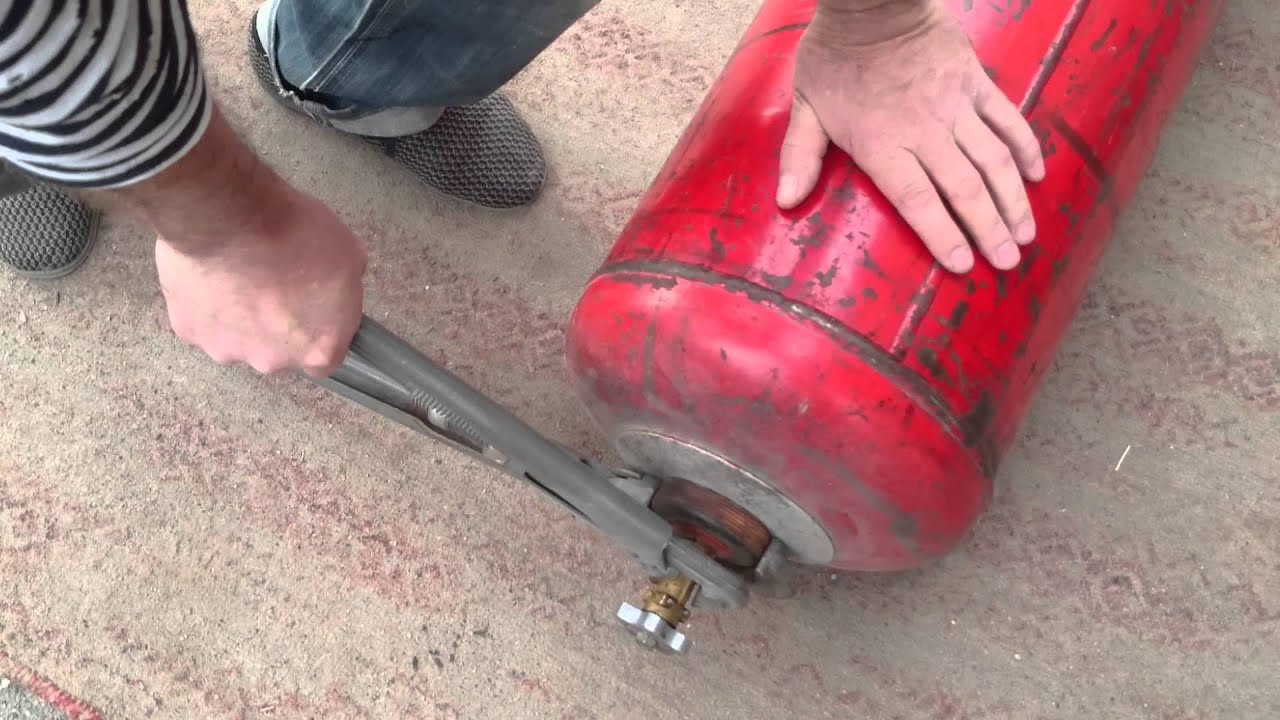
How to dismantle the valve and what to do next after that
The valve is removed using an adjustable or gas wrench, or, even simpler, an angle grinder with a cutting disc. Before you begin to remove the valve, you need to completely unscrew it and release the remaining gas from the cylinder. On the side where the hole formed at the valve site, you can weld a pipe with an elbow. You will get a pretty decent chimney.
Before you start cutting, you need to make sure that there is no explosive and flammable substances. Even if the valve is already unscrewed and the pressure in the container is the same as atmospheric pressure, this is not an indicator at all.The fact is that a special additive is added to the gas that was once in the cylinder - gasoline - which has a characteristic odor. It is also flammable, and if you don’t get rid of it, disaster can happen. In addition, there is most likely condensation remaining in the container.
To drain the condensate, after removing the valve, the cylinder is turned over and held for some time. And then, returning it to its usual vertical position, fill it with water using a hose and leave it like that for a couple of days. Immediately before cutting, the water can be drained, but, in principle, this is not necessary - its presence in the cylinder will not greatly affect the process, but will completely protect it from a possible explosion or fire.
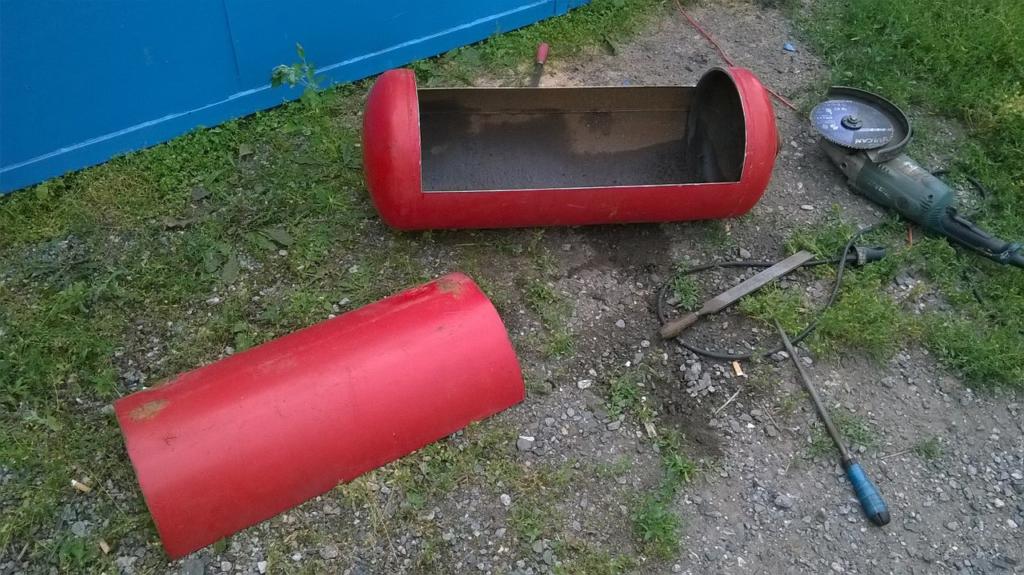
Marking and cutting
Start by placing the cylinder horizontally on a level surface. As a guide when marking, you can use the weld running along the wall of the cylinder. I’ll give you a sample of the markup I liked, as they say, in a hurry. It’s so fast, simple, reliable and you don’t need to mess around with hinges.
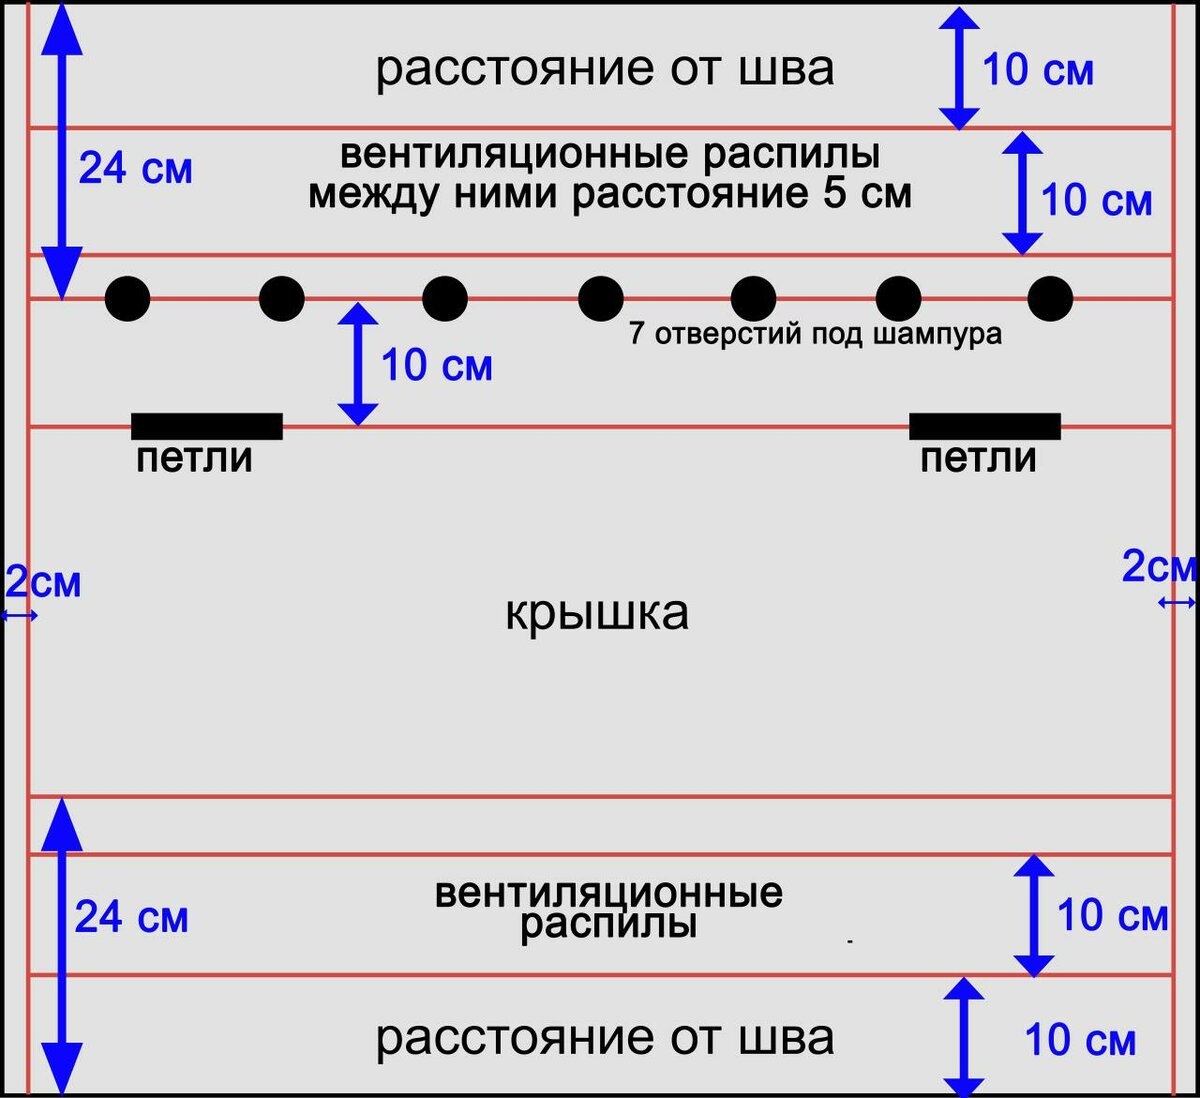
In this case, a fifty-liter cylinder is used as a test subject. From the seam down and up on both sides we lay two parallel lines 240 mm long. Then we draw a kind of rectangle by connecting these two lines. You can use chalk or a marker as a marking tool. The outer diameter of the cylinder is 960 mm, that is, when marking, we divided the container clearly in half. Then, without further ado, we use a grinder to cut the container according to the markings.
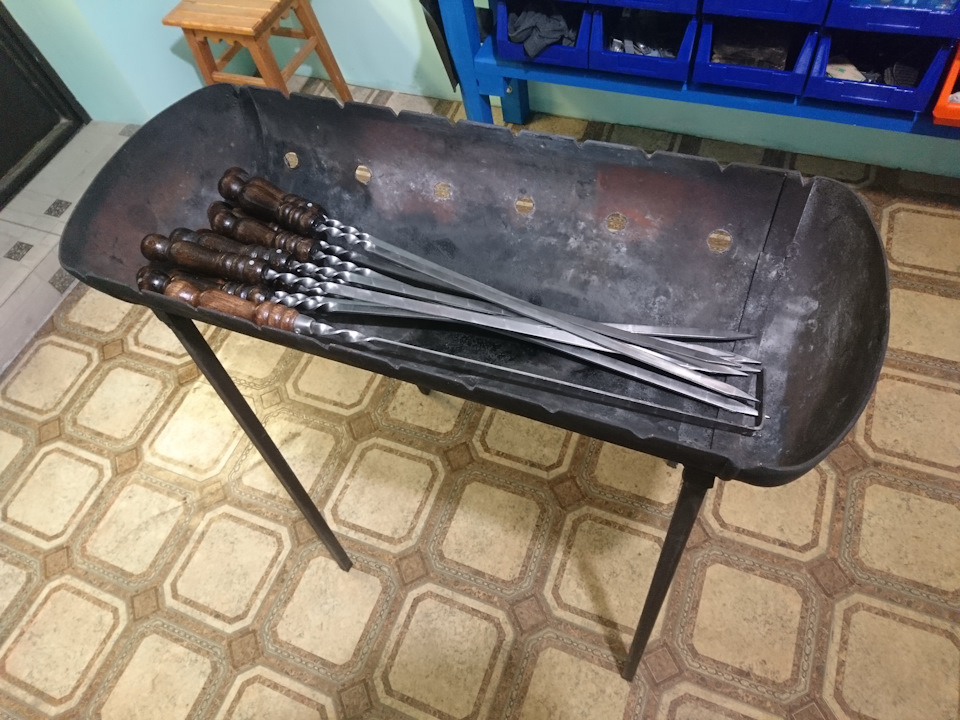
On one of the sides of the resulting barbecue, approximately 8-10 centimeters from the top of the wall, having previously applied markings, we drill holes for skewers at a distance of 8-10 cm from each other.Below the holes for the skewers, I recommend making parallel slits for air access. On the opposite side, opposite the holes, we make slots in the upper part of the wall.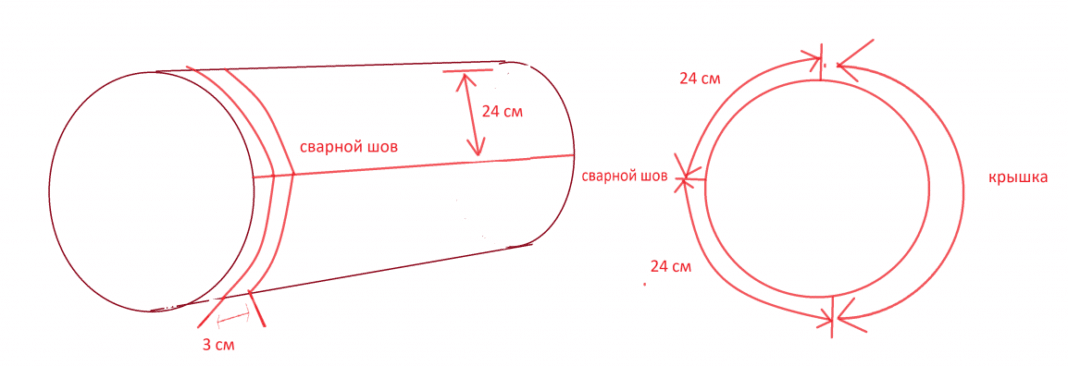
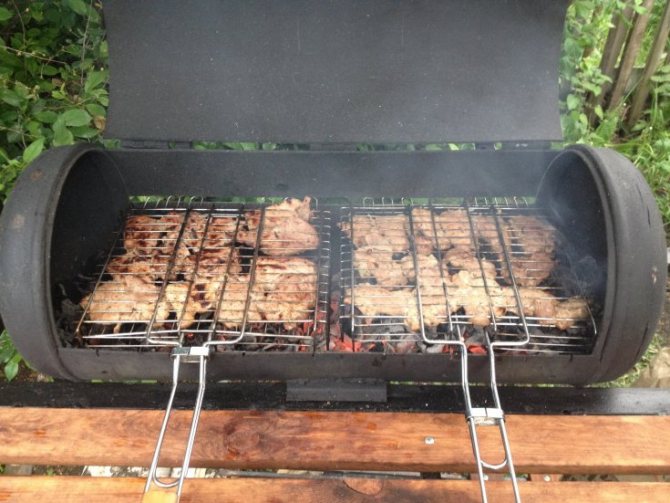
Inside the structure, in addition to the slots for skewers, you can install a grate of the appropriate size and fry meat on it. There is no need to attach the grate, let it be removable - use it, remove it, wash it properly.
Some get sophisticated - they make the structure closed, weld chimneys, equip two-chamber barbecues with cauldrons - yes, all this is real. But to make these delights you need time, desire and the necessary skills. We are following the path of least resistance.
How to attach a barbecue to legs - in a good way
The design can be made collapsible or integral - it all depends on the imagination of the owner. The main requirement is a user-friendly barbecue height - about a meter from the ground, plus or minus depending on the height of the owner. For ease of transportation, it is better to make a collapsible design.
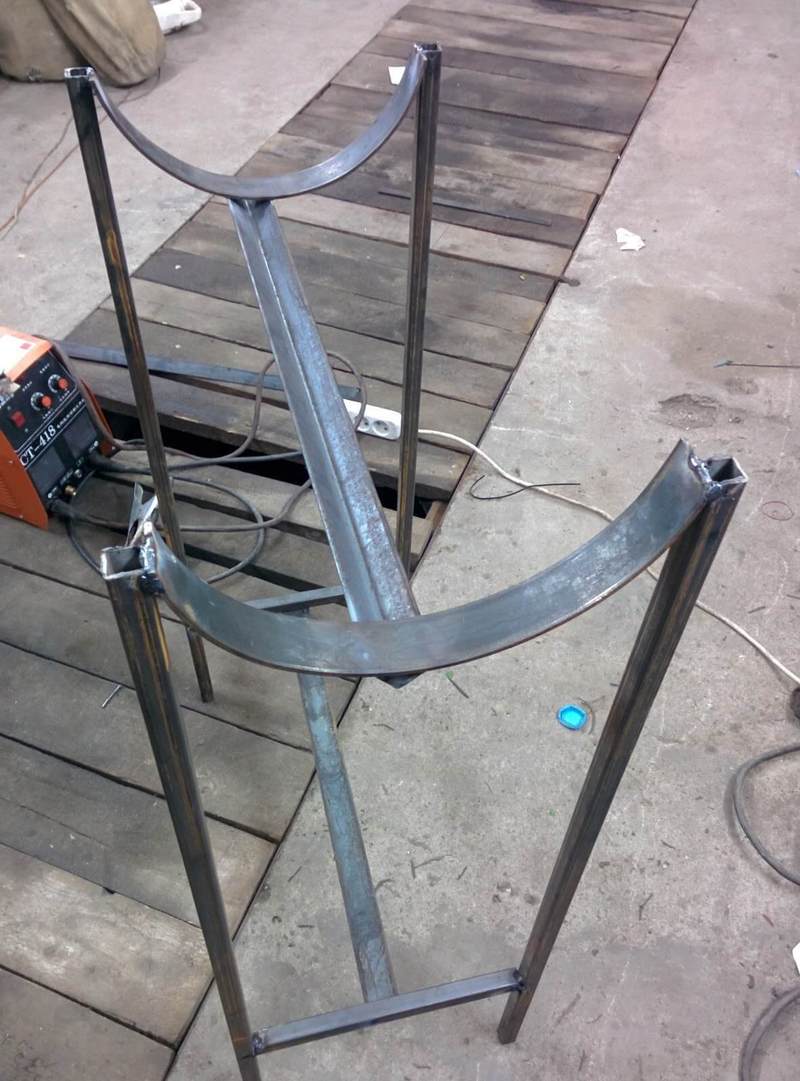
The simplest version of the legs looks like this - four steel legs from a pipe or angle are welded to the body of the barbecue. If you want to get more sophisticated, make a metal frame with a stock for half a cylinder. It is made from two strips curved in an arc of the corresponding radius, welded on top to the frame, as shown in the photo.
The best way to protect the grill from corrosion
Before doing anything about surface treatment, it must be thoroughly degreased and any dirt, rust and scale removed. Then you can go in several ways:
- Use thermal powder paint, but for these purposes you will need a special room and oven, since processing occurs at high temperatures.
- You can use silicone enamel, it is very heat-resistant - it can withstand temperatures of about six hundred degrees.
- Treat the body with a solution of sulfuric acid - this method is also called oxidation. After the procedure is completed, the body is boiled in water with laundry soap dissolved in it, after which it is kept for about an hour in a solution of sodium hydroxide.
That’s all, actually – the grill is ready for use. On the Internet you can find many more complex and bizarre schemes than the one discussed - if you like it, use it to your health.