Grinding machine from a washing machine engine: myth or reality
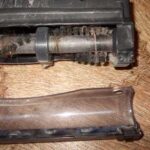
When any household appliance breaks down, you shouldn’t throw it away: there are many mechanisms inside that can easily be given a new life. They are used to make tools, equipment for various jobs, and much more. For example, you can make a grinding machine from a washing machine engine. Even asynchronous type motors are also suitable when creating a sharpener.
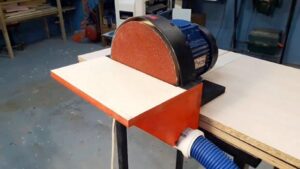
Household appliance motors usually have a low RPM and not very high power. But their good torque allows them to be used as a basis for disc sanding. It won’t take much time to make a sharpener from a washing machine motor. A minimum of tools is needed. The result is an excellent addition to the home workshop.
The content of the article
Tools and materials
Before you start making sandpaper from a washing machine motor, you need to make sure that you have all the necessary materials and tools. In addition to the electric motor itself, you will need boards or plates to make the base of the device.
You don’t have to buy them: in chain stores like Leroy Merlin, the materials are designed for large-scale construction, so they sell boards with large dimensions. You only need a little material, and the rest will just gather dust in the workshop.The basis for the equipment can be parts of pallets, cabinets, bedside tables, drawers, etc.
To make a sharpening machine from a washing machine motor, you will need the following materials:
- Plug with cable;
- Switch;
- Wood thicker than 25 mm. This is enough to create a solid foundation;
- Sandpaper of suitable grit;
- Bolts, nuts, screws and other fasteners;
- Wood glue;
- Metal corners.
You also need to find tools or their analogues:
- Screwdriver;
- Measuring device;
- Drill;
- Jigsaw for cutting wood;
- Bulgarian;
- Iron;
- Level for construction work;
- Writing instrument.

Before you start, you should check the performance of the engine. If it starts and you have everything you need to make a homemade emery, start the work, which we will divide into 4 stages:
- Assembly of the bed.
- Preparing the grinding disc.
- Collection of emery.
- Sandpaper installation and tests.
Assembling the bed
The bed is the stationary part of the grinding machine, providing it with stability and allowing it to work with high precision. It can be a converted drawer, cabinet/shelf. Check old unnecessary furniture for stability and strength, and also estimate how convenient it will be to use. If everything is fine, you can skip this step.
We will consider a situation in which there is no ready support. In this case, follow the plan:
- Cut a tabletop from a board more than 2.5 cm thick and 2 identical bars that will act as legs.
- Assemble the bed by making the letter “P” out of the blocks and tabletop.
- Fasten the components together using self-tapping screws.To obtain a more reliable design, you can use metal corners, installing them on the inside of the frame.
- Add a crossbar or jibs to the bed to make it more durable.
- To ensure horizontal stability, screw a small block perpendicularly to each block.
As a result, you will get the simplest wooden table. Choose the size of the structure yourself depending on what is most convenient for you. If you want to make the bed more attractive and extend its life, you can sand and varnish the wood. But in this case, it will not be possible to make sandpaper from an automatic washing machine motor, because the varnish will need at least one day to dry.
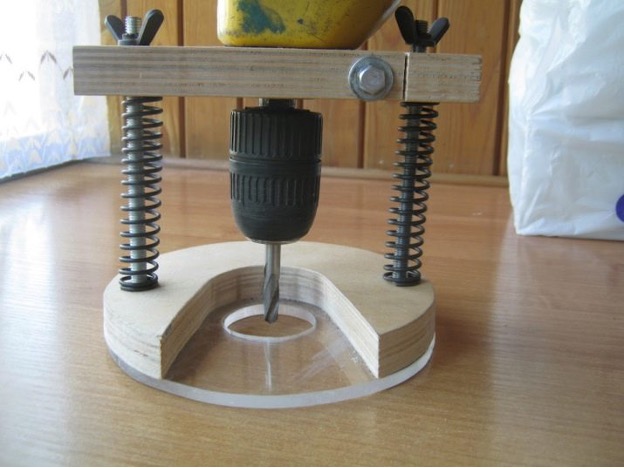
Preparing the grinding disc
This is the most important part of the sharpening machine, so you need to approach its manufacture wisely. We have prepared step-by-step instructions for you:
- Measure the diameter of the disk that you will need for your work. Draw a circle of the desired size on a board more than 2.5 cm thick. For accuracy, you can use a compass.
- Cut out the disc with a jigsaw and sand the edge until it is smooth.
- Make 3 holes on the engine pulley for the bolts using a drill.
- Measuring along the motor, drill the same number of holes in the grinding disc.
- Using bolts and nuts, secure the disk to the rotating element of the motor.
Assembly of the structure
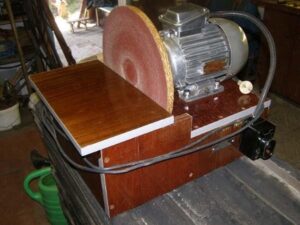
Using wooden blocks and steel angles, attach the sandpaper to the bed. Place the boards under the base and attach them to it. Then place the entire structure on the countertop and fasten them together.
The next step is connecting the engine to electricity. It already has special contacts for connection, so you just need to connect a wire with a plug to them.
Diagnostics and finishing work
After collection, we recommend running the device at full power. This will allow you to check the stability of the countertop and structure. If the frame is wobbly or in any way interferes with use, further strengthen it by adding crossbars, jibs and bars in the form of skis for the legs.
When the structure is stable, proceed to finishing work:
- Using a chisel/grinder with a flap wheel, sand the disc to perfection.
- Place the motor in such a position that the circle is strictly vertical.
- Cut out a circle from sandpaper that fits the size of the sanding disc.
- Spread the workpiece with wood glue and secure it to the structure.
- An iron will help speed up the gluing process.
- Secure the disc in this position in a vice.
- Check how smooth the sanding surface is using a level.
As you can see, making a homemade sharpener from an electric motor is not that difficult. Such equipment will fit perfectly into any home workshop, becoming a useful tool. At the same time, the costs of its production are minimal and only require an old motor from a washing machine.