How to make a circular saw from a drill with your own hands? Step-by-step instruction
A circular drill made from a drill is a convenient device that you can actually make yourself from scrap materials. The structure is made on the basis of MDF panels and wooden beams, as well as door hinges and various elements for fastening. Step-by-step manufacturing instructions with photos and descriptions of actions are presented in this article.
The content of the article
Materials and tools
A circular saw from a drill is made using standard materials and tools that can be found in any garage or workshop. To do this, you need to prepare the following tools:
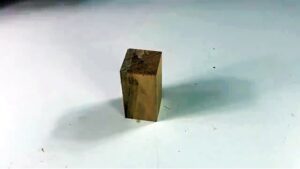
- wooden beam;
- half clamp made of steel;
- MDF based board;
- clamp;
- fastening element - a set of screws, nuts and bolts;
- the actual sawing disc (purchased separately);
- mortise door hinges;
- hammer with awl;
- profile type washers;
- drill;
- wrenches of different numbers;
- construction tape;
- jigsaw;
- pencil.
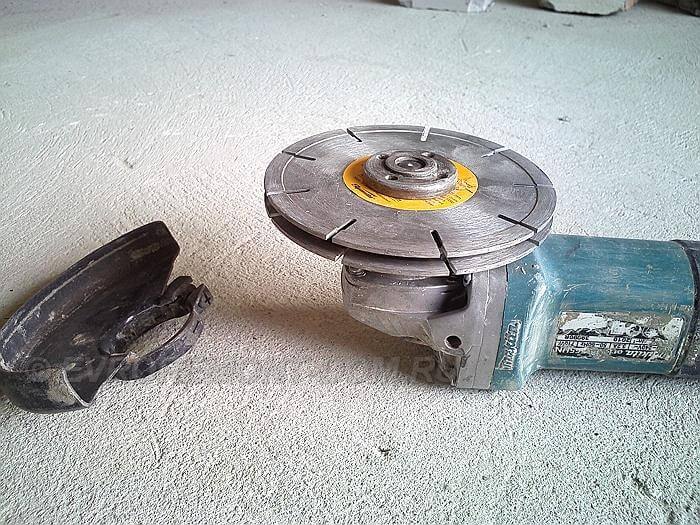
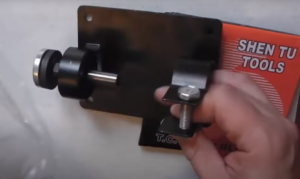
A circular saw from a drill can be made with your own hands in different ways. So, you can purchase a device, as in the photo. A drill is placed on it, fixed with self-tapping screws, and then attached to a pre-made wooden base.
Step-by-step instruction
You can make the device yourself, which will significantly reduce the cost. The main way to make a circular saw from a drill with your own hands consists of the following steps:
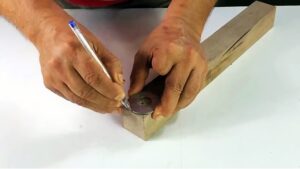
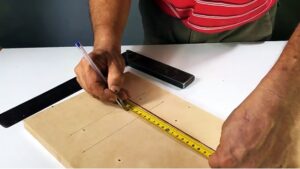
- Mark the beam at one end. You need to mark the places for drilling, and also trace the washer to round the corners.Mark a point in the center of each end - there will be a blind hole.
- To make a high-quality circular from a drill with your own hands, take a Forstner drill and make several identical recesses in the middle part of the beam on one side and the other (opposite) side.
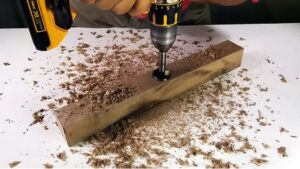
- At one end, make a hole in the form of an axis that will run parallel to the drilling axis. Round the corners. At the opposite end, make a blind hole in the form of an axis.
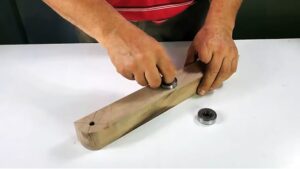
- Bearings are installed in the central recess and driven with a hammer directly through the block. This is necessary to ensure that the drill saw is durable and reliable.
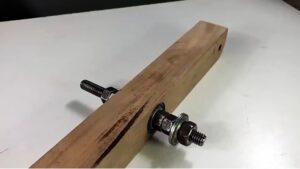
- Construction tape is wound around the pin, making 2 turns. They should go symmetrically about the center.

- Next, a saw from a drill is made with your own hands like this. Screw washers and nuts onto the studs and tighten them tightly using wrenches. To make the structure stable, second locknuts are installed.
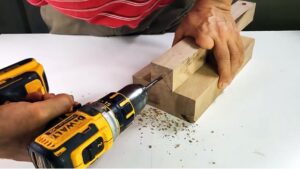
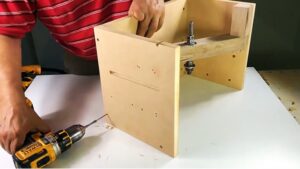
- They take a small piece of timber with a square cross-section and drill a hole (blind) along the axis in the center of the end.
- The described method of making a saw from a drill involves making a square from an MDF panel. The fragment of timber obtained at the previous stage is placed under any corner of this panel and fixed with screws. In this case, the block must be installed so that the hole “looks” inward.
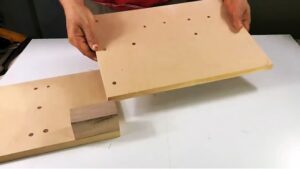
- The MDF square is installed vertically so that the block is at the top. And a rectangular fragment made of the same MDF material is attached to the bottom. One of its sides must be equal to the side of the square. Both fragments are fixed with screws. The installed beam with a pin is mounted with a short beam using a washer and bolt.
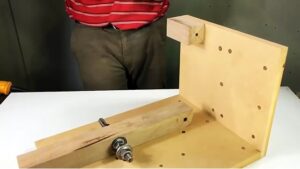
- The result should be a design like this.
- The next stage of the instructions on how to make a saw from a drill involves obtaining another square blank from MDF. A vertical groove is marked on it. In this case, the axis, which runs longitudinally, must coincide with the central hole, which goes on the end part of the bar.
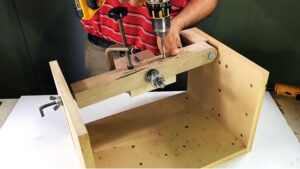
- Holes are drilled in this square and cuts are made using an electric jigsaw, as shown in the photo.

- To make the circular saw for the drill stable, the square together with the groove is connected to the end of the rectangular base using screws.
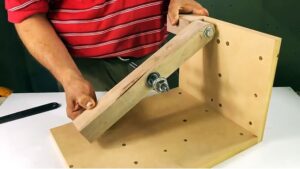
- Next, you need to secure the pin into the groove from the outside. It is pre-bent at a right angle. This stud should have a pointed end and a wing nut. It is screwed into the prepared hole at the end of the beam.
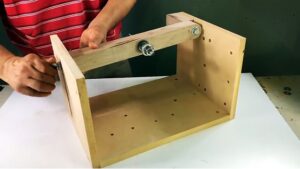
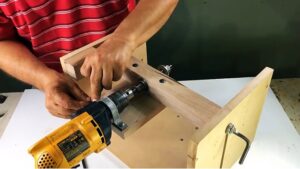
- A rectangular MDF console is fixed symmetrically relative to the center of the wooden block. She is directed towards a small wooden block. They are fixed with bolts that have spikes, as well as several heads in the shape of a semicircle.
- There are just a few steps left - and the DIY circular saw from a hand drill will be ready for use. The drill chuck is fixed at the very end of the pin. Next, take the half clamp and wrap it around the body of the drill itself with a belt. They are fixed using feints, and tightened with nuts from the bottom side.
- Now you need to ensure the strength of the structure so that the mini-circular drill works reliably. To do this, a rectangular fragment of MDF is laid on top and secured from the outside to the rack with the beam. To do this, use ordinary door hinges that cut into the surface.
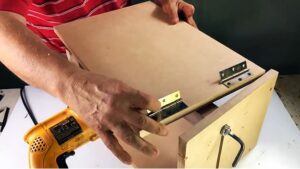
- The rectangular part is folded back and the blade of the future saw is mounted using profile washers.
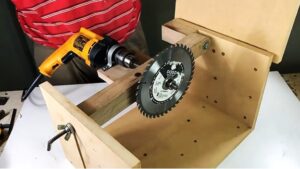
- The DIY mini-circular drill is almost ready.You just need to turn on the drill and slowly lower the folded panel, turning it around the hinges. If everything is done correctly, the disc should cut a groove, which forms the working surface. Next, you need to slightly loosen the thumb and move the pin in the shape of the letter “g”, setting the required cutting depth.
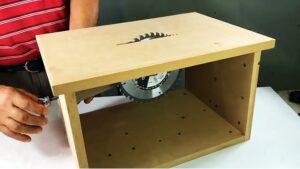
A device for turning a drill into a circular saw can be obtained at home. The main materials are MDF and wooden beams. It is recommended to draw up a diagram in advance and mark all the fastening points. Then they assemble the structure step by step, make a test cut and get to work.