How to use a laser level: operating principle, proper use and storage
There are several basic ways to use a laser level. The device is installed on a surface, the beam is turned on and projected onto the floor, walls or ceiling. They make outlines, after which they lay the tiles or put up a wall. The level can be used for a variety of tasks. The main methods of use are described in this material.
The content of the article
Preparatory stage
Before starting work, it is important to properly prepare the tool. Before you understand how to use a laser level to level floors and other surfaces, there are several steps you should take:
- Remove all obstacles that may arise in the path of the beam.
- Place the device so that the distance to the object is within the maximum permissible value specified in the instructions. If necessary, this distance can be increased using a special receiver.
- Secure the tool by placing it on a flat surface. Here you need to understand how to work with a laser level so that the error is minimal.
- Align the device along a horizontal line. To do this, focus on the built-in level with a bubble; in some cases, the devices are equipped with a self-leveling function.
To understand how to use a laser level correctly, you need to know about the principle of its operation. The level is particularly accurate due to the concentrated beam. Therefore, it is necessary to follow safety precautions to protect the eyes of yourself and others.
How to use the device
Several basic techniques have been developed for how to use a laser level. After the setup is completed, you can proceed directly to measurements. Recommendations for different cases (for example, wallpapering, laying tiles) are described below.
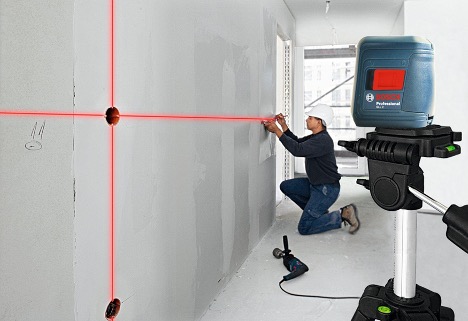
Alignment of walls
The basic instructions on how a laser level works relate to using the device for leveling walls. The device is installed next to it, literally 3-4 cm, and the beam is directed exactly along the wall. Then the deviations are measured. To do this, use a ruler installed strictly perpendicular to the laser.
Get the necessary numbers for deviations and calculate how much plaster is suitable for a given case. The procedure is quite simple. But in order for the measurements to be as accurate as possible, you should use a device with a laser head located in the lower part of the body.
Laying tiles
If you learn how to use a laser level to level walls, you can lay tiles efficiently. It must be positioned strictly perpendicular, so in this case you will need the option to construct planes.
Laying can be done using a laser beam. In this case, the tool is left turned on for the entire time. First check the battery charge level or install new batteries. If we talk about how to use a laser level for the floor, the principle will be exactly the same.
On the other hand, you can use a special marker or pencil to make markings. This will save battery. In addition, the beam will not interfere with the eyes while working. To correctly assess how to use a laser level, after finishing installation, you can turn on the device again and check the result.
Wallpapering
Since the principle of operation of a laser level is associated with the use of a beam, which allows for great accuracy, it can also be used for wallpapering. The instructions are exactly the same. You can turn on the beam and leave it on for the entire time, or make a few marks with a pencil, and then start gluing the wallpaper. After completing the work, you can check the results by connecting the device again.
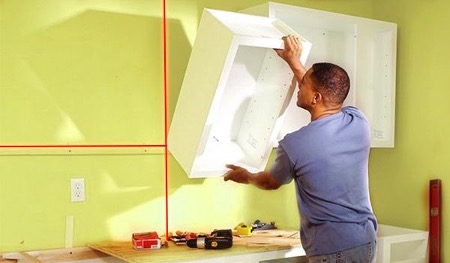
Furniture installation
Another option for using an electronic level is related to furniture installation. To properly install hanging boxes, you need to mark several beams in the horizontal plane. Then it will be possible to carry out measurements with minimal error.
Partitions
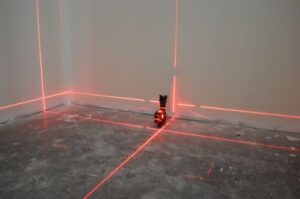
In rooms, partitions are often constructed using plasterboard sheets. In this situation, it is also useful to study the algorithm of how to use a laser level for walls. To make an even partition, proceed as follows:
- Direct the beam towards the floor so that it is parallel to the opposite wall (relative to the partition that you plan to install).
- The laser level device allows you to accurately mark the required lines. Do this with a pencil or marker. It is recommended to install marks at intervals of 20-40 cm.
- They are then connected by straight lines to form a single network.
- After this, using a level, transfer the same lines to the ceiling.
- At the last stage, a projection of the wall is made on the ceiling surface along similar points.
In the described case, it is enough to simply understand how to work with a laser level correctly. Moreover, to obtain more accurate outlines, it is better to use a device that can construct a 360° plane.
Laying the foundation
After pouring the foundation, you should determine how well the work was done. In these cases, it is also useful to know how to use a laser level. The sequence of actions is as follows:
- The device is placed directly in the center, leveling its position.
- Using a rod, measure the distance to the beam at each angle. They make notches.
- Next, the results obtained are evaluated. Knowledge of the structure and operating principle of a laser level will help with this.
- If the deviation is within 1 cm for every 10 m of base, this is an acceptable error. But if it exceeds 1 cm, modifications should be made.
Using a laser level does not raise any special questions - even a beginner can understand the instructions in a few measurement procedures. At the same time, in the professional sphere, and often at home, the instrument is used simultaneously with additional accessories.
In practice, an optical sight, laser receivers, tripods and slats are often used. Thanks to this, the speed and quality of measurements significantly increase if you know how to use a laser level correctly. At the same time, it is necessary to observe safety precautions, work in safety glasses and keep strangers away.