How to use a drill? Installing and removing the drill from the tool
Electric drill is a tool designed for drilling holes in various rocks. The tool itself is not capable of drilling without a special attachment - a drill. Therefore, to start using a drill you need to at least know two useful things:
- how to insert a drill bit into a drill;
- How to remove a drill bit from a drill.
We will talk about this and more in our article today.
The content of the article
How to insert a drill bit into a drill?
As noted above, a drill without a drill turns into a useless tool. It is thanks to drills that holes of the required diameter and in the right place are obtained. Before inserting the drill bit into the drill, you need to:
- Choose the right drill.
- Determine the mechanism for attaching the drill to the drill.
How to insert a drill into a drill: select a drill
First you need to understand what you are going to drill. For different materials you will need to look for the appropriate drill. For example, wood has its own drills, metal has its own, and concrete, stone, and brick have their own. Drills that come specifically for wood are not designed for drilling metal or concrete. Concrete drills are not designed for drilling metal and wood. Metal drill bits are not designed for drilling into concrete, but they can be used to drill into wood.Drills for concrete differ from other types of drills by a design feature, namely the presence of a special pobedit tip. Drills for metal and wood can be similar in appearance and differ only in hardening, sharpening or coating. At the same time, there is a separate category of wood drills that have a “feather shape” - they are difficult to confuse with other drills.
The second point is the diameter of the drill. If you accidentally drill a hole with a diameter slightly larger than necessary, then it will be very difficult for you to correct the situation, and in some cases it will be impossible to do so. If the hole is a little smaller than necessary, then it’s okay - just widen it with a drill of a slightly larger diameter.
The third point is the length of the drill. If you need to make several holes in a material that is not thick, then all you need to consider is that the length of the “working” part of the drill should be slightly longer than the thickness of the material. It's another matter when you need to drill a hole deeper. For example, you want to hang a picture on the wall or fix a cornice, boiler, cabinet, etc. Here you need to consider 2 things:
- Wall thickness. For example, if you want to hang a picture on a non-load-bearing wall 12 cm thick and for this you take a concrete drill 20 cm long, then there is a big risk that you will not guess with the depth of the hole and drill through the wall, and there is a neighbor! Ultimately, your neighbor will have to do cosmetic repairs due to your carelessness.
- Mounting length. For example, you want to hang a boiler on the wall and bought an anchor 12 cm long for it, but you have a drill of the required diameter for concrete, but 10 cm long. This means that the hole will not be deep enough and the anchor will not fit in properly.The result may simply not be aesthetically beautiful, but the fastening may not work to “open up” inside the concrete and your boiler simply will not hold on.
We will assume that you have selected the correct drill for its purpose, diameter and length; now it’s time to determine how to insert the drill into the drill.
How to insert a drill bit into a drill: fastening mechanism
You need to take a look at the drill. There are only two options here:
- the mechanism can be using a key;
- The mechanism can be quick-clamping.
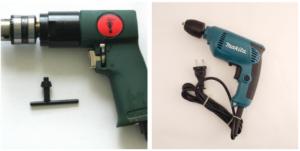
In the photo it looks like this:

A mechanism with a key implies the presence of a special device with which the drill is clamped in the drill chuck. This mechanism is quite simple to use:
- insert the drill into the drill chuck;
- insert a special key into the hole on the drill chuck;
- turn the key clockwise - the cartridge is clamped;
- You need to tighten the key with maximum hand force.
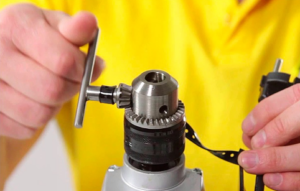
This is what it looks like in the photo:

Visually, a clamping mechanism with a key can be identified by the presence of special holes and teeth for the key on the drill chuck. This mechanism is convenient and clamps the drills quite firmly, but its main disadvantage is the key. If the key is suddenly lost, then it will be very difficult to insert or remove the drill from the drill.
Another thing is the quick-release mechanism. It doesn't require anything other than your hand to operate. The operating principle of such a mechanism is as follows:
- insert the drill into the drill chuck;
- press the locking button, which blocks the chuck from rotating;
- twist the cartridge by hand until it stops.
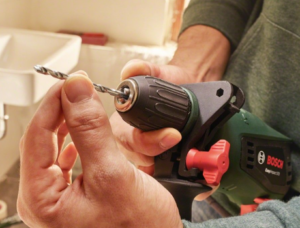
This is what it looks like in the photo:

Experienced drill users use this mechanism even more simply:
- insert the drill into the drill chuck;
- hold the cartridge with your hand;
- start the drill by pressing the start button, holding the chuck until the drill is completely fixed.
This method is not recommended or correct, because it carries a lot of risks, but nevertheless it is very popular among craftsmen who have been working with drills and screwdrivers with quick-release mechanisms for a long time.
How to remove a drill bit from a drill?
It’s probably not difficult to guess that removing a drill from a drill is not difficult if you put it there. This process will depend entirely on the drill chuck mechanism. The only difference will be in the direction of rotation of the clamping wrench or keyless chuck.
However, even for this simple process there are several recommendations:
- Unplug the drill. If you want to release the drill using the “wrong” method of the quick-release mechanism, then there is no need to de-energize it. Simply hold the chuck with your hand, switch the drill to “reverse” and smoothly press the “Start” button.
- If you have just finished drilling and need to replace the drill, do not grab the drill itself as it may be very hot.
- It is not always possible to free the drill the first time - this is normal. If you have been working with a drill for a long time, the chuck is automatically clamped very tightly and the clamping mechanism is slightly “stuck.” You just need to put in more effort. For example, you can wrap the quick-release mechanism in fabric to increase the grip of your hand with the chuck. You can lightly tap the cartridge. If the cartridge has a key mechanism, then you can tap it lightly with a hammer.
- If you lose the key to the clamping mechanism, then you can use a gas key and some kind of lock. You need to insert the latch into the key hole in the chuck. The fixation can be a nail or a screwdriver of suitable diameter.Once secured, you can try to unscrew the cartridge by hand; if that doesn’t work, then a gas wrench will help you.
Conclusion
Now the questions: “How to insert a drill into a drill?” or “How to remove a drill bit from a drill?” – will not put you in a dead end. A drill, although it seems like a simple tool, will nevertheless require skill and caution from you. Therefore, first of all, when working with a drill and even when replacing drills, take care of your safety.


