Installing a projector on the windshield: how to do it and configure it correctly
Installing a projector on the windshield is a moderately complex procedure that will require care and skills in working with car wiring. The device is attached to the dashboard or simply placed on it, then the contacts of the wires assembled in a harness are connected. How to do this correctly is described in the presented material.
The content of the article
Purpose and types of device
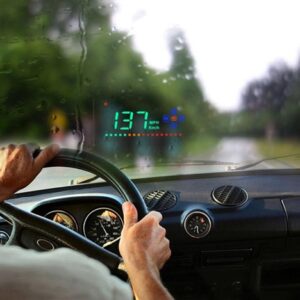
The projector in the car is called “Head Up Display”. Literally translated from English, this means “head display”. The device projects the display image onto the windshield, or more precisely, onto its lower part, next to the steering wheel. Thanks to this, the driver can fully concentrate on the road without lowering his gaze to the dashboard itself.
Before you figure out how to set up a projector on your windshield, it’s useful to familiarize yourself with the types of devices. Depending on the functions performed, the following types are distinguished:
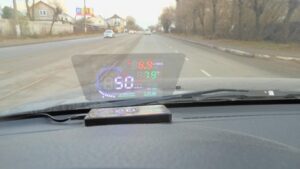
- Navigation projector – displays data on speed and direction of movement on a diagram (map). It can also show the music being played, the radio station and even play photos and videos.
- The speed projector is a basic device that reflects the speed and number of engine revolutions. It is often equipped with the option of a sound signal when the speed limit is violated.
- Speaking about what a head-up display is in a car, we should also mention multimedia systems.They perform a lot of different options, for example, they reflect all the data from the dashboard, sound alarms when there is a violation, project images of photos, videos, mp3 files and others.
How to install the projector
You can do the installation yourself if you follow the instructions carefully and clearly. The main stages are:
- The projector itself is placed on the dashboard next to the steering wheel.
- Remove the trim that covers the left pillar, as well as the front panel of the car.
- Find a cluster of wires coming from the hood, pull the wiring from the projector.
- They lift the hood, find the wires, remove the insulation and pull them out of the cabin.
- Disconnect the “-” terminal from the battery.
- To place the best projector on the windshield, the red wire next to the left pair is shorted to positive, the black wire is connected to ground. There is also a white wire - it is mounted on the sensor that determines the speed.
- Connect all the wires into a common bundle and apply insulation.
- Return the firmware to its place and check the operation of the device.
As you can see from the instructions, installing the projector itself is not difficult. Difficulties can only arise with searching, insulating wires, as well as connecting different contacts. If you are not sure, it is better to entrust this work to a professional.