Wall, sockets and other important objects for installing the projector
The projector can be mounted to the ceiling, wall, or simply placed on a flat surface. It can serve as a table, cabinet, chest of drawers and even the floor. If the wall under the projector is white and has a matte surface, it can be used as a screen. In other cases, you will need to hang the canvas as well. This article describes where and how best to mount the projector.
The content of the article
Where can I install the projector?
When installing the device, you should take into account not only the comfort of the audience, but also practical issues, for example, where the sockets for the projector are located. Several places are suitable for placement:
- ceiling;
- wall;
- flat surface (shelf, cabinet, table).
Ceiling
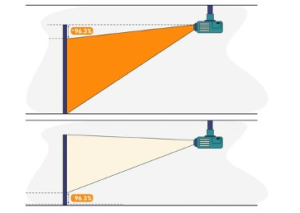
Before mounting the device to the ceiling, you should understand what outlets are needed for the projector. Almost always it works from a standard 220 V network. It is equally important to determine the distance from the screen. It depends on the size of the canvas, which lies in the range of 1.15:1 – 2.8:1.
Calculating the distance is quite simple - to do this, its diagonal is multiplied by the first number. For example, if the diagonal is 300 cm, then 300 * 1.15 = 345 cm. Thus, the minimum distance will be 3.5 m. The maximum is approximately 2 times larger, that is, no more than 7.0 m.
Before installation, it is also recommended to check which cables are needed for the projector. Included are digital HDMI extenders with a USB connector.But their standard length (2 m) may not be enough - in this case, you will need to purchase another wire.
The installation process itself looks like this:
- Calculate the optimal distance.
- Apply a corresponding mark to the ceiling.
- Using a hammer drill, holes are made to install the bracket.
- Secure the bracket and carefully check it using a level.
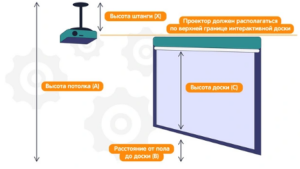
- The projector is attached to the bracket at an angle to the screen. The device should be in line (parallel to the floor) with the upper border of the canvas, as shown in the diagram.
- Connect the wires for the projector, turn on the device and adjust the image. In this case, you need to take into account the positive and negative offset specified in the instructions. This will ensure that the image does not appear above the top or below the bottom edge of the screen.
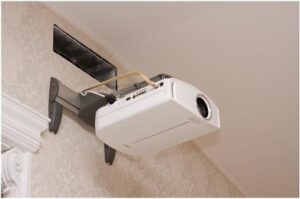
Wall
If the wall is not finished with wallpaper, it is enough to paint it with white paint with a matte surface. But most often this will not work, so you need to secure the projector to a bracket. Moreover, the support in this case will be of a different type. The design is slightly different from the ceiling one, but the sequence of actions is approximately the same:
- Determine the optimal distance.
- Make markings on the wall.
- A puncher is used to create holes for fasteners.
- Mount the bracket.
- Attach the device and plug it into an outlet under the projector.
- Turn on and adjust the image.
Flat surface
Finally, the device can simply be placed on a flat surface. The easiest option is to place it on the floor. You will need to unscrew the legs as much as possible, adjust the angle and distance. It is worth considering that the operating rules for the projector prohibit installing it on a carpet or other fleecy surfaces. Otherwise, they will interfere with the free removal of warm air.
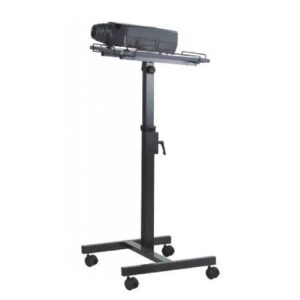
Similarly, you can install it on a closet, cabinet, chest of drawers, or even just on a table. If the height of the legs is not enough, you can put 1-2 books. But this is a temporary solution - it is best to purchase a special stand that allows you to adjust almost any angle.
How to set up your projector
For correct operation, you will need the entire kit, including wires to connect the projector. After installing the bracket, you should turn on the device and perform hardware configuration:
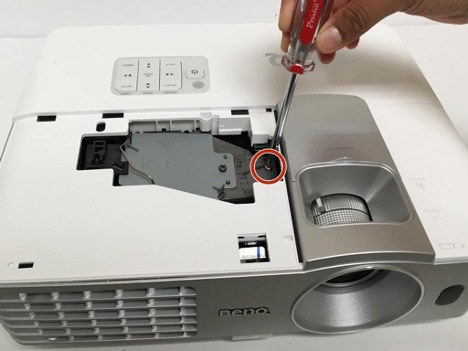
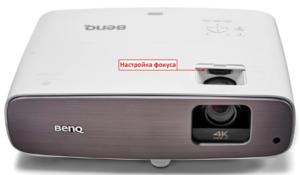
- Reduce the height below or above the lens using the wheel or remote control.
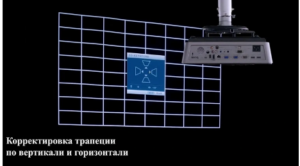
- If the picture is “skewed”, select the option to correct keystone distortion.
- Adjust clarity and sharpness - you can freeze frame the titles of a film or video.

- Frame a frame with clouds in the sky and adjust the contrast, paying attention to the degree of expression of the edges.

- Measure and, if necessary, adjust the brightness based on a contrasting image, for example, a black coat on a light background.

- Choose a color palette from several bright frames, for example, with natural landscapes, a flower shop and city views.

If the image is still faded, you should check if the economy mode is turned on. The reason may also be related to the lighting in the room - if possible, the room should be darkened. It is best to do the adjustment in the evening or with blackout curtains closed. Moreover, it is worth considering that over time the lamp will still begin to shine worse, so you will have to purchase a new one or adjust the settings themselves.
It is clear what wires are needed for the projector. When purchased, they always come as a set. At the same time, it is worth taking into account their length, and for this it is necessary to calculate the distance in advance.It is recommended to use a level while working - then the image will be clearly projected on the screen.