How to enable WPS on a router
The WPS Wi-Fi Protected Setup button allows you to turn on the wireless Wi-Fi network. Even a person who is not very knowledgeable about such issues can figure out the connection. This also ensures that the feature can be enabled safely. Let's see how you can enable WPS.
The content of the article
Enabling WPS on the router
WPS is a key that allows you to turn on wireless Wi-Fi. It makes the switching method easier, because usually you have to perform some software steps to connect, and thanks to the button, we only need to wait 2 minutes until the connection between the devices is established.

This makes using the network easier and safer. But not all routers have this button. But that doesn't mean they don't support this feature. You just need to take the appropriate steps directly in the system.
What difficulties may arise
Usually there are no difficulties. But Wi-Fi may experience interference in bad weather. Its operation is often affected by strong wind, rain or lightning. If the weather conditions are good, but the wireless connection still does not work, one of the devices (router or computer) may be damaged or their settings have been lost. It is better to contact the service center.

Step-by-step activation of WPS on the router
The setup process is very simple. You just need to find the WPS button on the router and click on it.This will enable wireless communication and will take some time to detect devices. There are two connection methods:
- Program.
- Hardware.
Hardware connection
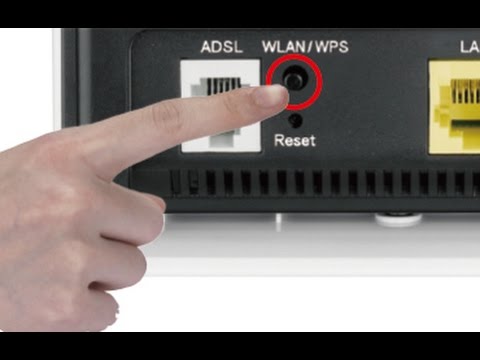
Your router should have a WPS button (may be called QSS). Press this button and hold it for 5 seconds.
Attention! In many models, this button is also responsible for system settings. And if you hold it for more than 5 seconds, they can be reset to factory settings. The button is located on the bottom panel of the device. After pressing the button, you need to wait about 2 minutes until the connection between the devices is set up.
The network identification name will remain the same, but the password for connecting to the network will change; it is generated randomly.
Software connection
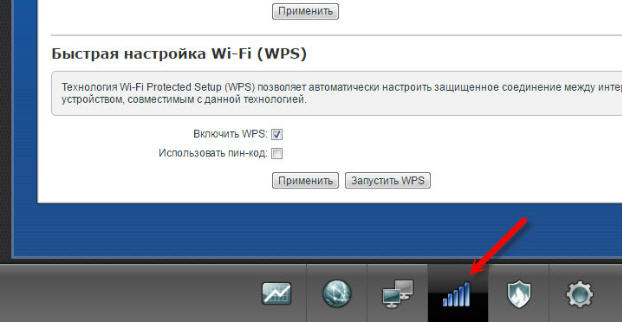
Some devices do not have a WPS button on the body, but at the same time they are able to support the Wi-Fi Protected Setup function. This means that we need to configure it manually. There should be a Pin code on the label (located on the lower body of the device). Let's remember it. If the sticker is damaged, you can go to the device's web interface and find it there. We look for the icon on the computer that is responsible for the wireless network. Click on it. We will see a list of all available networks. Select our router and click on “Connection”.

This will launch the connection wizard. This is where you will need to enter your PIN code. Click Next. We are waiting for the computer to connect to the wireless network. If there are no initial settings on the computer, after entering the code, a window for setting up Wi-Fi will open. Specify the SSID, encryption and password key. We write down the last one, since it will be needed in the process of connecting other devices to this network.
The WPS button really makes connecting to a wireless network easier.Now to connect, just press it and wait 2 minutes. This also makes the connection process safer.


