Signs of a faulty computer power supply: how to identify them yourself
There are fairly reliable signs of a malfunctioning computer power supply, which can be used to determine the breakdown. One of the main symptoms is that the PC turns on uncontrollably and does not turn off for a long time. You can navigate by extraneous sounds during cooler operation and other manifestations. Step-by-step instructions for diagnosing breakdowns are described in this article.
The content of the article
Main symptoms of a malfunction
If there are problems with the computer's power supply, the symptoms will appear clearly. The main symptoms of a malfunction are:
- The PC turns on on its own, and this can happen at any time;
- the system cannot go into sleep mode - the computer remains turned on;
- after turning off, the device turns on immediately or after a while, and unexpectedly;
- the fan in the power supply stops spinning;
- The PC starts from the button (as usual), but after a few seconds or minutes it turns off.

In these cases, the computer's power supply will most likely need to be replaced. Although sometimes the problem is not with this element, but with others. For example, the user installed a very powerful video card, and the power of the unit is no longer enough. If you do not purchase a more advanced model, the old one may not work properly.In this case, the ways to understand that the power supply is faulty are exactly the same.
Causes of malfunction
Replacing the power supply may be necessary only in cases where its repair is impractical or impossible. To verify this, you need to assume the cause of the malfunction:
- Voltage drop is one of the common factors. Has a bad effect on various types of household appliances.
- External damage, for example, kinks in the wire, mechanical damage.
- Cheap, low-quality materials require complete replacement.
- You also need to figure out how to change the power supply on your computer in cases where battery faults are detected.
Self-diagnosis: step-by-step instructions
As already mentioned, replacing the power supply is not always necessary. First of all, you need to determine the exact cause of the malfunction. You can do this yourself - below are step-by-step instructions.
Step 1. Visual inspection
If the power supply is faulty, this can be determined through a routine inspection. The easiest way is to temporarily replace it with another device, and if the computer starts working normally, then the reason is definitely related to the block.
To carry out a visual inspection, proceed as follows:
- Turn off the PC and remove the plug from the socket.
- Unscrew the screws and remove the side wall of the system unit.
- Using a screwdriver, unscrew the screws securing the block and pull it out.
- It is not necessary to disconnect the wires - you can carefully remove the frame and inspect it.
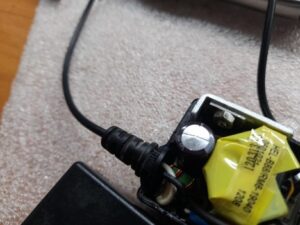
- They check the capacitors - if they are deformed or swollen, this probably indicates a breakdown.
- Inspect the cooler with bearings. You can determine the performance during operation - if there are extraneous sounds, the parts are out of order. If necessary, it is replaced.
Step 2: Check with a paperclip
It is clear why a power supply is needed in a computer. This is a device that provides electricity to all PC components. If it breaks, the system will work intermittently. Therefore, at the second stage of the inspection it is necessary to proceed as follows:
- Disconnect the computer.
- Disconnect all wires - connectors going to the board, processor, video card.
- Take a paperclip or strong wire and bend it into a “U” shape.
- Find a 24-pin type connector (lots of wires tied together). Find the connector for the green and black wires, close them through a paper clip.
- Plug in the unit (do not touch the paper clip with your hands). If it works, but the cooler gets hot, you will only have to change this part.
This method of understanding that the power supply has burned out cannot be considered universal. Even if the device works, additional diagnostics are required.
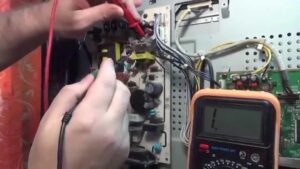
Step 3. Test with a multimeter
Using a multimeter allows you to get more reliable conclusions about breakdowns. To check, proceed as follows:
- Switch the device to voltage measurement mode.
- Leave the paperclip in the same position as described in the previous section.
- Measure the voltage level between the black and orange wires. Normally, it should be no less than 3.14 and no more than 3.47 V.
- They “ring” between the black and purple wires. Normal range is 4.75-5.25 V.
- When studying how to understand that a computer power supply has burned out, measure the indicator between the red and black wires. The value should be approximately in the same range as in the previous case.
- Measure in the area between the black and yellow wires. Normal values are no less than 11.4 and no more than 12.6 V.

It is clear what the power supply in a computer is responsible for, and in what cases it can break.The most common case is a problem with voltage drop. This can be prevented by installing a stabilizer. There is an option to purchase a pulse unit, but it cannot protect in all cases.
Therefore, it is advisable to learn how to identify the signs when a computer power supply has burned out. You can perform simple repairs, for example, replacing the cooler yourself. however, it is better to entrust more complex types of work to a professional. You will also have to contact a specialist in cases where it is difficult to determine the signs of a breakdown in the computer power supply.