How to find out the printer port
 It is not uncommon for technology users to encounter the problem of how to recognize the printer connector. Even a beginner can solve this issue; you don’t need to look for special software for this. You can find out the connector using the usual settings directly in Windows.
The content of the article
How can I determine the printer port?
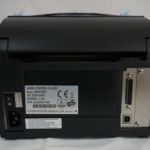
If you need to find out the equipment connector, then first you need to know that most old devices of this type use the so-called LPT port as a connection.
Attention! As for equipment with USB, most of them have a special function called Plug&Play.
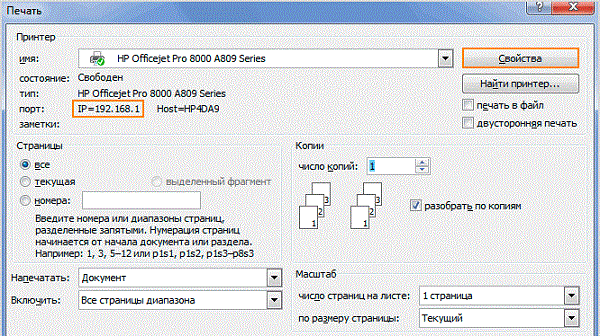
This option is used to determine and configure the device configuration on the computer:
- To determine the port, you need to go to the main menu by pressing the “Start” key. In the list of devices that appears, you need to find the “Printers and Faxes” section and click on it.
- In the list of equipment that appears, find the icon and name of the device used for printing, and right-click on it to display the device menu. In the list that appears, find the “Properties” menu.
- In the new dialog menu, go to the ports section. Here you can find out the connector used for the printing device.
- To use a new device on your computer, you need to use “Start” to open “Control Panel” and find “Printers”. Then go to the submenu with a list of printing equipment.
- In the window on the left you need to find the option responsible for installing printing equipment.Then click on it twice with the mouse and, skipping the first dialog menu, click “Next”.
- Find the “Local Hardware” line in the new installation wizard menu and check the box. Wait a certain amount of time until the system automatically finds the device connected to the computer. If the installation wizard does not find the module that is responsible for connecting printing equipment, then click “Next” and go to “Use port”. In the menu that appears, click “LPT 1”. At the end, you need to save the added changes and make manipulations, which will then appear in the window.
Depending on Windows
Installation of printing equipment taking into account the operating system.
For Windows 10
Most often, to set up printing equipment, you simply need to connect it to a PC. To do this, insert the USB cable of the printing device into the USB connector, connect the printer to the network and turn it on:
- Go to “Start”, after the “Settings” menu, select “Devices”.
- Find "Add". After a while, the computer will detect the printing equipment, then “Add device”.
- If the printer is not listed, click “No hardware available,” then follow the instructions to manually add the device using several options.

For Windows 7
First, you need to examine the tab with information about all printers connected to the computer. Through “Start”, go to “Control Panel” and click.
A list of available devices appears. Go to “Printers” and identify yours by name. This is especially true if several printers are connected to the computer. Right-click on the desired device and go to “Printer Properties”.
The new menu will most likely have several tabs. You need to find the “General” item.The “Location” line usually indicates the exact IP, for example, 192.172.15.0. Rewrite it, so you can later determine the port of a specific printer.
In general, there is nothing difficult about installing a printing device on a computer. The most important thing is to correctly decide on the connection method.

