How to completely remove a printer in Windows 7
 Sometimes it happens that a person has not used a particular printing device for a long time, but it is still in the list of equipment in the OS interface. The driver for this printer is still on the PC, which sometimes additionally loads the operating system. That is, you need to uninstall the driver.
The content of the article
When to remove a printer from the registry
Why is it necessary to uninstall the driver: for starters, when certain failures occur during its operation or it is impossible to install new drivers if you do not uninstall the old ones.
Naturally, other reasons are also likely - for example, the printer simply broke down and there is no way to use it, so a new MFP was purchased.
Methods for removing a printer
You can completely uninstall the printer driver from a computer running Windows 7 using special applications or using only operating system tools.
Reference! The first method is the simplest, but the latter is much more reliable. In addition, in this case there is no need to additionally install various programs.
Removing a printer in Windows 7 completely: step by step
Main stages:
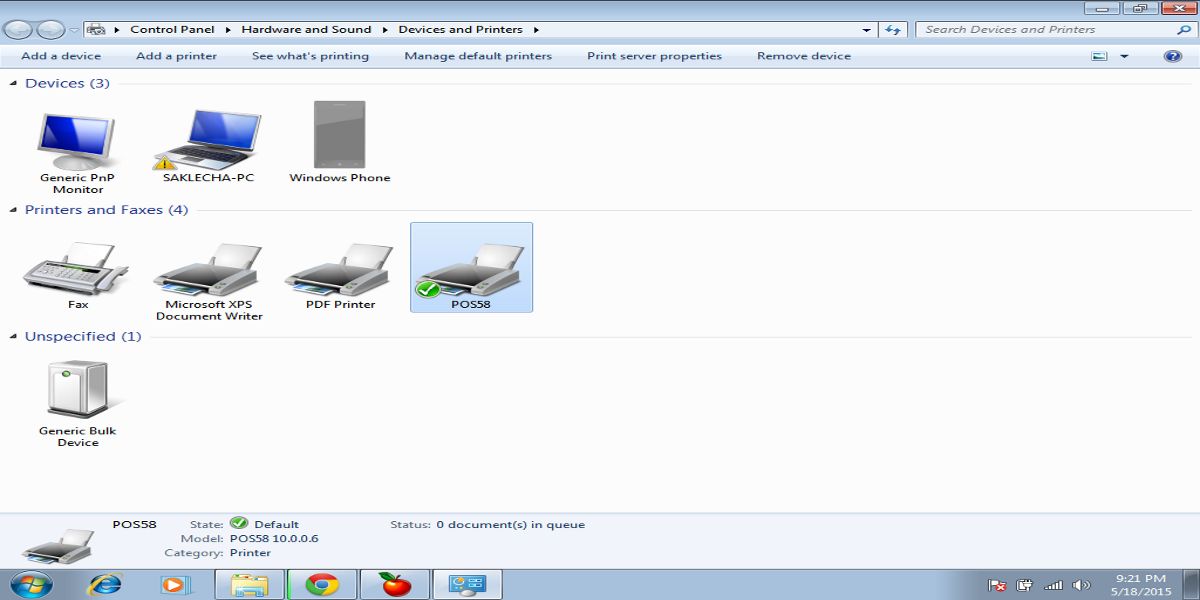
- To uninstall the printer from Windows and remove all its additional files, you first need to enter the “Control Panel” menu, which contains a list of connected equipment.
- Find the required device among the entire list of specified devices. Open the menu by right-clicking on the shortcut.
- In the list that appears, find and click on the item that launches the uninstallation program for this equipment. This removes the printer driver.
- Go to the “Run” command line again, specify “Services.msc” to go to the “Services” section. You can get to the section in the “Control Panel” using administration. Here you need to select “Print Management” and right-click on the icon. In the list that appears, select the file that is responsible for restarting this service.
- The performed manipulations will restart the above-mentioned service. This procedure is required to correctly uninstall the driver.
- Then you need to contact the print server. Open Run again and enter “printui/s/t2” in the command line. A menu with print server options will then appear.
- Go to the tab in which all the drivers are located, then look for the option related to specific equipment and, after checking it, click “Delete”.
These were the main stages. But this is not the final process, since these actions will not delete all files of the printing device on the PC. Therefore you need to do the following:
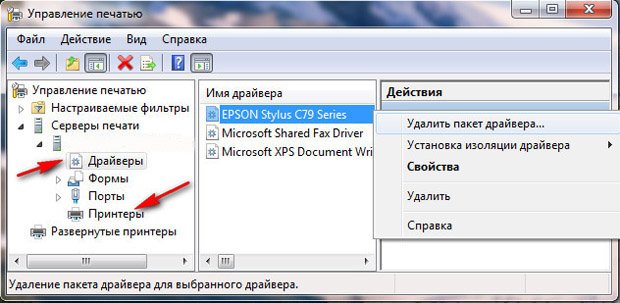
- Go to “Print Management”.
- In the new menu you need to find “Filter settings”, then click “Drivers”.
- After the above steps, the drivers will be visible on the left side.
- Find the equipment and, having gone into its parameters, click the uninstall button.
Application uninstall panel
Then you need to uninstall the software specific to your specific printing equipment.Why you need to use Windows 7 tools using the application uninstall panel.
Find everything that relates to the printer from the list of available software and uninstall it. Moreover, this method is suitable for any version of Windows. Only in Windows 10 the names of the items for printers are different.
Cleaning Program Files
But before you reinstall the equipment or connect a new printing device to your computer, you need to clean out the “garbage”. To do this, go to “Program Files” and uninstall here all files related in a certain way to the printer.
Registry cleaning is also required. To do this, you will need to write “regedit” in the “Run” menu. In the new menu you need to select “Edit” and then click on the “Find” section in the list. Enter the name of the printing equipment in the search engine of this menu and click “Next”. Everything touching the printing device will light up. In this case, you only need to delete these files until the program displays information that there is nothing on request.
Attention! Then you just need to restart the PC and, if necessary, install a new driver or perform other manipulations that the old software did not allow.
The driver cannot be uninstalled
Sometimes it happens that the printing device cannot be uninstalled. You need to find the registry by going into it “regedit” and typing “Run”.
Then go to “HKEY_LOCAL_MACHINE\SYSTEM\CurrentControlSet\Control\Print\Environments\”, look for “PrintProcessors”. The files must be named differently, for example, instead of copy write copy_hold. Then go to the print manager, remove the desired device from there, and disable the service.Afterwards, rename the files and turn on this manager again. Using these steps, you will probably be able to resolve the issue of uninstalling the printing device driver.
If the above option did not help, you can do the following:
- Go to "Printers". Find the required equipment here, then uninstall.
- Enter “Control Panel”, after “Services”. Find “Manage Printers” and disable this feature.
- Go to the registry, go to “HKEY_LOCAL_MACHINE\SYSTEM\CurrentControlSet\Control\Print\Environments\Drivers\”.
- Find the program to uninstall from your computer, now you need to name it differently.
- Re-open the print manager, uninstall the device from it, as indicated at the beginning of the article.
The main reason for equipment malfunction is software that was installed from unverified sources. Therefore, to uninstall it you need to follow the recommendations described above. This can solve the problem with the printer.