How to completely remove a printer in Windows 10
 Many computer owners have a printer - with this device, you can print not only the most important documents, but also any excerpts from books, pictures and everything that is more convenient to perceive on paper rather than from the screen. But sometimes the printer driver needs to be completely removed from the PC. The need for this arises for a variety of reasons, but the simplest is that you no longer use the device. How to do this? What exactly needs to be done to uninstall it in the Windows operating system? You will learn about all this in this article.
The content of the article
Removing a printer through Settings
The first way is to delete it through “Options”. Let's take a closer look at the sequence of actions.
IMPORTANT! Please note that in order to get rid of a driver that has become unnecessary, you must log in through the Administrator account - that is, the first account created that has the ability to remove any programs and drivers. Otherwise, you will need to enter a password for this account, so if you are not the only one using the computer, check this information.
Settings is one of the most convenient applications that has been greatly improved in the updated Windows 10. How can you use it to remove a printer?
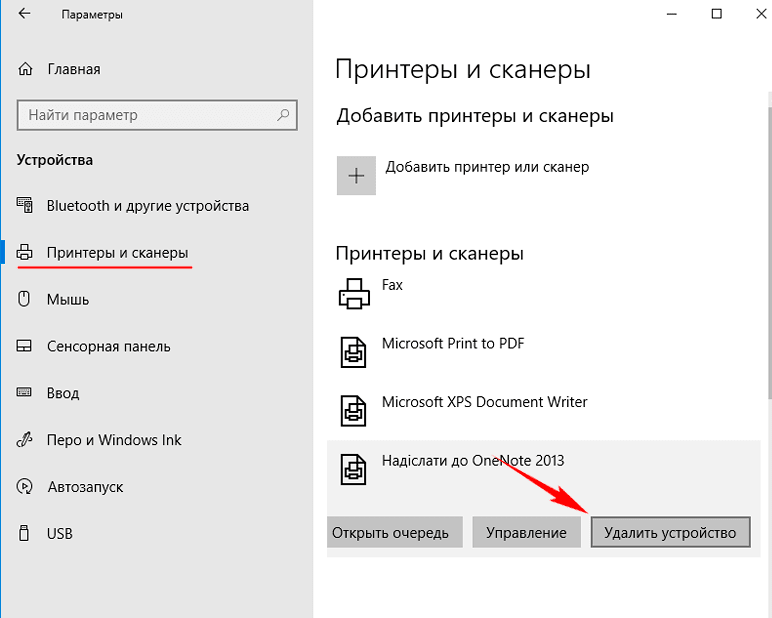
The first thing you need to do is go to “Devices”, where you will find the “Printers and Scanners” tab. From the list that appears, you need to select exactly the printer that you no longer plan to use and click “Remove device”. This completes the entire procedure.
How to delete a printer in Print Management
There is another way to remove a printing device, which not every user knows about. Meanwhile, this operation is quite simple and does not require special skills or in-depth knowledge in the field of technology, as well as a lot of time.
You will need to press several keys on the keyboard (combinations of any buttons are called “hot keys”; there can be many such combinations), and then enter a certain letter code. Let's look at the sequence of actions in more detail so that every computer owner can use this method to remove the printer driver.
The first step is to press the two key combination: Win+R. A special input field will appear on the screen where you need to insert the text code: printmanagement.msc.
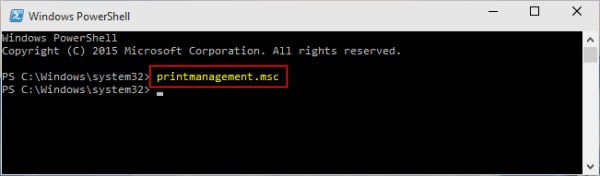
After this, you need to go to “Print Servers”, where the name of your PC will be written - please note that if you did not install it yourself, the name usually contains the name of the manufacturer and model of the computer. Now select "Printers". When you right-click next to it, a context menu will appear in which you need to select the “Delete” option.
Thus, deleting a printer through Print Management is as easy as using other methods. But it is undoubtedly worth studying all the others in order to choose the most suitable and convenient one for yourself.
Removing a printing device from the Printers folder
The Windows 10 version hides a folder called Printers, but that doesn't mean you can't use it to remove an unnecessary driver. You can also open the required folder by entering a special code into the window, which is called up using a hotkey combination.
IMPORTANT! Please note that hot keys are very useful combinations with which you can perform a huge number of different operations. That is why you should search on the Internet or in the instructions for lists of all the most important combinations that may be useful during the further operation of the device.
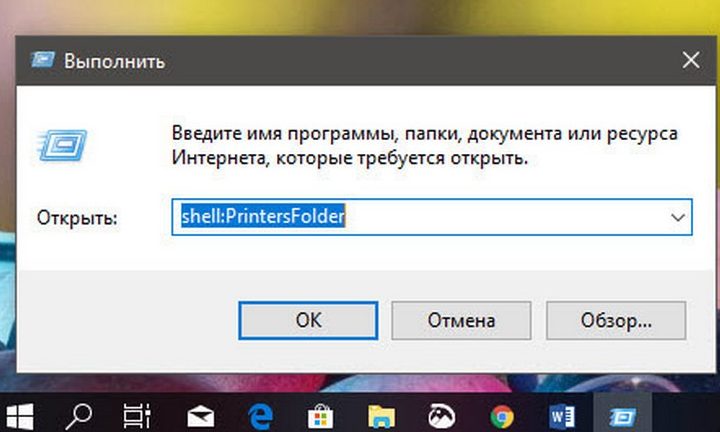
As mentioned earlier, to open the input window you need the combination Win + R. In the field that opens, paste the following code: shell:PrintersFolder. A special folder will open in which you will see a list of all ever connected printers and other devices with similar functionality. Select the unnecessary one and click on the “Delete” button, which will appear in the context menu.
How to remove a printer through the Control Panel
Removing it through the Control Panel is practically the easiest way. This is explained by the fact that the classic panel is familiar to every user, regardless of the version of the operating system and the level of “advancedness” in using technology.
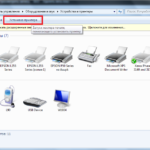
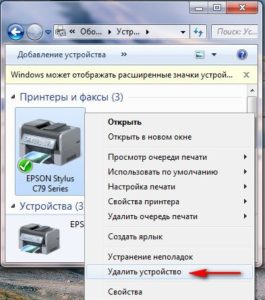
You need to go to the "Devices and Printers" section. In order to minimize the time spent on this operation, use a special input field, which will independently search for the section you need.
Then all that remains is to perform the simple actions already familiar to us - call up the context menu related to the printer to be deleted and select the “Delete” option.
Using Device Manager to remove a printer
In the “Device Manager”, which can also be opened using hot keys, you need to find the “Print Queue” section. In the items that open, you will see all available printers whose drivers are present on the computer.

In this list, you need to select the printer to delete and click the “Delete” button that appears in the context menu.
As you can see, in most cases the whole procedure comes down to opening the context menu and deleting an unnecessary file on the computer. This is a traditional method that works with a huge number of files.
IMPORTANT! Please note that unused drivers or a large amount of unnecessary media load up the computer's memory, which can cause it to start working incorrectly. That is why you should get rid of them in time.
Now you know how to remove a printer that you no longer use from your computer. This can be done in several ways at once, which allows anyone, even the most insecure user of a personal computer, to choose the most convenient and fastest one. You can also inspect your PC storage for other unnecessary drivers and remove them in the same way so that nothing interferes with the fast and comfortable operation of the device.