How to disassemble the printer
 Sometimes various problems may arise when working with the printer. Usually they are resolved quite simply. Most often, it is enough to check that all wires are connected correctly and reboot the system. After this, automatic diagnostics and troubleshooting will occur.
However, in some cases the source of the problem lies within the printer's design. In this case, it is necessary to provide access to the parts located inside the housing under the main panel. We are talking about disassembling the device. This must be done very carefully so as not to damage the parts and not disrupt the functioning of the equipment. If you have already encountered a similar problem, you can get to work. For beginners, it will be useful to read the instructions so as not to break the product when disassembling the structure.
IMPORTANT: If you repair or replace parts yourself, please remember that the warranty will become void in this case. If you doubt your capabilities, it is better to contact a service center.
The content of the article
How to open the printer?
 To provide access to the internal components, simply look inside; for this purpose, open the cover. You can do this as follows:
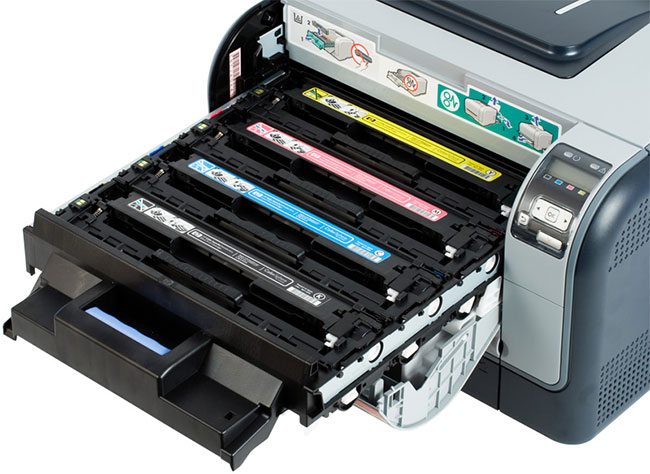
- While the printer is running, pause printing for a while. Place the cartridges in a quiet position to stop their movement.
- Lift the main cover of the equipment.Be careful when handling the laser model; internal parts may become very hot.
- Remove the cartridges by pulling the special handles or notches without any sudden movements.
- If there are retaining clips, carefully bend them back. Now you will have access to the internal elements to find the problem and fix it.
IMPORTANT: Perform all actions carefully and in compliance with safety precautions. Don't try to rush; too much haste can harm the process.
How to safely disassemble the printer: instructions
 Once you have access to the internal parts, you can begin disassembling the printer's components. To do this, follow these steps in order:
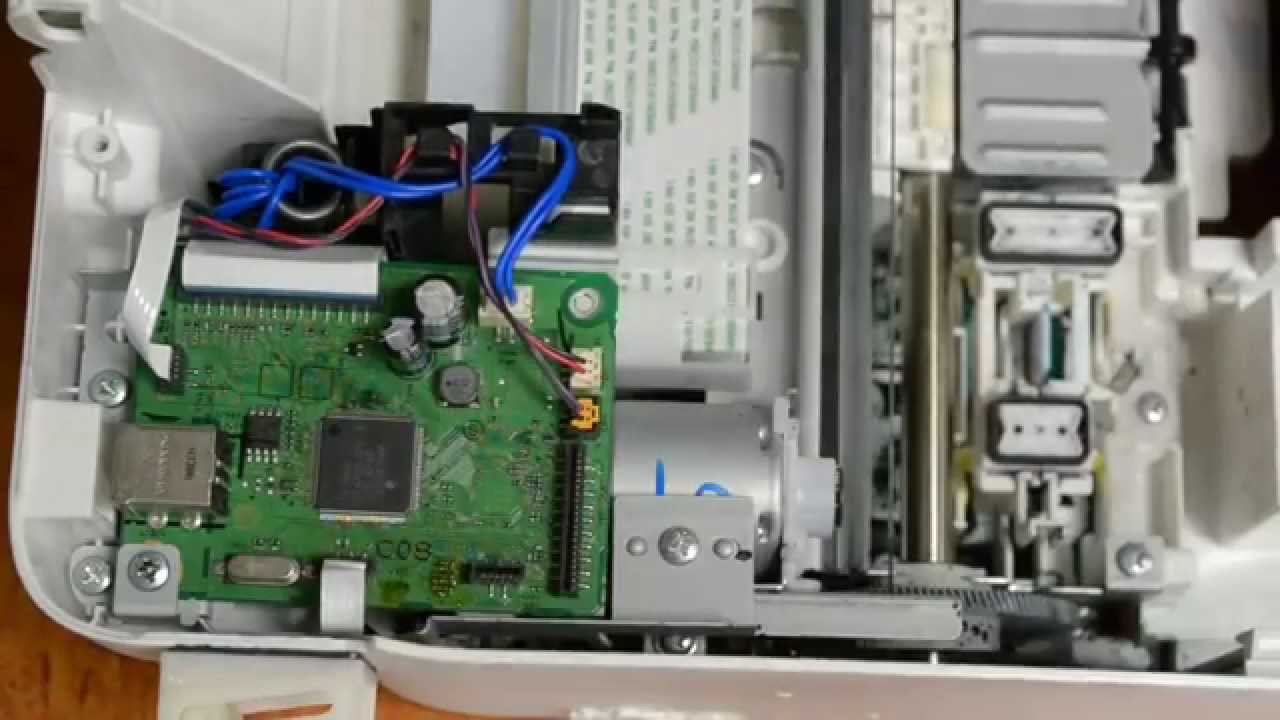
- Using a screwdriver, carefully unscrew all the bolts on the outer panels of the product. First remove the side sheets, then the top cover panel.
- Remove all parts of the rollers that pick up and feed paper into the print compartment.
- After this, proceed to dismantling the deeper systems, unscrew the screws holding the frame.
- Now you have all the components of the device at your disposal. The further course of action depends on the location of the source of the problem.
To perform the steps described above, you will need a screwdriver and available materials that can be used for convenience. You should prepare in advance the workplace where you will disassemble the equipment. Remove any foreign objects and cover the surface with rags or paper sheets to prevent any remaining paint from getting on the interior elements. It is also worth preparing a place where you will put the parts of the disassembled case.
Do not forget about the printer diagram and instructions for reassembling the device.To perform this, you will need to become familiar with the main components and operating principles of the equipment.