How to print a picture on a printer from a computer
 It just so happens that having bought a computer, we certainly think about the fact that we need to buy a printer. This is not surprising, because the need to print something arises every day. These include coursework, an interesting screenshot from your favorite game, and various photographs. In a word, there is more than enough work for the printer. Another thing is that not every person, especially older people, knows how to properly use all this equipment, much less various software. Let's try to understand all these questions in more detail.
The content of the article
How to print a picture from a computer?
In order to print a picture on a computer, you need to do the following procedure:
- Connect the printer to the electrical network.
- Check if the printing device is connected to the computer. If the device is connected, make sure the drivers are installed for it. Without them, printing will be impossible. Drivers can be installed from the disk that came with the device. If the disk is lost or damaged, you need to visit the printer manufacturer’s website and select your hardware model and download the necessary software.
Once all the prep work is completed, you can start printing what you need.In principle, the Windows system provides quite a lot of opportunities for saving a digital image on a hard drive.
The simplest thing is to open the desired picture for viewing in the Windows Photo Viewer.
In this program, you can not only view the image, but also perform some simple actions with it.
 In order to print a picture from this program, you need to open the menu “Seal" and already in this menu, select the item "Seal". Or press the key combination Ctrl+P.
You don't have to open this program to print the image. It is enough to select the desired file in any folder and right-click to open the context menu on it.
In this menu, you will need to find the item “Seal". It makes no difference what you do, the first way or the second. The result of your actions will be a call to the print dialog.
The first step is to select a printer to which the images will be printed. Even if you only have one printing device, go to the drop-down list and make sure you make the right choice.
REFERENCE! The fact is that many programs create their own virtual printers in the system. The next step is to select the size of paper on which to print.
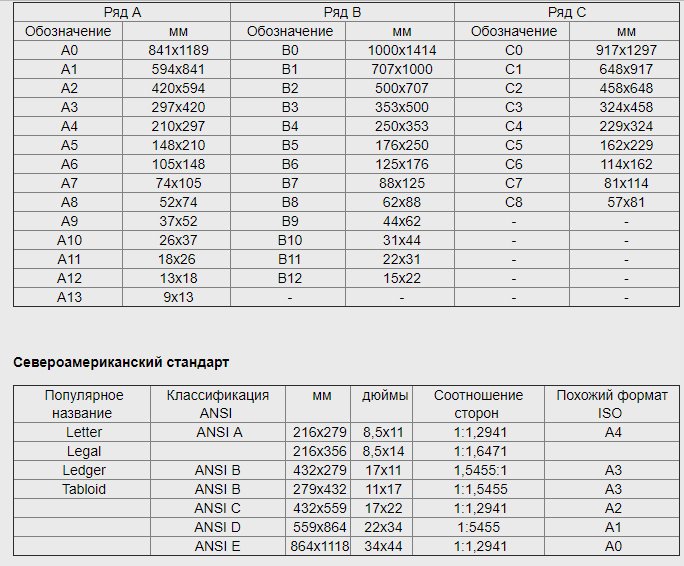
Considering that there are a huge variety of formats and in Windows they are presented both in the GOST system and in the North American standard, to make it easier to navigate, use the format table.
Once you have figured out the format, you need to select a layout for printing.
At the same time, you can specify the number of copies of the image to be printed. And the end of all operations will be pressing the button “Seal«.
How to increase or decrease the size
Very often the question arises of reducing or increasing the size of an image before printing. There are several options here and it all depends on how and in what program the pictures are printed. The most basic option if printing is done from Word.
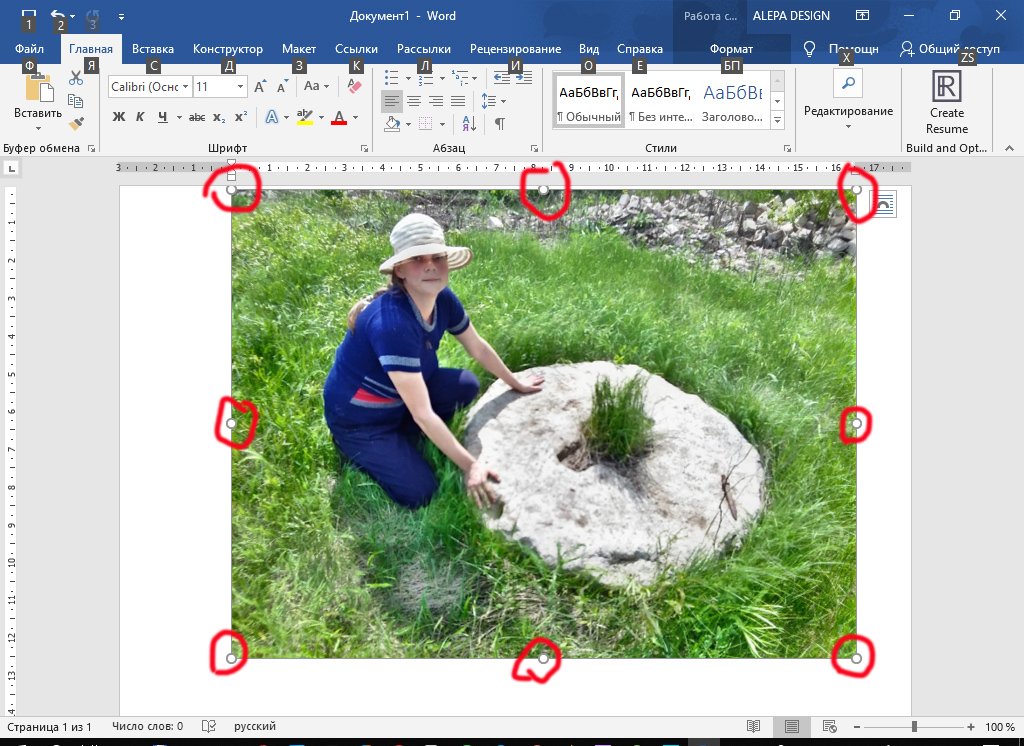 In order to change the size in this program, you should select the desired image with the mouse.
Please note that special markers have appeared around the perimeter. They serve for resizing and also for rotation.
It is enough to grab one of the markers with the mouse and drag it towards decreasing or increasing.
But often printing does not come from this program. What to do in such cases? The best software for working with graphic images is Photochop. But not everyone has this software on their computer and not every person knows how to use it.
REFERENCE! To resize the image, you can use Internet services.
This is very convenient if preparation for work is carried out, for example, from a smartphone or tablet. In fact, even being in nature, you can not only take photographs, but having access to the network, bring all the images to the same format.
To do this, first of all, you need to go to the website. In the work field you need to select the required picture.
Please note that the service has several tabs. When working with the “Proportional” tab, use the slider to change all image sizes at once. On the “Disproportional” tab, you can change the width and height separately.
The remaining tabs are clear by their names. The service allows you to upload several images at once and the sizes can be changed in batches.
How to change orientation before printing on a printer
Sometimes situations arise where it is necessary to change the orientation of the image before printing. The easiest way to do this is in the same image viewer that comes standard with Windows.
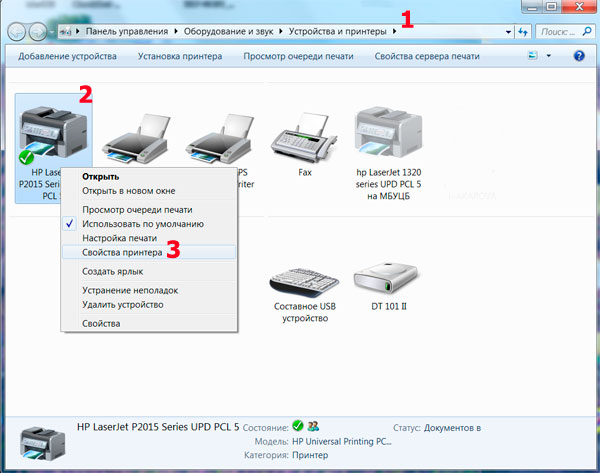 After the image is opened, you need to use the arrow keys. They allow you to sequentially flip the image. Depending on which button you press, the rotation will occur clockwise or counterclockwise. To save the result of your work, simply close the program. All changes will be automatically saved.
Concluding our conversation, I would like to recommend the following. For high-quality printing of images, be it pictures downloaded from the Internet, or photographs taken at a picnic, it is best to use the software that comes with the printer. As a rule, this software is designed specifically for printing photos, so it has a very clear and friendly interface, as well as many settings. Thanks to this advanced functionality, even a less knowledgeable person can print a photo at a professional level without much difficulty.

