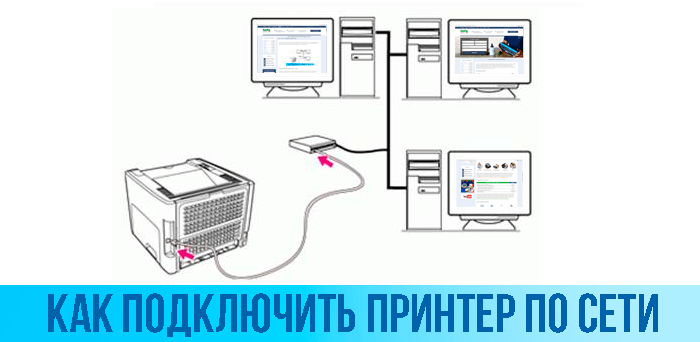
How to connect a printer via local network
A printer is a peripheral device for outputting information. By converting the electronic format into printed form, paper media are obtained. Nowadays, there is a huge range of equipment for various purposes: office work or home use. If you wish, you can choose a device based on your personal preferences, parameters and financial capabilities. Good and high-quality equipment is available in different price ranges.
Typically, printers are used to print documents and images, but with the advent of the Internet, the list of possibilities has increased. With global network access, users can easily collaborate and share files online for fast work. However, to obtain these features and benefits, your equipment must be connected correctly and synchronized with your computer.
For experienced users this will not be a problem, but the first time you try to turn it on, questions may arise. We will try to answer them in the article, and will also describe a detailed plan for gaining access to a network connection. This information will be especially useful for beginners who are faced with a similar task for the first time. Regardless of whether the owner has MAC or Windows.
The content of the article
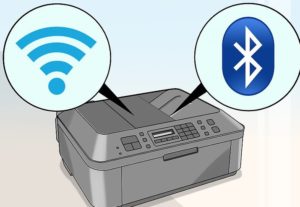
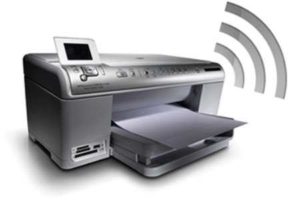
How to connect a printer via wifi?
Before you start working and setting up the system to improve quality, you should make sure that the connection is correct. If you haven't already done so, use the step-by-step instructions to connect and register your printer on your local network:
- Connect the equipment to the power source. Connect the printer to the computer port using a wire.
- Download the software and driver package using the installation disc that came with the hardware you purchased.
- After that, go to the main menu using the start button on the desktop or by pressing the corresponding button on the keyboard.
- From the suggested items, go to “devices and printers”. Find the name of your model and right-click on it.
- A small dialog box should appear with a list of possible actions. Select “properties”, and in the menu that appears, click on “access”.
- In the center of the dialog box there will be an inscription “sharing...” Place a checkmark next to it.
- Click OK at the bottom of the window and save your changes. Now your printer has access to the local network.
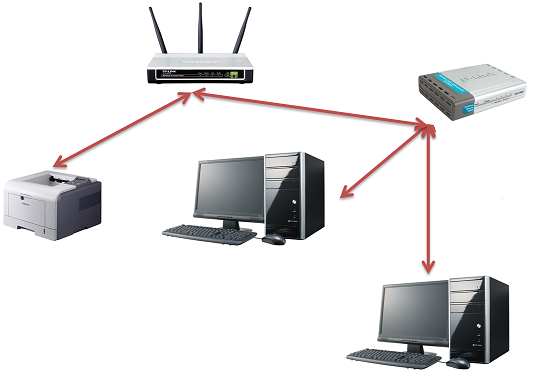
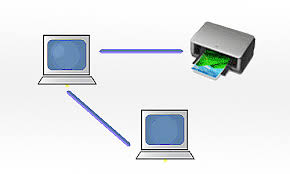
 By using local network access, multiple computers can be synchronized with one printer. This avoids the cost of purchasing additional equipment, and also saves time by being able to quickly switch between computers.
IMPORTANT: When you get access to the local network, you need to make all computers paired in this group. All devices must recognize the printer and connect to it.
How to connect 2 printers to two or one computer?
 If you have several printers in your home or office, you need to connect each of them. Let's look at the option of connecting two devices:
- Perform all the steps for the second printer step by step as described above.
- Go to “devices and printers”, find the new equipment and go to its settings. Usually the first connected equipment becomes the main one, and a green check mark is displayed on its picture.
- Allow sharing as in the first case. If problems arise, you can try changing the IP.
IMPORTANT: During operation, the system will request permission to print; if you constantly use only one printer, set it as the default. Then the program will automatically print through it, this will save time and eliminate unnecessary steps.
This way you can connect several devices at once. The only limitation is the number of connectors on the main processor body. This problem can be solved by purchasing a splitter. But do not overload the equipment, this can lead to malfunctions. And it will be difficult for the user to navigate the printing process.
How to set up a network printer?
 After you have successfully connected, you need to configure the printer. This is necessary for coordinated operation of all paired devices. If you want to print files or documents at a distance from the main processor, you must correctly configure the output of information. Because there are different operating systems, the setup process may vary slightly. In order for you to easily configure the necessary parameters, we will analyze the operating principle for each case.
IMPORTANT: When setting up a network connection, you will need computer access to the Internet (via a modem or router).
Setting up in Windows 7. For convenience and understanding of the basic principle, we will begin to consider the parameters with Windows version 7. To detect the equipment, the system must perform the following manipulations:
- Before you start setting up, you need to know the current IP address. It can be found in the instruction manual, on the product panel, or in the settings. If the program automatically set the values, you need to contact the router and look at the information for the devices.
- Use the search bar in the Start menu to find the printer you need. You can go through the standard path to “devices and printers”.
- Click on the “add printer” button. The proposed options must contain the required item. If it is missing, click on the value “the required printer is missing...”.
- Then click on the “add by ip value” button. Enter the address that you found out in advance.
- After that, save the changes and exit the dialog box by clicking OK. You can also optionally set automatic driver detection and designate the default device.
- When installing the driver, follow the instructions and advice of the download wizard.
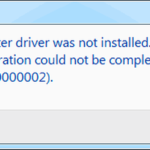
If difficulties arise, try rebooting the system and performing all the steps again. If this does not help, the settings may have gone wrong or the program may have been damaged by a virus. Carry out a thorough diagnosis of the possible causes of malfunctions when gaining access, and if necessary, contact a technician or service center for help.
Setting up in Windows 8. Windows 8 uses a similar rule. Perform all the steps discussed above in order. Connection should not be difficult.If you have any questions, please refer to the instructions and documentation included with the purchased equipment. It describes detailed solutions to issues and practical advice.
The only difficulty will be the slightly modified interface and the names of individual menu items. This will make it difficult to navigate the system, however, the general commands are written the same. Therefore, just follow the instructions for connecting and setting up a local network for Windows 7.
Setting up in Windows 10. The pairing process in this system may seem more complicated. Compared to previous versions, the appearance of the menu has been significantly changed and some options have been replaced. The developers also removed connections to private networks. To complete the setup, use the step-by-step plan:
- In the general information menu, find out the name and address of the PC, this will be needed for further pairing of equipment.
- From the Start menu, go to Settings. After that, select the “Network and Internet” section, and then “Change connection properties”.
- Place a pointer and activate “public”. If the system is blocked by an antivirus, disable it while performing the settings.
- Return to the previous “status” tab. In the dialog box that opens, you need to select options for accessing the local network through the “sharing options”.
- Set up network discovery and pointer to file sharing.
How to set up for two printers?
 If you have multiple devices connected, you will need to configure each device. All steps are performed in turn for each printer. However, if you configure the main device, do not set it to public access.This can only be done after all components of the local group have been connected.
It is also worth considering that the main monitor must remain turned on while the entire system is running. It will serve as a server for files sent for printing.