How to connect a printer to a laptop via wifi
Wireless technologies are quickly gaining popularity among users. Compactness, ease of use and the absence of unnecessary wires are undoubted advantages. We will tell you about simple and fast methods of contactless connection in our article.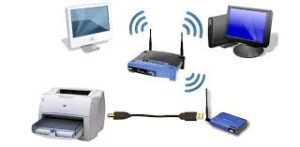
The content of the article
Connecting a printer via a wi-fi router
There are several options to connect the model using a network device:
- Via WPS mode (with software or hardware support).
- Using the router software (depending on the manufacturer).
- Using a special adapter.
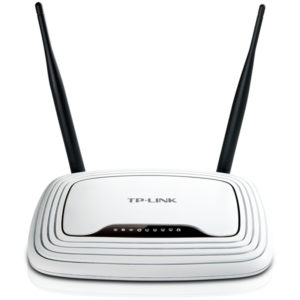
WPS mode is carried out using one of the following methods:
- We consistently enable the function of the same name in the printer menu, then in the router (no more than 2 minutes should pass between activations).
- The option may be located at Network – Wireless – Wi-Fi Protected Setup.
- In the router interface, we find the corresponding switch (for example, WPS Setup) and assign it the Enabled position.
- Additionally, we check the type of enabled protection of the network device; the optimal modes will be WPA or WPA2.
IMPORTANT. MAC address filtering must be disabled on the router.
The second method is suitable if there is an indicator on the hardware panel. We activate the special key first on the printing device (wait until the LED starts blinking), then on the network device.
If the connection is successfully established, the indicator will go into operating mode (will light steadily). The mode must be supported by both the printer and the network station. For the activation method specifically for your model, see the manual (in addition to the usual pressing, the button, for example, can be held for some time).
REFERENCE. At the bottom of the network device you will find a special WPS sign and a code that will be entered when connecting the equipment.
Some router models, such as Asus and TP-Link, can work with special applications, providing detection and further configuration of wireless devices.
Work algorithm:
- The equipment is switched off.
- We connect the printer to the router via USB.
- We pair the router with the laptop.
- We first turn on the network device, wait for it to load, then activate the gadget.
- Download Printer Setup Utility from the Asus website and run the program. For devices from a Chinese manufacturer, the application is called TP-Link Printer Controller.
- We follow the instructions and search for the desired device.
- After detecting the machine using the Printer Setup Utility, you need to add it to the list of available items. To do this, follow the path Control Panel (Settings) – Devices and Printers. In the last section, click “Add a printer.”
- If the search for devices does not lead to results, then click “Find a printer using other parameters” and select “Add a printer by its TCP/IP address or host name.” Then we indicate the router address.
- In case of further problems, we use manual configuration of the TCP/IP port, where we select the LPR protocol, in the “Queue name” column we write the name of the printer. The system will prompt you to install the driver, click on the model name.Downloading and installing the program will complete your manipulations.
- With TP-Link, select the device in the program window, go to the “Tools” section and use the “Auto-connect for printing” option. Further use of the equipment will take place automatically, and no additional steps will be required.
ON A NOTE. If there are still problems with detection, check the reliability and functionality of all connections. Rebooting all equipment (even the laptop) may help.
Printing equipment may contain a special module that automatically establishes communication with the network.
In this case, you only need to adjust the connection to the PC, in the following way:
- Go to Control Panel - Devices and Printers.
- Start searching for a printer. Here you can use manual configuration of the TCP/IP port; in its window, fill in the address of the printing device (it can be viewed in the router settings).
- As a result, the system will detect and apply the latest drivers.
- You will receive a message indicating that the hardware has been installed successfully.
Setting up a wi-fi printer
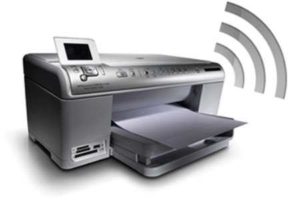
Procedure:
- Install the cartridges, connect the power cord, and turn on the printing device.
- The gadget will automatically perform the initial settings.
- Select the appropriate method of pairing with a PC.
- Save the selected configuration.
The easiest ways to connect a printer via wi-fi.
Wireless communication methods do not always provide the correct result. Here, much is determined by the characteristics of the equipment: both the printing device and the PC. However, in most cases, possible problems can be eliminated. Let's look at the most accessible and simple options for connecting a device.
To the laptop.
There are two main methods that can be used that are simple and effective.
Direct connection using an access point. Procedure:
- We turn on the laptop and device.
- From the included disk (or from the manufacturer’s website) download and install the device driver. We restart the system.
- On the laptop we search for a wireless network, looking for it by model name. In the Devices and Printers section, select the desired device using RMB and click “Set as default”.
- We go into the settings of the printing machine itself and mark the network in which it will work. Then enter the password.
- Checking the wireless network settings. A flashing (or lit) wi-fi indicator on the device indicates its activation.
In rare cases when the laptop does not detect the wireless connection, we proceed as follows:
- reset the settings to factory settings and then perform the basic setup (according to the user manual).
- We check the functionality of the network.
- As a result of these actions, the equipment appears in the list of working devices.
REFERENCE. The method requires manual connection every session. The positive effect is that you can immediately print a document from any wireless device, bypassing a PC. This will save you a lot of time.
The HP Smart Install function has been developed for HP printing devices that are popular in Russia.
REFERENCE. This method is also suitable for other models that support a wireless network and WEP or WPA security modes. They usually have an installation wizard option.
To use this tool, proceed as follows:
- Temporarily connect the printer to the PC via a USB cable.
- On the hardware panel, press the “Settings” button, and in the menu that opens, use the “Network” item.
- The wireless equipment installation wizard is activated, after processing the data it will provide a list of available networks.
- Select the Wi-Fi protocol from the list. You will need to enter your network password (WEP or WPA key).
- Once the setup is complete, the wizard will inform you that you can disconnect the USB cable.
ON A NOTE. The availability of the HP Smart Install option is indicated in the product manual.
If tool support is not found, you can use an alternative program.
- To do this, go to the manufacturer’s website, go through the Drivers and Downloads – Printers – Products sections.
- Enter the name of the device and wait for the search results.
- We confirm the OS version, select the utility and download. It is desirable that this be a complete software.
Install the downloaded file.
- We connect the printer to the PC via a USB cable.
- In installation mode, the installation wizard will ask you to specify the communication type.
- Choose the wireless option.
- We follow the instructions of the application and, if necessary, fill in the data (password and ID).
- The hardware installation is complete, the wizard will inform you that you can disconnect the USB cable.
To the computer
A PC supports identical wireless connection methods as a laptop. Therefore, we will focus on connecting to a local network, that is, a united group of computers, this makes it possible to network print. A necessary condition is that the device is already paired with one of the computers.
- On the main PC, go through Control Panel, Devices and Printers.
- In the window, select the desired device and add it if necessary.
- The device should become available to all PCs.
- To do this, on the main computer, in the Devices and Printers section, select Printer Properties - Access.
- Activate the “Sharing this printer” item.
- Then on each computer in the same section, select the “Add a printer” command.
- We follow the message “The required printer is not in the list.”
- Let's use the item "Select a shared printer by name".
- In the line, first enter the name of the computer, then the printing device.
- The system will search for the device and driver package, the installation of which will complete the initialization of the equipment.
To MacBook
Apple computers do not have any differences when installing a wireless printer. Therefore, we present a general algorithm of actions:
- Install the cartridges, turn on the device, and load paper into the main tray.
- Download the drivers (from disk or the Internet), and after installing them, restart the system.
- On the PC, activate the wireless connection sign and then select the printing device from the list of available networks.
- The system will ask for a password, enter the data.
- Initialization of the printing device is completed.
IMPORTANT. When using any of the mentioned methods, you will need to install drivers for the device on your Windows.
In the article, we discussed in detail the methods of how to set up (bind) a printer and hope that we helped you solve all your questions.

