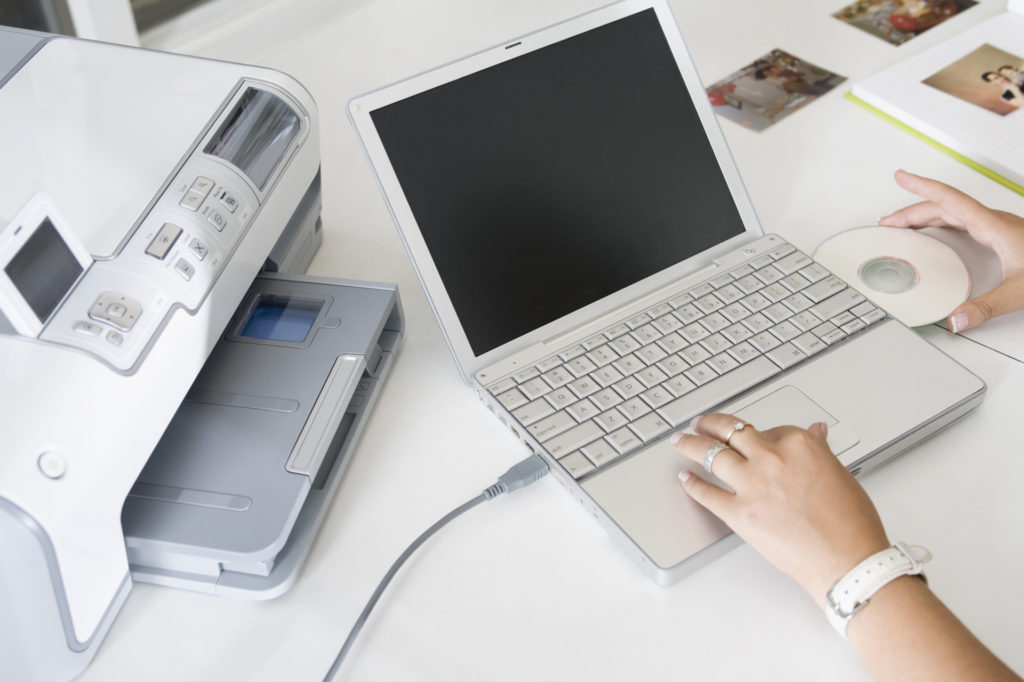
How to connect a printer to a laptop
It is very easy to connect a printer purchased from a licensed computer equipment store to a PC. To do this, you need to find the instructions for it and follow it. But the task becomes more complicated if the new item is used or “gray” (imported not entirely legally): the user manual may be missing or there simply is no section in a familiar language. Such problems can be easily solved if you act thoughtfully and slowly.
The content of the article
Preparing to connect
Regardless of which technology the printer works with, you should understand: this device does not like frequent movements and requires free space around it. You should pay most attention to the paper feed and output points of printed sheets: the first is necessary for user convenience, and the second is for the correct operation of the printer.
Having decided on the location of the new item, you should consider how to connect it to the electrical network. There is no point in being powered through an uninterruptible power supply - the printer consumes a lot of energy and if the power goes out from the battery, it will still not work. If there is no free outlet nearby, the best solution would be to carry it with an additional socket for the new plug.
When these issues are resolved, it’s time to prepare for connection. The basic configuration of the printer includes:
- power cord (often removable);
- cable with USB plug;
- installation disk.
If everything you need is found in the box, great, you can proceed to the most important moment. What should be done if the last pair of components is missing will be discussed below.
Connection progress
The first stage is a basic check of the printer's functionality. To do this, you need to connect the power cord to it and put the plug into the outlet. Success is indicated by the illuminated indicators of the device. Some of them may blink - this is not a big deal; the equipment performs self-diagnosis, which usually takes no more than 5 minutes. After the specified time has passed, the update should be disconnected from the network.
If the indicators do not light up, you need to find the power button on the product body. It may be located on the rear panel, near the power cord, or on the top of the front control panel. After clicking on it, the printer will turn on.
If during the test you hear a crackling sound or smell of burnt plastic, it is better not to take risks and not proceed to the next steps. These phenomena may indicate a malfunction of the equipment and require contacting specialists.
The second stage is connecting to a computer. The classic method is using a USB cable with Type A and Type B plugs. The first is inserted into any convenient port of a PC or laptop, and the second into the corresponding connector on the printer.

These manipulations can be carried out while the equipment is turned on, then the computer’s operating system will immediately notify the user about connecting a new device. But experts recommend playing it safe and turning off the printer’s power before making the first connection via USB.
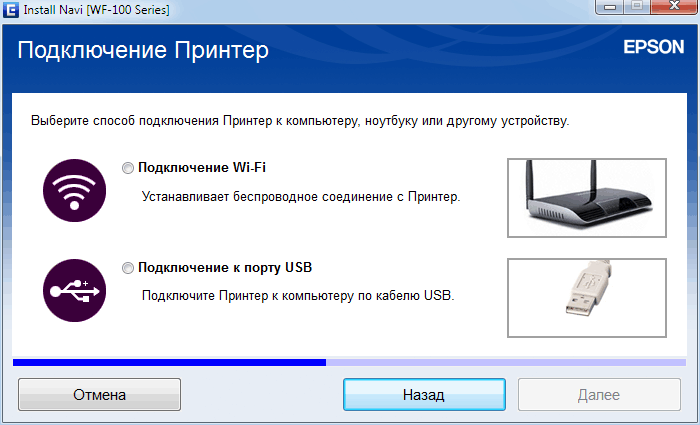
If the required cable is not included in the package, this may indicate that the printer can be connected wirelessly.To make sure it is available, just look at the icons near the indicators on the body of the new product and find the Wi-Fi symbol. Near it there is usually a corresponding button, clicking on which activates the desired function. A glowing indicator indicates that the mode has been successfully activated. He indicates that now it’s time to find the printer in the computer menu.
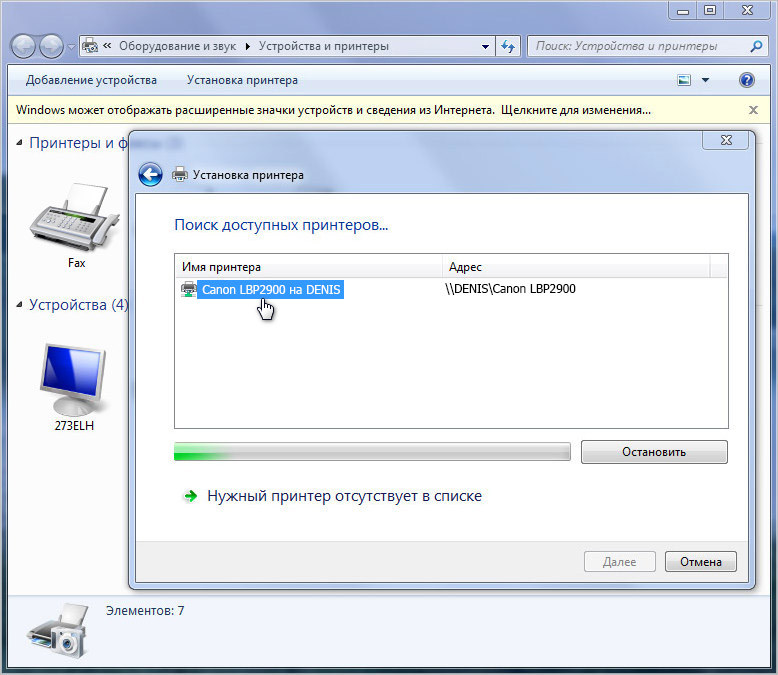
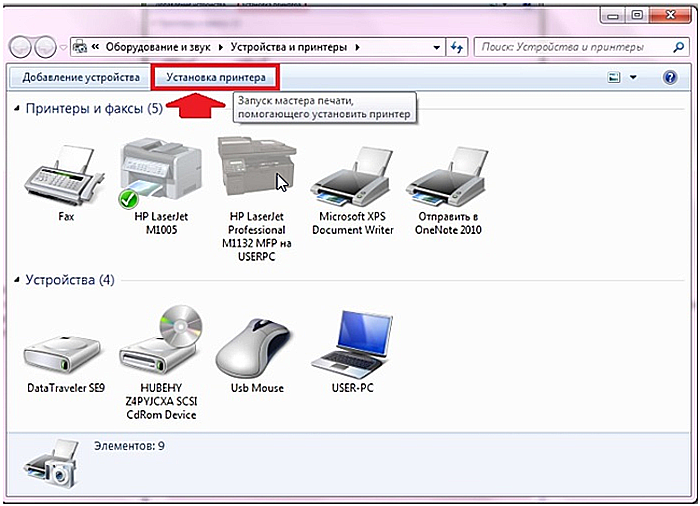
To do this, you first need to go to Start, then to Control Panel/Hardware. In the window that opens there is a Devices and Printers item. Now you should add a new device to the list. Clicking on the “Add new devices” sub-item will launch an automatic search for available equipment. Further, all work is carried out in accordance with Windows prompts.
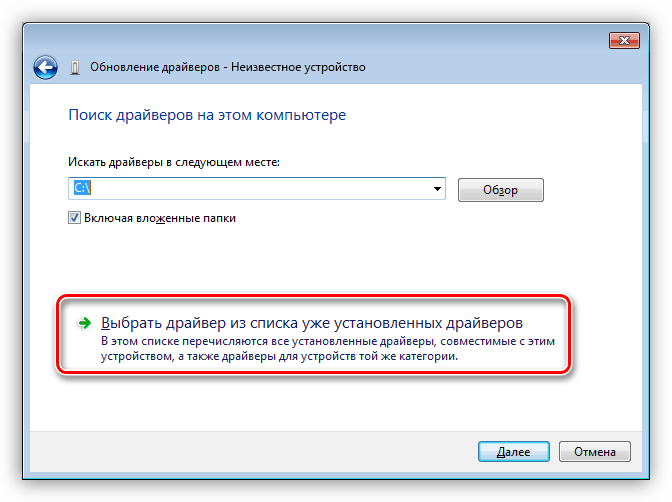
Stage three - download the driver. To do this, you need to send the installation disk to the PC drive and follow the prompts that pop up on the monitor. If you connect a printer to a laptop, this may cause some difficulties - often compact computers do not have disk drives. You can use the same method if there is simply no installation disk.
In such a situation, you will need an Internet connection. In the search engine, you need to find the drivers for your printer, download them and install them, follow the pop-up prompts, and configure the printer to work.
It is best to download data packages from the official website of the equipment manufacturer - this guarantees correct operation of the device and the absence of viruses in the downloaded file.
After installing the driver, the printer is ready to print.
Functionality check
To make sure everything is done correctly, you should load paper into the receiver and test print the document.This can be a text file from Microsoft Word or an image from Paint, which are transferred to paper by clicking on the “Print” item in the menu of the corresponding program or pressing the key combination “Ctrl + P”.