DIY tablet stand
You can make a tablet stand yourself. There are many ways from which you can make a stand for a gadget. The most original of them will be discussed in this article.
The content of the article
What can you make a tablet stand from?
You don’t have to buy a tablet stand in a store. You can do it yourself, saving quite a lot of money for the family budget. Materials that can be found in every home are suitable for production:
- cardboard;
- tree;
- plastic;
- old CD;
- flexible wire;
- Lego constructor;
- leather or its substitute (as facing material);
- dense material (such as denim).
There are many options for homemade accessories: from the simplest cardboard holder to a leather-trimmed stand case. More complex models require time, patience and, most importantly, desire.
Depending on the chosen model, additional materials may be needed:
- varnish (for wooden structures);
- sandpaper;
- elastic band for fastening;
- double sided tape;
thick thread for stitching leather or dense material; - soft velvet-type fabric for interior decoration;
- glue.
Reference! The simplest holder for a tablet can be a regular school book stand.
Basic requirements for a tablet, regardless of the complexity of the model:
- sustainability;
- Possibility of installation at different angles;
- Easy to install, fix and remove the tablet.
What tools will you need?
Most models do not require much physical effort or skill. Simple cardboard coasters can be made in a few minutes. Complex ones will require more time and perseverance, but the result will bring a lot of positive emotions.
To work, depending on the chosen model, you may need the usual tools available in every home:
- scissors;
- knife;
- wood saw;
- chisel;
- ruler;
- pencil;
- stapler;
- awl (for making holes);
- needle for stitching thick material or leather.
For complex metal models:
- drill;
- screwdriver;
- screwdriver.
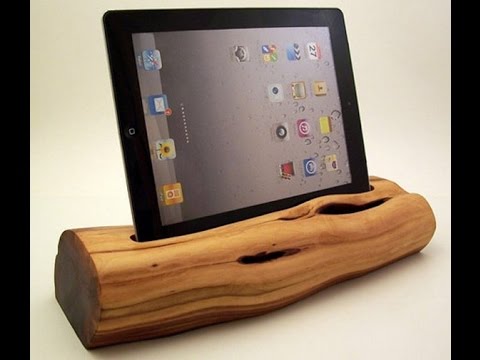
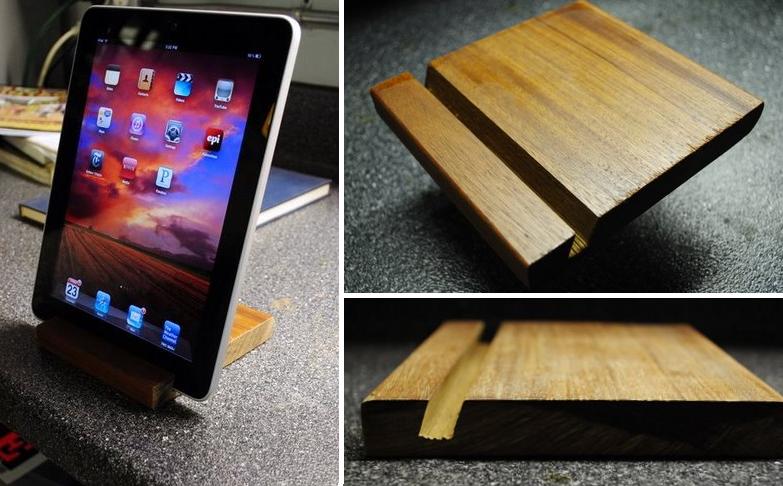
Wooden stand
The wooden product has an aesthetic appearance, long service life, and good stability.
The manufacturing process consists of several steps:
- Prepare a solid rectangular block of wood that fits tightly to the table.
- Mark the dimensions with a pencil. The stand can be made along the length of the tablet or slightly narrower. It must be stable in any position of the device (horizontal or vertical).
- Saw off the block to the intended dimensions.
- Draw a line 1/3 of the width from the front edge.
- Along the length of the line, make an internal recess using a drill or chisel into which the gadget will be inserted. The depth of the recess should ensure the stability of the gadget at an angle in a horizontal or vertical position.
- Sand the block with sandpaper until perfectly smooth.
- Cover the finished stand with clear or colored varnish.
Important! Poorly sanded wood can damage the surface of the tablet and injure the owner's hands.
Stand case
The model is in the form of a book-stand, the most popular and convenient. Before making it, it is recommended to familiarize yourself with the finished case in order to have an idea of its design. For manufacturing you will need the materials listed above.
Manufacturing includes several steps:
- From thick paper, folded in half, cut out a rectangle according to the dimensions of the tablet with a small tolerance. The resulting plate should cover it like a book. It will be the basis for creating the elements of the case.
- Make folds on the front side by folding the base in half or three. Using bends, the installation angle of the device will be adjusted in the future.
- From hard flexible plastic, cut out the back plate and 2-3 front plates (depending on the number of bends) to the size of the gadget. The rigidity of the plates must be such that it can hold the shape of the cover.
- The plastic along the cut line should be sanded with sandpaper so that it does not subsequently tear the casing of the cover.
- Place the base on the leather and cut out the front side of the cover.
- Place the back plate on the skin, place the tablet on top, and mark a hole in the case for the rear camera. The hole can be made using a screwdriver heated over a fire.
- Cut out the inside of the cover from suede, velvet or similar soft material.
- Place the plates on the inner fabric, fasten them with double-sided tape or glue.
- To attach the gadget to the case, use elastic bands that are attached at the top and bottom. Make holes using an awl and stretch rubber bands through them that will hold the tablet on the front side.
- On top of the inner part with the plates, place the front trim made of leather or denim, and sew them together.
- If everything is done correctly and carefully, you get an excellent book case, no worse than a factory accessory.
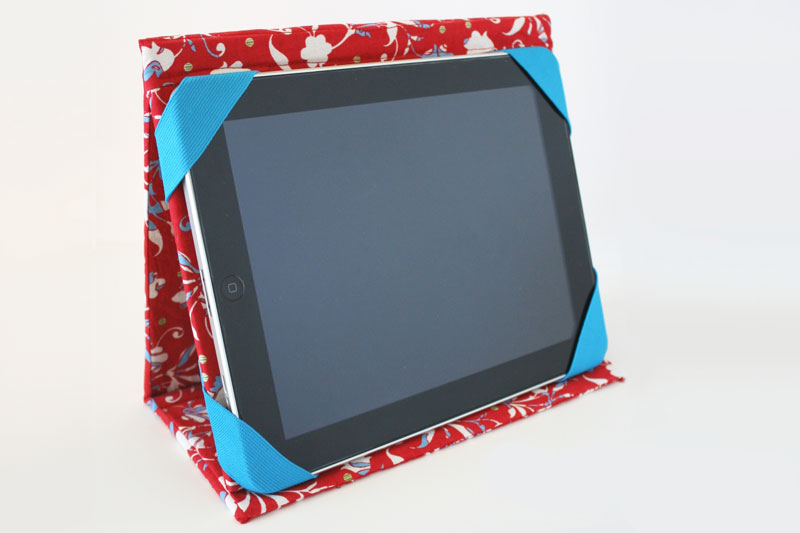
The women's version of the case can be decorated with beautiful braid, rhinestones, and stones.