DIY laptop stand
Those users who work at a laptop in a static position may experience inconvenience due to the small size of the case and the monitor being too low. In addition, it would not hurt for each owner to once again take care of cooling the processor, since factory fans do not always cope with this task.
The content of the article
How to make a laptop stand with your own hands
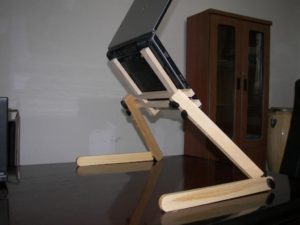
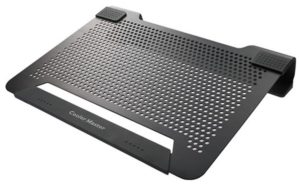
 A do-it-yourself laptop cooling stand will help solve two problems at once - it will help you establish a comfortable position for the device and make it possible to insert additional coolers under the processor.
In general, a laptop stand is something that everyone should make for themselves, taking into account personal preferences. The method shown below is just one of the options, the most convenient and reliable. It is not necessary to repeat the entire sequence of actions exactly, just take the main idea.
By and large, you can put a laptop on anything. A person, depending on the amount of time and available materials, has the ability to cut and fasten a soft stand from pieces of cardboard in three minutes, or spend several days creating a complex system of fasteners so that the laptop fits tightly and is able to fix it in a comfortable position .
What you will need
 List of materials for creating a cooling pad for a laptop for construction in the manner described here. The presence of these materials is not strictly necessary; they can be easily replaced with similar ones:
- Self-tapping screws - for fastening together the components of the future structure;
- Wooden bars, profiles, linings - as material for the main body. If you have a workshop at home or simply a tendency to construct from wood, then it is not necessary to purchase new parts - you just need to look in the bins for the presence of remnants of wooden elements. If it is possible to process metal parts, then wood can be replaced with metal.
- Wood varnish (or primer and paint for metal) - in order for the product to last longer, it should be protected from the adverse conditions of the outside world. Accordingly, in addition to the varnish, you will also need a brush.
- Tools for woodworking – router, jigsaw or grinder. It will help turn blanks into parts that are compatible with each other and remove unnecessary corners, burrs, etc.
- A drill with drills of a smaller diameter than self-tapping screws will allow you to prepare the wood for screwing in the fastening elements.
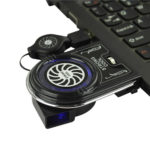
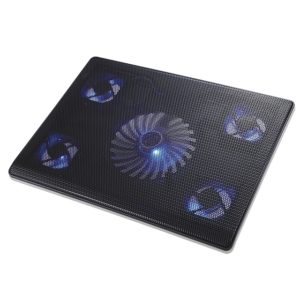
- Coolers are additional fans for cooling the system. You can use several pieces, depending on how many are available - more is better.
- Power supply for coolers - in order for the fans to work, they must be connected to the power supply. There is no need to purchase a very powerful device - twelve volts is enough.
- Insulating tape – to ensure insulation of cooler wires.
- Scissors - will help separate the old insulation.
- Molex is a means of connecting coolers and power supplies.
- A welding machine (if there are metal parts) will help to combine several metal elements with each other.
- Screwdriver or screwdriver.
Instructions: how to make a stand with your own hands
 Step-by-step assembly of a laptop stand with cooling:
- Cut two identical parts from wood or metal to create flat legs. The length of the parts should be greater than the width of the laptop, the height and level of inclination can be selected as desired. It is recommended to make oblong holes in the inner part of the “legs” - this will make the structure lighter and more convenient to move. The thickness is chosen to your taste; legs that are too thin will not be strong enough, and thick legs will leave less space for coolers.
- Coat the parts with varnish (for wood) or successively with primer for metal and paint (for metal) and let them dry completely.
Attention! It is recommended to apply paint or varnish in two or three layers. This will take more time, but will also enhance the durability and reliability of the coating. Each subsequent layer is applied only after the previous one has completely dried.
- Cut a square or rectangle from metal, wood, chipboard, plywood or any other material that will serve as the base of the stand on which the mini-computer will be installed. The sides of this platform must correspond to the dimensions of future stands and be greater than the length of the laptop.
- Make round holes in the rectangle, corresponding in size to the dimensions of the coolers purchased for additional cooling. If you have purchased a lot of fans. It is advisable to distribute them evenly. And so that there is room for self-tapping screws.After complete processing, this part should also be coated with varnish/paint in several layers.
- Based on the size of the previous part, cut out four elements from wood or iron that will act as sides. Their presence will give the device additional stability, which is especially important when creating a tilted stand. The thickness of the parts depends on the difference in the lengths and widths of the base and the laptop; it is highly recommended to leave a few millimeters of free space. Holes should be made in the side panels, or in the front and back (depending on where the ventilation hole is located on the laptop) so that the internal fan can expel hot air.
Attention! To connect the edges more tightly to each other, you should make their ends not even, but beveled, like picture frames.
The sum of the degree measure of adjacent angles should be equal to 90. When processing, you need to attach the parts to each other with cuts so that they form an even rectangle.
- Apply varnish (paint) to each of the sides.
- Mark the places for the screws on each of the wooden parts (so that they fit tightly together and the stand is stable), then drill holes in the marked places with a drill whose drill diameter is smaller than that of the screws. This measure will significantly reduce the likelihood that the piece of wood will burst when screwing in the screws.
- Screw the fans to the previously designated locations. The screws need to be fastened with the cap facing up towards the laptop. The blades must be positioned to exhaust air
- The wires from the coolers should all be connected to the power supply via Molex. This is where scissors and insulating tape come in handy to cover the exposed contact points.The operation of the fans should be checked to ensure that everything is done correctly.
- Assemble the entire structure and fasten it with self-tapping screws. All caps should face outward so that the sharp ends remain inside and do not scratch the laptop or fingers.
Recommendation
 Immediately before assembling the stand, it is recommended to carefully think through the design of the stand, measure the dimensions of the laptop and sketch out a drawing of the future creation. It will be very useful to determine in advance the dimensions of each of the parts, as well as their quantity. If possible, it is advisable to outline a schedule for all the work in order to get it done faster: for example, while one varnished part is drying, another is being cut out and processed, coolers are being completed, etc. Proper organization of work will allow it to be completed quickly and efficiently.