How to disassemble a laptop cooler
 To extend the life of any electronic equipment, it is necessary to take proper care of it on time. The main reason laptops fail is that dust and dirt accumulate on their internal parts. This leads to the fact that the elements of the device begin to overheat and break down after some time. Therefore, it is extremely important to remove contamination from the internal elements of the device.
The content of the article
Why is it necessary to disassemble a laptop cooler?
A laptop cooling system is necessary to protect the device from overheating during operation. It includes several components: fans, copper radiator, heat pipes. This complexity is explained by the fact that during operation the graphics adapter, processor and motherboard get quite hot. The cooling system prevents these elements from becoming overheated.
The device is cooled by air circulation. The cooler or fan is responsible for this. It is involved not only in cooling the computer components, but also in ventilating the air in the case.
During operation, the cooler passes a large amount of air through itself. Along with it, dust and tiny particles of dirt enter the fan. Over time, dust accumulates on fan parts and increases their weight. This causes the winding on the product coil to heat up and burn out.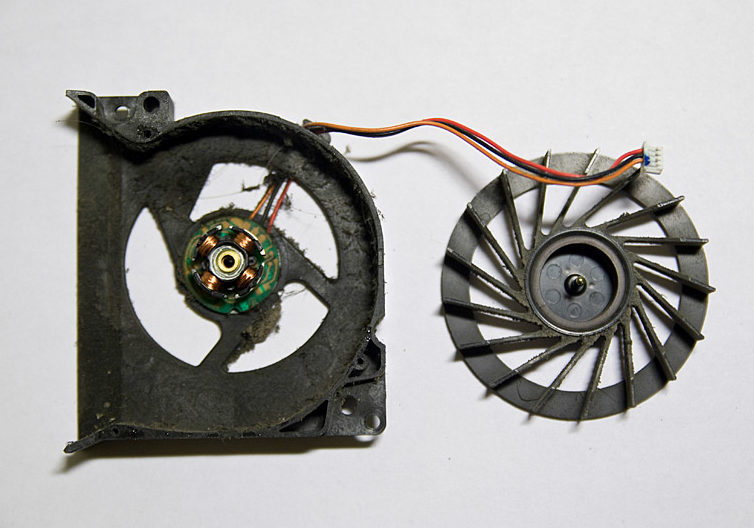
A cooler failure leads to disruption of the functioning of the entire laptop cooling system. As a result, the device's motherboard overheats.
Attention! It is strictly forbidden to allow the system board to overheat. This leads to failure of laptop components and expensive repairs!
To prevent problems with the operation of the device, the fan must be periodically thoroughly cleaned of accumulated dust and dirt.
How to disassemble a laptop cooler
Cleaning the fan is a fairly simple procedure. To do this, it is not necessary to take the laptop to a specialized workshop.
To clean the fan you will need to prepare:
- cotton buds;
- screwdriver;
- alcohol-containing substance;
- needle or scalpel;
- silicone grease - it is necessary to lubricate the cooler after cleaning is completed.
Before you begin to directly clean the fan, the cooler must be removed and disassembled.
The fan is disassembled in several stages:
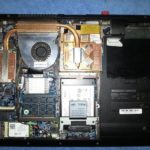
- The laptop should be turned off first. Using a screwdriver, unscrew the bolts that secure the back cover of the product. After this, you need to carefully disconnect all the cables. It is important to remember their location so that during the assembly stage there are no problems with reconnection.
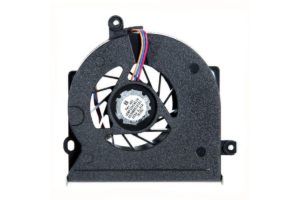
- Unscrew the fan that needs to be cleaned. It is imperative to disconnect all the wires going to the cooler from the power supply and only then proceed with dismantling. You need to peel off the sticker from the central part of the removed fan. You shouldn't throw it away yourself.
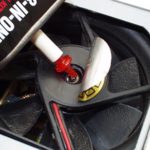
- Next, you need to remove the rubber plug.
- There is a retaining ring under the plug. It must be carefully removed. To do this, you need to insert a sharp object into the slot on the ring and lift one side.Do not put a lot of effort into this, as the ring can easily be damaged.
- Under the ring there are two plugs that secure the rod and protect the mechanism from possible oil ingress. They also need to be dismantled.
Cooler cleaning procedure
After the cooler is completely dismantled and disassembled, you can begin cleaning and lubricating it.
To do this you need:
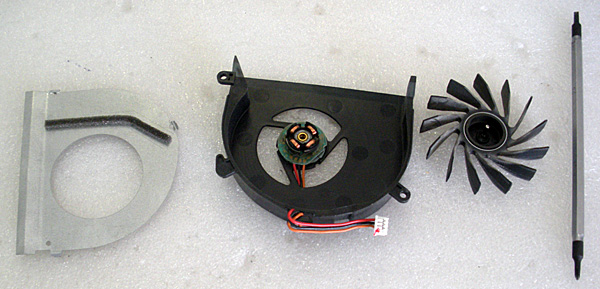
- First, disassemble it into two parts. One of them will have electric coils. It must be thoroughly wiped or blown with a stream of air. The other half can be washed under running water.
- Use a cotton swab dipped in alcohol to wipe both halves of the fan. The alcohol will remove any remaining dirt and old grease.
- Lubricate the internal parts with special silicone grease. It protects the product from moisture and overheating.
- Next, you should assemble the cooler in the reverse order and install it in the laptop case.
Cleaning the device from dust and dirt is a very important and necessary procedure. With its help you can significantly increase the life of your laptop. It is recommended to perform it at least twice a year. At the same time, if the laptop is used in a dusty room, the frequency of cleaning must be increased.