How to disassemble headphones
 Conventional headphones are made of a wire, a plug and a pair of speakers. Additionally, the headset can be equipped with other elements that expand its scope of application. Each of these elements may fail during operation. Before you begin the repair, you should understand how to disassemble the headphones or vacuum earphone, so as not to completely damage the headset. Let's look at the features of disassembling the main categories of headphones. Having studied this information, you can easily cope with any headphones, because the features of all are similar.
The content of the article
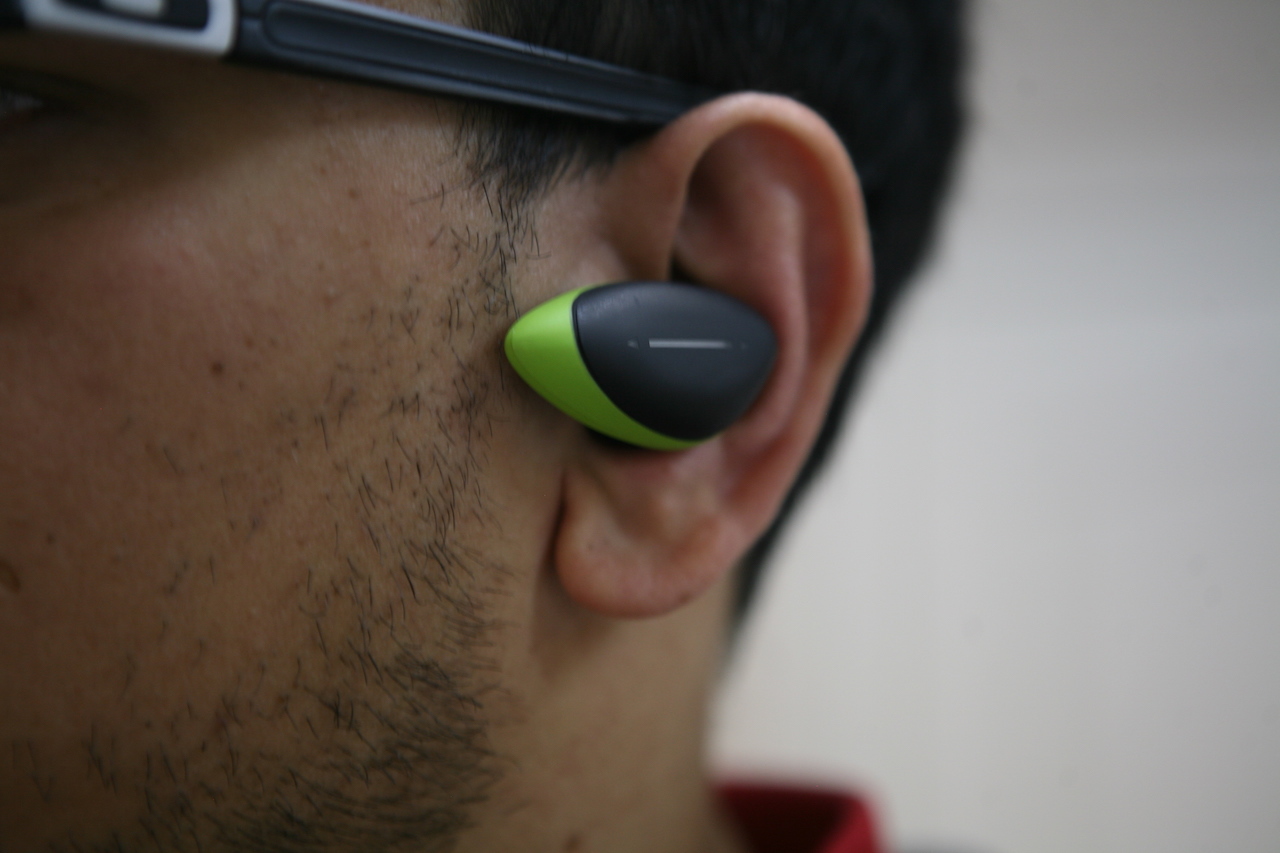
How to disassemble an earphone with a microphone
Often, a headset equipped with additional functions breaks down. These elements are placed in a small plastic case for ease of use, which is attached to a cord. In order to get to these elements, it is necessary to disassemble the case. It is usually glued and in order to separate the two halves you will need to use a knife.
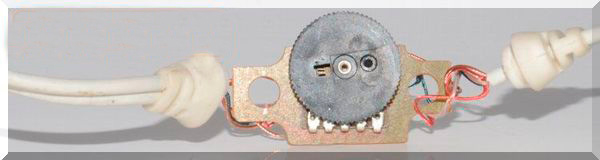
The failure of the volume control can be determined by the characteristic crackling sound in the speakers or by poor sound. The problem lies in such a component as a variable resistor. This part consists of a slider that moves over a resistive layer. You can extend the life of this element using graphite lubricant. Lubricate the elements with a cotton swab.
Problems with the microphone are manifested by deterioration of audibility during a conversation. The cause is often clogging. To fix this problem, you need to wipe the microphone with a cotton swab, which you have previously moistened with alcohol. When all the manipulations are completed, you can glue the two halves of the body together.
How to disassemble vacuum headphones
If there is a breakdown of the vacuum headset near the speaker, you will need to disassemble it. The algorithm of your actions should be as follows:
 Locate the seam on the earphone body. It must be influenced with a knife or other thin but strong element. In order for the seam to open onto the body, you can press a little with pliers.
- When the case opens you can see the inside of the earphone. This is a speaker with contacts. Using a soldering iron, disconnect the damaged wires, but first of all you need to mark the color of the insulation. Use a marker to avoid confusion later.
- You will need to cut off the non-working element from the common headset cable. Strip the wires from the working wire and solder them to the speaker contacts. Carefully follow your markings on the insulation.

To diagnose whether the work was done correctly, connect the headset to the gadget and turn on the music. If everything works as expected, glue the half of the disassembled case together. Using the same principle, you can disassemble a Bluetooth headset.
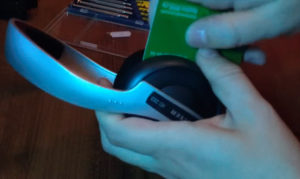
How to disassemble large wireless headphones
If your large headphones fail, they can also be disassembled. The speakers are hidden inside the case; disassembling it becomes more difficult due to the fact that there are hidden screws and latches. If during disassembly you do not find all the elements, you can simply break the plastic parts.
IMPORTANT.Different headphone manufacturers use different mounting methods, so be careful.
Let's consider several main options:
 For example, to disassemble the Sennheiser HD203 headset, you will first need to remove the ear pad. These soft pads are attached using special latches and can be easily removed using a regular plastic card. Under the soft pad you will see 4 screws. Unscrew them using a screwdriver.
- The body halves are not glued together. After you tighten the screws, it will not be difficult to separate the elements. There are speakers installed on the front panel, and it is to their contacts that you will need to solder a new wire if the old one fails.
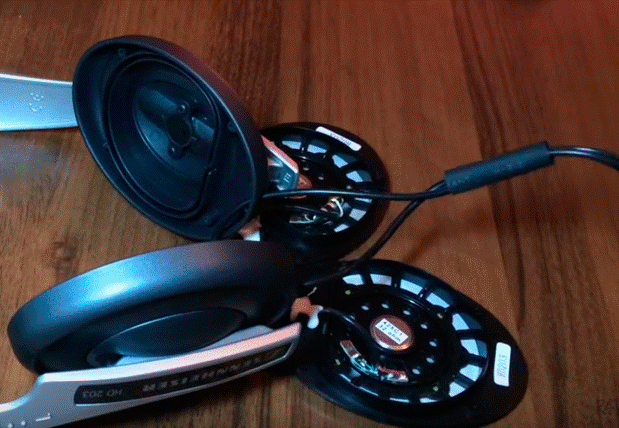
Other manufacturers may glue soft pads, in which case you will need to use a knife or screwdriver to remove them. The halves can be secured using screws or latches. When disassembling the headset, be careful and take your time so as not to break anything.
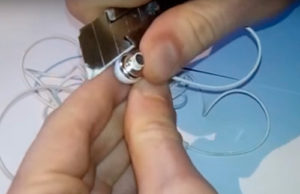
How to disassemble the headphone plug
If there is something wrong with the headphones, you need to pay attention to the plug. A very common cause of breakdown is bending of the cable cores at the junction with the plug. It is not difficult to identify such a breakdown. You need to activate the headphones and turn on the music, moving your fingers over the bend, you should hear a crackling sound or some kind of noise. This indicates a problem in this particular location. Therefore, it is necessary to disassemble the plug and repair it.
To repair, follow these steps:
- Using wire cutters, disconnect the cable from the plug.
PURPOSE OF REPAIR. Remove the metal part from the braid. Keep in mind that the element is securely soldered and you will not be able to save the braid.
- Remove the metal part of the plug carefully, it is important not to damage the contacts. Save soldered wires. Based on the color of the insulation, it is easy to figure out where to solder the cable cores.
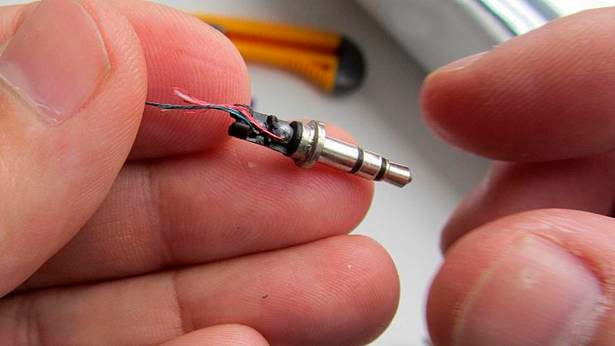
REFERENCE. If the headset is equipped with a microphone, then under the braid you will see not three, but four wires.
- The cable that you separated from the plug will need to be stripped. It will be enough to take 5 mm of insulation to be able to solder the copper core to the plug contact.
IMPORTANT. The wire veins are coated using a sewn-in varnish, which prevents soldering. To work, you need to peel off or scorch this coating.
- Make a new housing for the plug. To do this, you will need a cap from a regular pen. Place a piece of heat shrink tubing onto the wire. This will reduce the likelihood of damaging the wire again in the same place. The cable cores must be soldered to the plug contacts. Don't forget about the color of the wires and their matching.
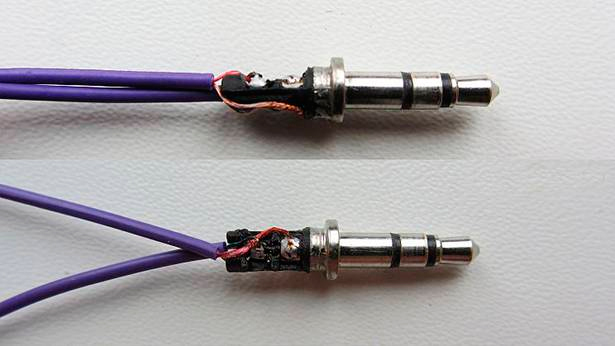
- Use a tester to check functionality. In another case, you can plug the plug into the device and turn on the music. If everything works well, heat up the heat shrink tubing. Move the cap after lubricating it with epoxy resin.
The process of disassembling headphones is a relatively simple task. The main thing is to do everything carefully and take your time. After reading the information provided, you can easily repair problems with your headset and continue to use it.