How to set up your monitor for correct color reproduction
 The desire to see an image on the monitor screen that is optimal in terms of brightness, sharpness, saturation and other parameters can be easily explained, because the comfort of the eyes during work and the receipt of aesthetic pleasure from contemplating a high-quality picture depend on this. Despite the presence of subjective factors, there are general universal recommendations for high-quality adjustment of monitor color rendering, especially relevant if you need to print any image.
The content of the article
What is color rendering and in what cases is it needed to be adjusted?
Color rendering is the influence of the color spectrum on visual perception. Correct screen calibration is necessary not only for domestic purposes, for eye comfort, it is also a professional necessity for designers, video editors, photographers, printing workers and many others. Not only the quality of the intended print depends on this, but also the work on customer edits.
IMPORTANT! When adjusting the settings, keep in mind that they may depend on lighting, as well as the type of matrix and video card.
Settings can be carried out in three ways: with your own parameters setting tools (buttons directly on the monitor), standard operating system programs, as well as additionally installed applications.
The simplest method is the first, but it is also the most primitive, since we can’t talk about fine-tuning. For domestic use, the second method is sufficient, but for professional use the third is required, and in some cases the programs are purchased or rented.
Basic recommendations for screen calibration are as follows:
- It is necessary to start no earlier than twenty minutes after switching on, since it takes time to warm up.
- Reset all factory settings before you begin. Such a function may be included in the program, and if it is not there, you can install the wini2cddc utility. It is convenient because there is a free thirty-day version, however, it will not be needed more than once, so it can be removed immediately after use.
- You should also disable all existing auto settings.
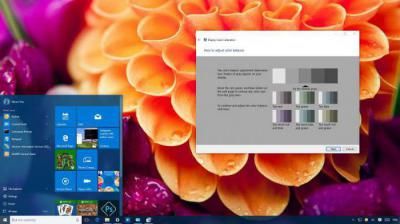
Easy calibration using Windows capabilities
There is a standard program for this. To open it, you need to follow the path “Settings-System-Display-Advanced screen settings”. Or just type “Monitor color calibration” in the search. This applies to the tenth version. In systems 7 and 8.1, the necessary function is located on the control panel, the “Screen” item.
REFERENCE! Since this program is designed for ordinary users, all its settings are simple, intuitive and provided with prompts, so you do not need any special additional knowledge for this, you just need to follow the specified operations.
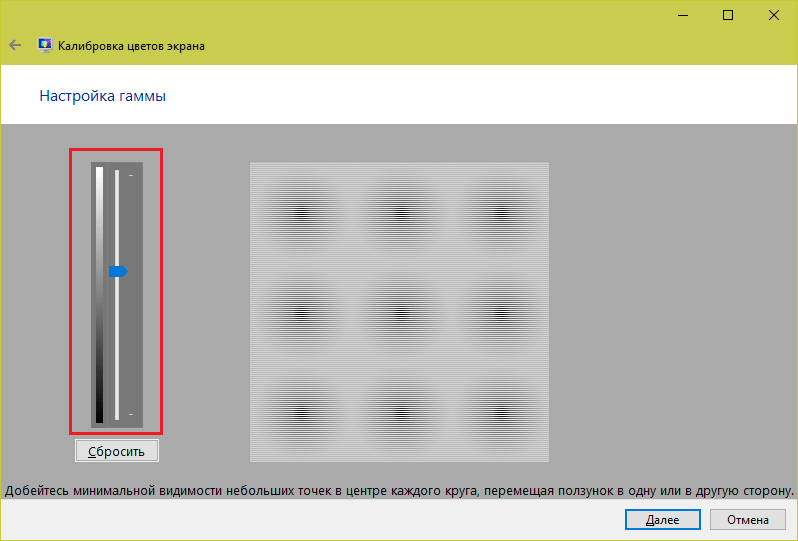
Before you begin, expand the window to full size and sit directly in front of the screen at the distance at which you usually work. The first step is to adjust the gamma by moving the slider. Your task is to adjust so that the points in the center of the circles merge with them in color.
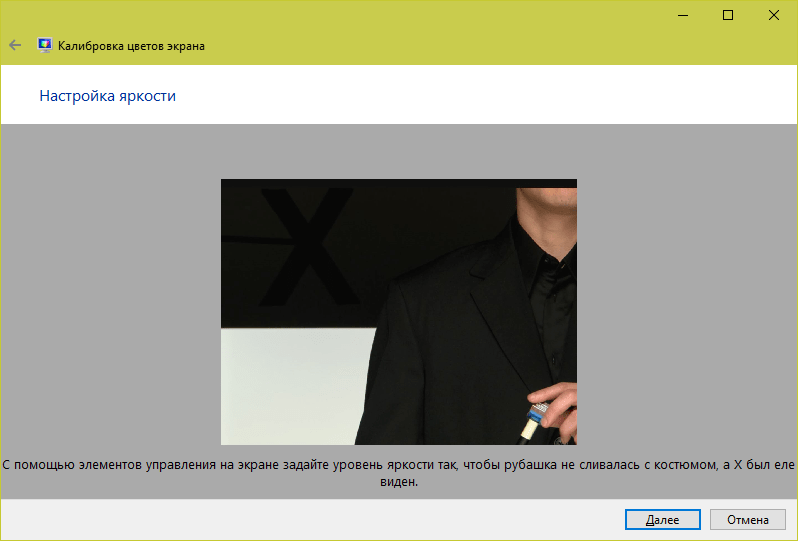
Next, you need to adjust the brightness. This cannot be done in the program; to do this, you need to find the “Power Options” item on the control panel and make changes in it. In this test, the suit should not blend into the shirt (too low settings), and the cross in the background should not stand out significantly (too high).
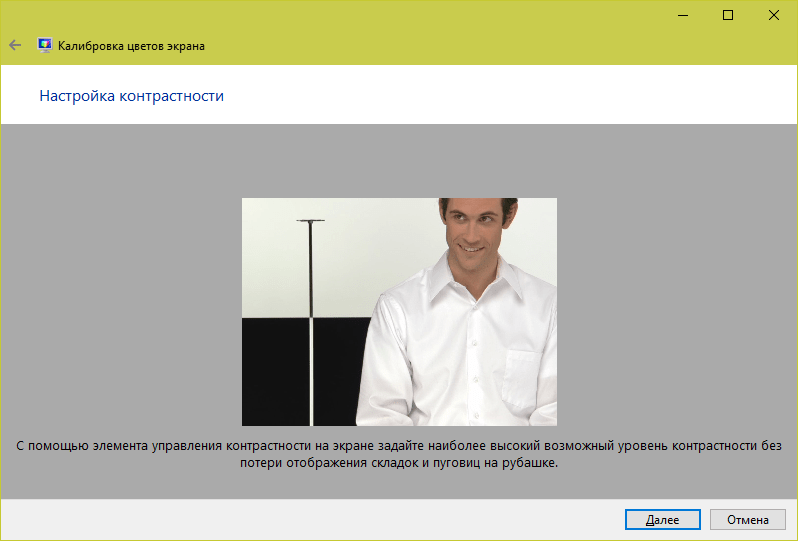
After this, the contrast is adjusted by adjusting the monitor itself. For an ideal result, all details on the shirt should be distinguishable.
And finally, the last thing is color balance. If all the stripes are gray, then everything is in order, but if they have any other shade, adjust this by moving the sliders.

The last step is to save all changes. You can also compare what you get with how the color correction was adjusted earlier.
Adjusting monitor colors using RealColor
RealColor is an image that opens full screen to check the correct color reproduction.
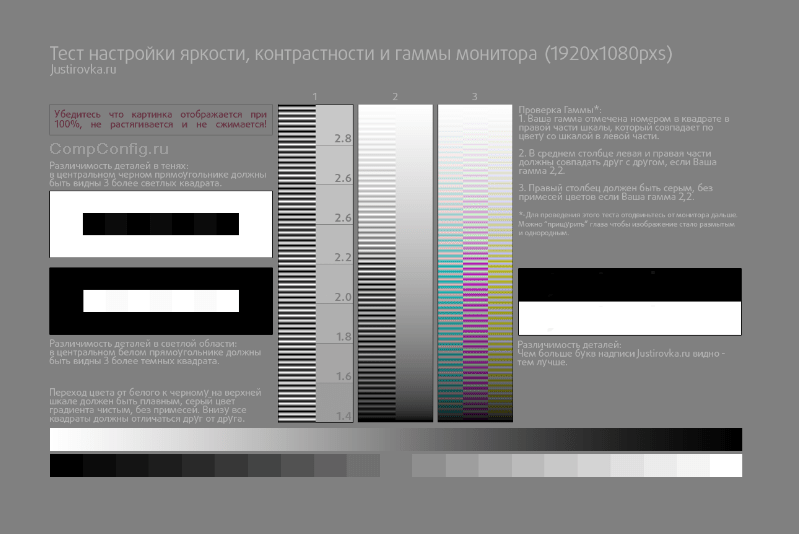
On horizontal and vertical stripes depicting a smooth gradient there should be no clear lines and stripes, and on the rest, the boundaries between colors should be clearly visible.
How to change screen color using Adobe Gamma
This program is necessary for those who work in Photoshop; it is included with it and is used to adjust color rendering. The most convenient way to work with it is to use the setup wizard.
First, set the brightness and contrast parameters.
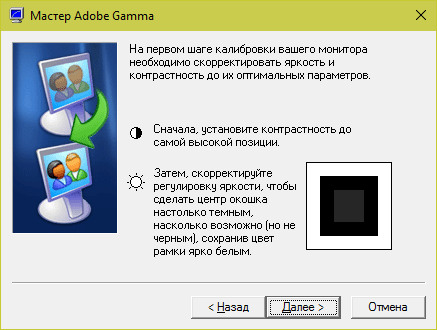
The smallest square should be as close in color as possible to the black surrounding it, but not merge with it, and the frame should maintain the lightest possible tone.
The next step is RGB settings.
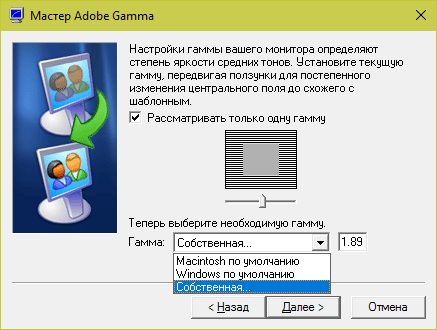
The preferred settings for an LCD monitor are 1.8, for a CRT monitor it is 2.2.
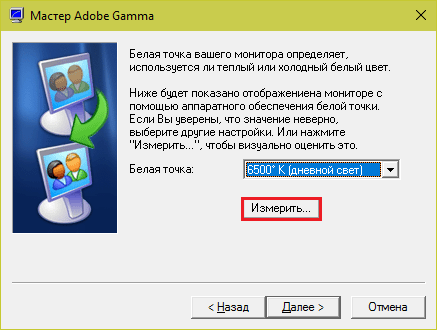
After this, the color temperature of the white point is set in Kelvin. If you use your computer primarily in daylight, the optimal parameters are 5500–6500 K. With warm electric light - 5000 K, with fluorescent light - 9300 K.
The last step is to save the settings.