DIY microphone amplifier
If the microphone's sound is very weak and there is distortion, then this problem can be eliminated using a preamplifier. This is a device that can amplify a weak signal to the required volume level. And the sound wave immediately gets amplified into the computer and without extraneous sounds. You don’t have to buy an amplifier in a store, but you can make it yourself.
The content of the article
How to make a microphone amplifier with your own hands
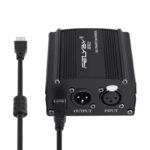
To make a microphone preamplifier that will take energy not from batteries or not pull long wires from another power source, but so that it is recharged directly from the sound card, you need to make a circuit with a phantom power source. That is, a circuit where the transmission of the information signal and the power supply of the device occur together via a common wire.
This option is the most optimal, because a regular battery often runs out, and using the battery also requires recharging it from time to time. Using the power supply is also not entirely convenient, because there are wires that can interfere with movement and third-party interference. These factors lead to inconvenience in using the device.
Important! The operation of the microphone is based on the property of some materials with increased dielectric permeability to change their charge when exposed to a sound wave.And to amplify the microphone signal, you need to set the resistance in the range from 200 to 600 Ohms, and the capacitance of the capacitor should be up to 10 microfarads.
For this purpose you must have:
- resistors;
- capacitors;
- transistor;
- plug and sockets for connecting the device;
- wires;
- frame;
- microphone;
- additional tools - wire cutters, soldering iron, scissors, tweezers, glue gun.
Amplifier circuit
There are many ways to assemble an amplifier, but this circuit is distinguished by its simplicity and it is based on a classic transistor stage, where a common emitter is installed. Also, to assemble it you do not need to purchase expensive parts. It will take only one hour of free time to make it. The circuit consumes 9 mA of current in operation, and 3 mA at rest.
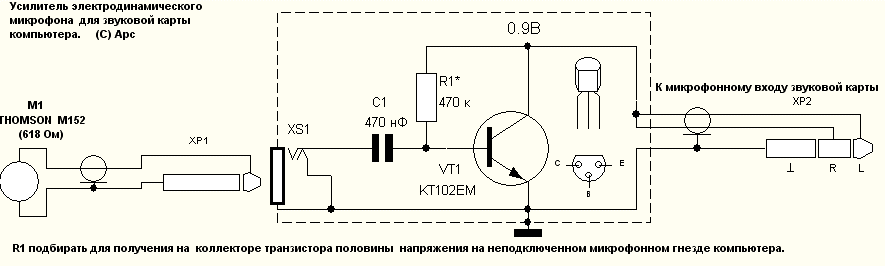
It has two capacitors and two resistors, one plug, a transistor and an electret microphone. The amplifier board turns out to be very small in size, which can be attached to the plug; if it is slightly larger in size, then you need to take some kind of plastic part to make the case.
The principle of its operation is such that power is supplied to the elements through resistors R1 and R2, in order to prevent feedback in the frequencies of the supplied signal, capacitor C1 is used, and a resistor is needed to eliminate extraneous clicks when connecting a microphone to work. The signal comes from the resistor and goes to the transistor to amplify it. Thanks to this circuit, the signal from a dynamic microphone can be doubled.
Microphone amplifier: step by step
We take a resistor, it will perform the function of biasing the voltage. We take a transistor model KT 315 and can replace KT 3102 or BC847. To make a circuit, we can take a homemade breadboard.Before use, rinse it thoroughly with any solvent. You need to solder the connectors through which the power is supplied; we also use this method to connect the microphone input and output connectors. We take the connectors and solder them to our board. They can be taken from an old DVD player or tape recorder. The switch can be taken from an old toy car. Solder all the parts to the board.
To make a housing for a microphone amplifier, we take a plastic box. We make holes in it for the connectors and for the switch. We glue the board to the box and cover it with the top of the plastic box.
If assembled correctly, the circuit does not need to be further configured and the microphone can be immediately connected to work. This microphone amplifier greatly improves the sound quality and there is no extraneous noise. The circuit also works well with an electret microphone.
Important! Before connecting a microphone to the device, you should check its contacts, and also that the power at the microphone input is at least 5 volts.
If there is no such voltage, then we take another plug and attach it to the connector and measure with a voltmeter the voltage that exists between the large tap and the other two taps, which are shorter. When measuring voltage, you need to be careful not to short the plug terminals to each other.

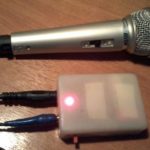
To check, take a dynamic microphone, connect it, connect the amplifier output with a wire to the computer or speakers, or to the device you need, and turn on the power. If an LED was used during assembly, then its glow indicates that the amplifier is working. But the electrode itself is not required in the circuit.