How to connect a microphone to a computer
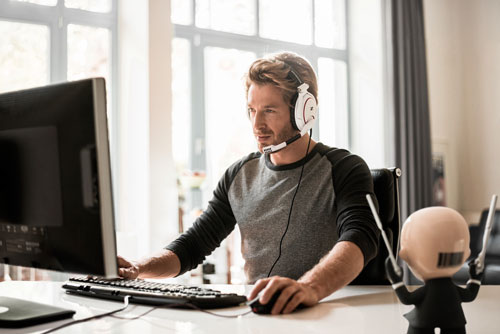
 Often, many users need to connect a microphone to their computer. This desire can be caused by a variety of needs. Starting from comfortable playing in a team for experienced gamers and ending with the banal desire to sing karaoke.
Connecting this device is also necessary if there is a need to communicate with relatives or friends via the Skype application.
A computer is a universal device and you can do almost anything on it. Including connecting and setting up a microphone for a variety of needs.
The content of the article
How to connect a microphone
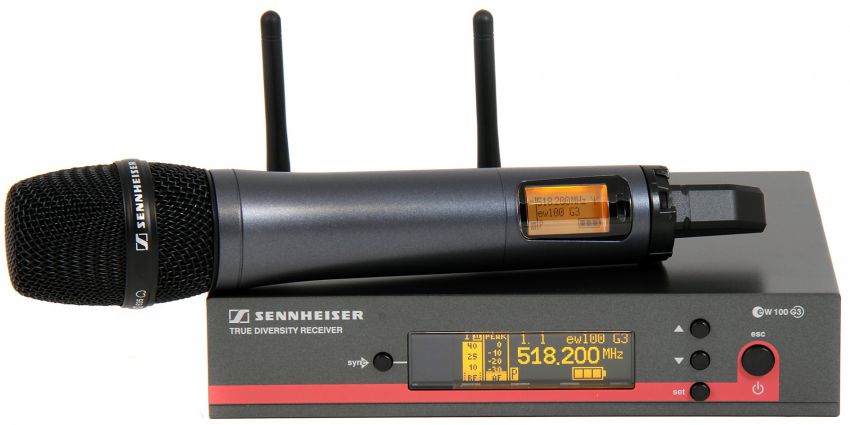
Models come in a wide variety and support a wide variety of connectors and formats.
Connection options
The standard input for this device is a 3.5 mm jack, but there are also outputs for USB, 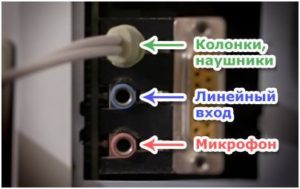 where microphones are also connected.
In order to connect a microphone to a PC on the motherboard, there must be a sound card with the necessary connectors.
If we are talking about laptops, then all the necessary outputs are built in by default.
Types of microphones
There are three main types of microphones in terms of structure and type of operation:
- capacitor;
- electret;
- dynamic.
Condenser and electret have their own power supply, which allows you to increase your own sensitivity and volume level in hardware. Such devices receive sounds in fairly high quality. However, along with the voice, extraneous noise often enters the passband.
Dynamic devices do not have additional circuits or power supplies. Therefore, the input signal is quite weak, and software processing is required for high-quality use.
Connection diagram
Usually on the back panel of the computer there are several connectors for connecting 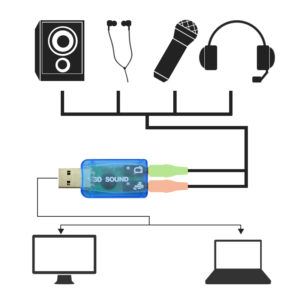 various devices that support the miniJack format.
- One of them is used to connect an acoustic system in the form of speakers, headphones or a music center.
- The other is needed to connect a microphone.
IMPORTANT! To prevent users from confusing anything, the connectors are marked in different colors. Green for speakers, pink for microphone.
In many cases, next to these ports there are pictures that explain what the connector is for.
Via miniJack
There are also outputs on the front panel for connecting devices via miniJack.
This is done for convenience if the headset is built into gaming headphones and the cable length does not allow it to be connected to the back panel.
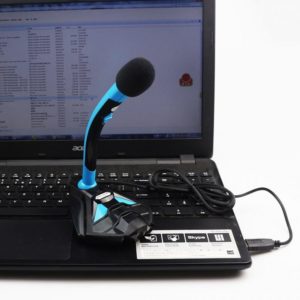
Via USB port
Connecting a microphone via a USB port is technically no different.
Once the cable has been plugged into the appropriate connector, the computer should automatically detect and add a new device.
Connecting a microphone for karaoke
IMPORTANT! In order to connect a microphone for karaoke, you need to find out how
it has a connector.
Often such devices have a 6.3 mm output.There may not be such a port on the PC panel, then a 6.3–3.6 mm adapter can come to the user’s aid.
If there is no adapter, you should try to find a microphone cable that has a different port. They usually come in two types: XLR - 6.3 or XLR - 3.5.
REFERENCE. XLR is a connector format that plugs directly into the microphone.
Microphone settings
After the cables have been connected, you should proceed to the software setup. To do this you should 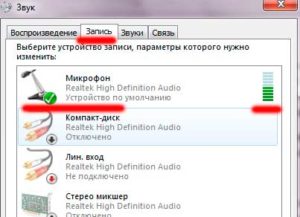 exit to the sound settings menu. There are several ways to do this.
Easy way
The easiest way is to simply click on the speaker icon, which is located on the quick access panel. In the submenu that opens, select “Recording Devices”.
Second option: “Start” - “Control Panel” - “Sound” - “Recording Devices”
- After this, the settings menu for connected devices will open on the screen.
- If a microphone is connected, it will appear in the Recording window. A green check mark icon should appear next to the device image. In this case, the device is ready for use.
- If the microphone is working, the user can talk and blow on it. Next to the name is a scale of the level of received sounds, and after the actions described above, it should change.
- If directed speech has no effect on this scale, the device may be faulty.
Test recording
Another check for microphone performance is a “test recording”.
- In order to record from a microphone, select “Start” - “Accessories” - “Sound Recording”. This will open an application that allows you to record audio from the connected device.
- In order to record, click on the red circle and the inscription “Start recording”.
- After creating an audio file (usually WAVE format), the user has the opportunity to listen to it and evaluate the performance of the connected microphone by playing back the resulting recording.
Attention! If the computer sees the connected device, however, there is no sound, check the volume on the device itself or in the settings.
Signal Boost
Increasing the sensitivity or amplification of the received signal may also help. This is done both programmatically (in the settings on the PC) and hardware, on the device itself.
In order to open more detailed settings of the connected device, you should select the required model and open the “Properties” menu.
In the tab that opens, you can find out all the information about the microphone model and view the driver version. And also enable or disable this device.
Volume settings
In order to check the functionality of the device, as well as debug the volume, you should 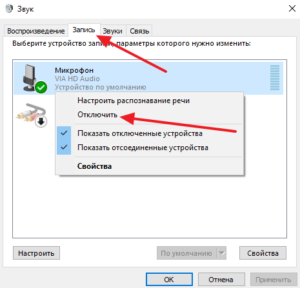 In the “Properties” menu, select the “Listen” sub-item.
After this, the user will be able to hear sounds from the microphone in their own speakers or headphones. This will make sure that the device is working properly: it does not distort the sound and has no extraneous audio noise.
Important! If the computer does not see the connected device, you should check the connectors. It is quite possible that due to a violation of the integrity of the contacts, the port is faulty. In this case, you should use a different entrance.
Then the user should open the “Levels” sub-item. Here you can set and adjust the program volume and sensitivity of the connected device.This is necessary for more comfortable use and debugging of the received signal.
It is also possible to change the balance of the received signal to the left or right channel.
Attention! There are many third-party programs to create different effects. They can both improve the quality of the received signal by automatically filtering noise at the input, and modify the received signal. At the same time, they make the user’s voice higher or lower, and also give it various processing in the form of echo or auto-tune.
Additional settings
The “Advanced” tab allows you to select the processing bit depth and sampling frequency when processing an analog signal.
This option is useful to the user only if he has a weak sound card. It does not allow you to process a large amount of information in a short time, and distortions or freezes are observed when working with the microphone.
In this case, you should reduce the sampling frequency or bit depth.
Important! If the sound from the microphone is too weak, you can use the microphone boost function in the advanced settings.
This can improve the volume and quality of the received signal. However, corresponding noise that falls within the passband will also be amplified.